Make-Ahead Friendly Fall Fennel, Apple, Celery, Pomegranate Salad
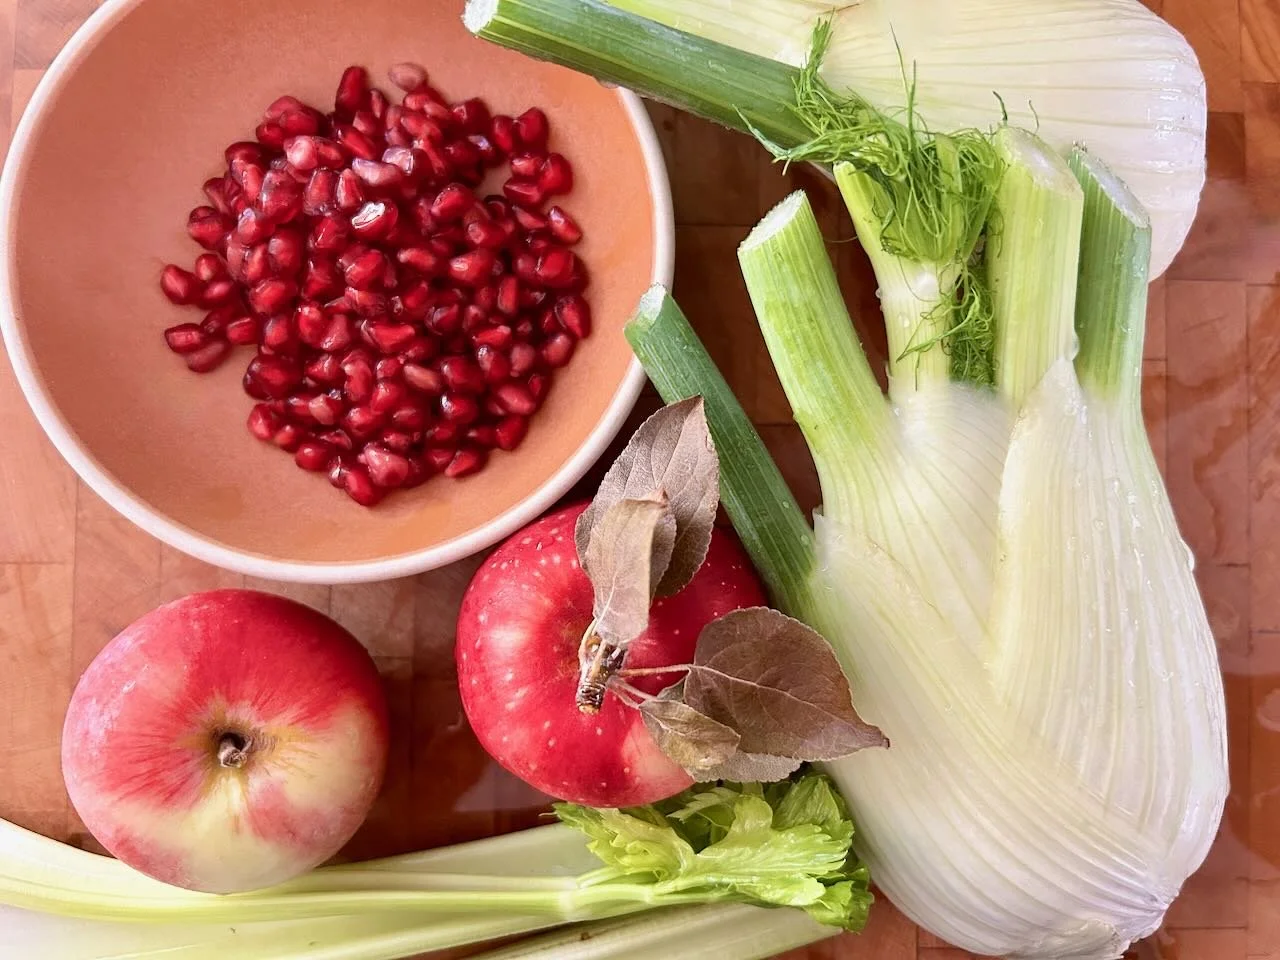
Every week, I like to make a batch of salads that can sit in my fridge for days on end, and that I can grab in a pinch for lunches, dinner, or a quick snack.
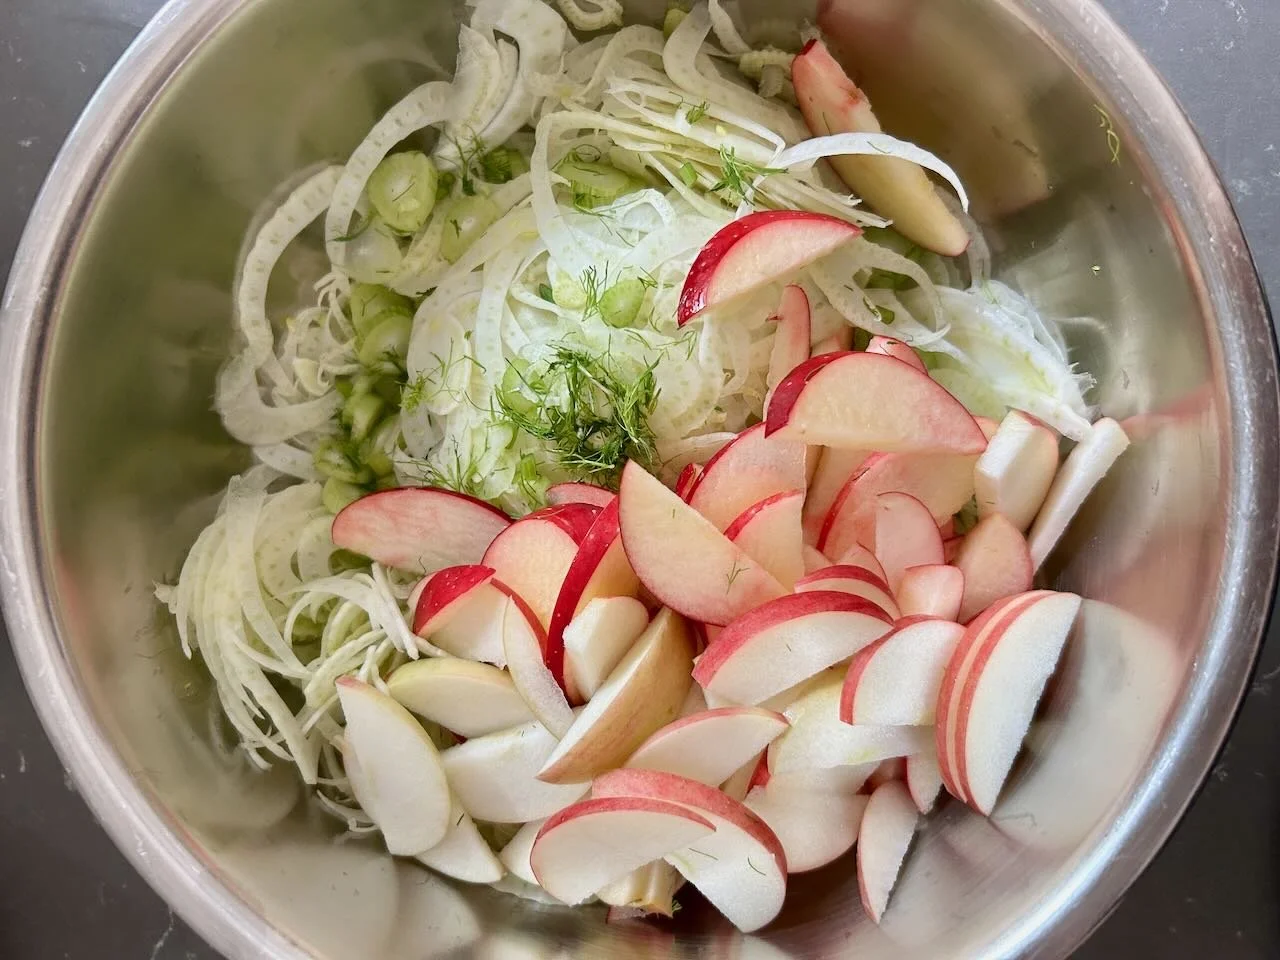
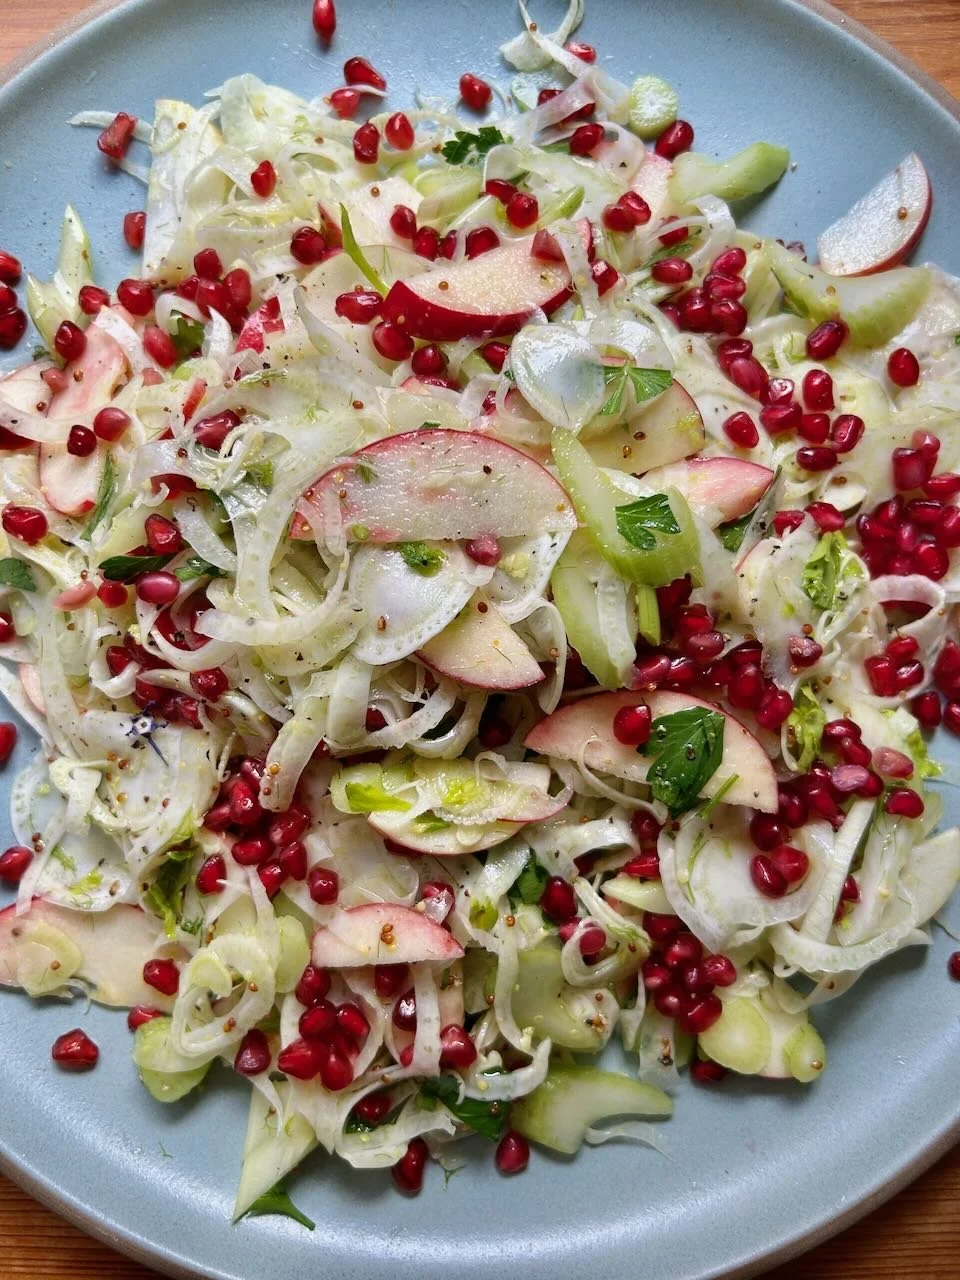
This fennel apple salad is a fall staple. It’s festive enough for hosting, and simple enough that it makes for a great dinner side with a piece of salmon. The fennel and apple stay bright and vibrant, thanks to a good dose of lemon juice. The ingredients do soften as they sit in the fridge; if you prefer more texture slice them thicker and they’ll retain their firmness for longer. If you prefer a delicate salad, slice the fennel on a mandolin very thin for tender bites.
Fennel, Apple, Celery, Pomegranate Salad
Serves 6
Ingredients:
For the salad-
2 heads (1 lb) fennel
3 stalks of celery
1 large apple, or 2 medium (Cosmic Crisp, Pink Lady, or your preferred variety)
½ cup pomegranate arils
2 Tbsps lemon juice
¼ cup parsley or mint
salt and pepper, to taste
For the dressing-
2 Tbsps lemon juice
2 tsps whole grain Dijon mustard
2 tsps honey, or to taste
2 tsps dried tarragon (optional)
½ tsp kosher salt
3 Tbsps olive oil
Directions:
Prepare your vegetables: Peel any tough outer leaves from the fennel, trim the top fronds (you can reserve the leafy bits as garnish). Thinly slice the fennel with a mandoline or a knife; if making in advance, you may want to slice a little less thin as the fennel will soften as it sits in the fridge. Thinly slice the celery on the bias. Core the apple, and slice into thin half-moons; or your desired shape and size.
Add all of the vegetables to a bowl, and toss well with the juice of a lemon. Season with salt and pepper.
Make the dressing: Whisk together the lemon juice, mustard, honey, tarragon and salt. Slowly drizzle in the olive oil while whisking until the dressing is emulsified. Alternatively, you can shake everything together in a jar. Taste and adjust as desired with more honey for sweetness, lemon juice for brightness, or oil for richness.
Assemble: Toss the salad with the dressing. Just before serving, garnish with pomegranate and herbs. Salad keeps for up to 4 days in an airtight container in the fridge; but it will soften as it sits.
Sheet-pan Lemony Potatoes and Baby Artichokes

Did you know you can roast artichokes?
While steaming or boiling makes for a classic artichoke preparation, roasting offers a slightly different experience: the artichoke becomes caramalized and sweet, with crispy edges. I particularly like roasting baby artichokes, as they have no “choke” in their center and can cook quickly alongside other vegetables. One note, once roasted, the outer leaves of the baby artichoke can be a bit tough, but the center leaves and heart become very tender and delicious.
For a quick weeknight meal, I sliced up some small Yukon gold potatoes, halved the baby artichokes, and sliced a whole lemon. Make sure to remove the seeds! That’s what makes cooked lemon taste bitter. Halfway through the cooking time, I added a few chicken sausages as well for a complete meal, but that is entirely optional. This dish is more about the method of cooking than an exact science, and it makes for a simple and elegant way to use some of Spring’s best produce.
If for some reason you’re not an artichoke fan, the lemony potatoes are still worth the effort. Simply add more potatoes, or swap artichokes for another vegetable you’d like to roast (like fennel).
Sheet-pan lemony Potatoes and Baby artichokes
Serves 3-4
Time: 45 minutes
Ingredients:
2 lbs (900 g) baby artichokes or 2 cups frozen artichoke hearts (thawed and patted dry)
2 lbs (900 g) Yukon gold potatoes
2 lemons, preferably organic
3 Tbsps oil (olive oil or any neutral cooking oil will work here)
1 tsp paprika
1 tsp garlic powder
1 tsp dried oregano
Salt and pepper, to taste
4 chicken sausages, fully cooked (optional)
Directions:
Preheat the oven to 425°F.
Trim the sharp tips of and the very bottom of the stems from the artichokes; remove any very tough outer leaves. Slice the baby artichokes in half (they’re small enough that they likely don’t have a choke, but if they do, remove it before roasting). Slice the potatoes into rounds about ¼-½-inch thick. Slice one of the lemons into very thin rounds, and remove any seeds (to prevent bitterness); slice the second lemon in half.
Toss the artichokes, potatoes, and lemon rounds in the oil. Season with paprika, garlic powder, oregano, and a generous amount of salt and pepper.
Arrange the artichokes, potatoes, and lemon in a single layer on a sheet-pan. I like to place the artichokes cut-side down to start, and place the lemon rounds scattered on top. Squeeze the juice from half a lemon over everything.
Roast in the oven for 15 minutes, then flip the potatoes and artichokes. At this stage you can add whole or sliced sausage to the sheet-pan.
Return to the oven and roast for an additional 15-20 minutes, or until the potatoes and artichokes are both golden brown on both sides. For extra lemon flavor, squeeze the juice from the remaining lemon over top before serving.
Serve immediately.

The Secret to Crispy Tofu Every Time + A Sweet & Spicy Gochujang Glaze
This is the foolproof way to get crispy tofu every time—no deep frying, no complicated techniques, just reliably golden, crackly tofu coated in a flavor-packed gochujang glaze. The secret? A light coating of starch before pan-frying, a technique I first picked up from watching Korean home cooks like Maangchi on YouTube. The result is tofu with a perfectly crisp exterior that soaks up a sticky-sweet, spicy, gingery glaze made with gochujang, tamari, garlic, and maple syrup. It’s easy, fast, and has become a staple weeknight meal in our home.
This crispy gochujang tofu is best served hot and fresh—ideally over rice, with a healthy side of kimchi—but it also makes a surprisingly delicious leftover. I love eating the cold tofu straight from the fridge the next day or tossing it into a grain bowl for lunch. However you serve it, this is a dish that turns tofu skeptics into fans every time.

Crispy Tofu with Gingery Gochujang Sauce
Ingredients
For the sauce-
3 Tbsps Tamari or soy sauce
1 Tbsp gochujang paste*, or to taste
1 Tbsp rice vinegar
2 tsps maple syrup or honey, or to taste
2 cloves garlic, peeled and grated on a microplane or finely minced
1 (2-inch) piece of fresh ginger, peeled and grated or finely minced
For the tofu-
1 (14-16 oz) block firm or extra firm tofu
¼ cup potato starch or cornstarch
½ tsp salt
2 Tbsps coconut, avocado, or neutral oil
Toasted sesame seeds, for garnish, optional
Sliced scallion, for garnish, optional
*Notes:
Gochujang can vary widely in both flavor and spice depending on the brand. When in doubt, start with a mild version if possible. Prefer it hot? Add more paste to taste.
Directions:
For the sauce-
Whisk together the tamari and gochujang, rice vinegar, and maple syrup. Add the garlic and ginger and stir to combine. Taste and adjust the seasoning as desired: too spicy, add a little more tamari and vinegar. Too spicy? Add more tamari and vinegar. Not sweet enough? Add more maple syrup, honey, or a pinch of sugar.
For the tofu-
Remove the tofu from its package, and wrap in a clean kitchen towel or paper towels. Place a heavy cast iron skillet (or similar flat heavy object) on top to help the tofu release some of its extra liquid. You can skip this step but your tofu might end up a little less crispy and a little more crumbly. Let the tofu to sit for 15-30 minutes.
When you’re ready to cook the tofu, slice the tofu into equal-sized pieces, either cubes or triangles. I prefer 1- to 2-inch cubes for this recipe. Add the tofu pieces to a bowl, toss with the potato starch and season with salt. (Using a bowl for this step ensures that each piece of tofu will get evenly coated in salt and starch).
Add oil to a large cast iron or nonstick skillet over medium-high heat until hot. Reduce the heat to medium or medium-low, then add the coated tofu in an even layer. (Don’t overcrowd the pan—cook in batches if needed.) Over medium heat, let the tofu brown undisturbed on one side for 5-6 minutes to develop a crispy crust. Adjust heat if needed: If too hot, the tofu may burn;
if too low, it may take longer to crisp.
Flip the tofu and cook for another 4–5 minutes, or until golden brown.You can stop right there, or choose to meticulously brown each of the remaining sides.
Turn off the heat and immediately pour in the sauce. It will bubble up and thicken as it hits the hot pan. For a thicker sauce, turn the heat back to medium and let the sauce simmer for 2–3 minutes, stirring occasionally.
Serve immediately garnished with sesame seeds and scallions, if desired.

Served with multigrain rice, roasted asparagus and mushrooms, and kimchi
One-bowl blueberry lemon snacking cake (gluten-free/grain-free)

Snacking cakes are typically simple cakes made with one-bowl batters, that use easy-to-find ingredients, and are baked off in a single baking dish. This simple blueberry lemon version is perfect as a grain-free/dairy-free dessert for any meal. Almond flour replaces regular flour, and well-whisked eggs and sugar help give the cake lightness and volume. You can also replace the blueberries with raspberries or blackberries; frozen or fresh berries both work in this recipe. This cake is very delicate, soft, light, and full of citrusy lemon and sweet berry flavor. It is best the same day it is baked, but still delicious (albeit a little softer) the next day.
Originally published for The Nosher
Blueberry Lemon Snacking Cake (Grain-free/Dairy-free)
Makes 1 9” round or square cake
Prep time: 15 minutes
Bake time: 30-35 minutes
Ingredients:
3 lg eggs, at room temperature
½ cup granulated sugar
2 Tbsps oil
Zest of 1 lemon (about 2 tsps)
2 Tbsps lemon juice
1 tsp vanilla extract
¼ tsp almond extract (optional)
2¼ cups super-fine almond flour
1 Tbsp potato starch, plus more for dusting the berries
1 tsp baking powder
½ tsp baking soda
¼ tsp salt
1¼ cup blueberries, fresh or frozen
1 Tbsps turbinado or coarse sugar (optional)
Directions:
Preheat the oven to 350°F. Generously grease and line a 9” round or square baking dish with parchment paper.
In a standmixer fitted with the whisk attachment, or in a large bowl using a whisk or handheld mixer, beat together the eggs and sugar until doubled in size and pale yellow, about 5-6 minutes.
To the egg mixture, add the oil, lemon zest, lemon juice, vanilla, and almond extract if using. Whisk together until just combined, being careful not to deflate the egg mixture too much.
To the center of the bowl, add the almond flour, potato starch, baking powder, baking soda, and salt. Gently fold the mixture until the dry ingredients are fully incorporated into the wet ingredients.
Toss the blueberries in a spoonful of starch, and add 1 cup of the berries to the batter. Gently fold and combine.
Transfer the batter to the lined and greased baking dish. Top the cake with the remaining ¼ cup of berries. Sprinkle the top of the cake with turbinado sugar.
Bake for 30-35 minutes, or until it looks evenly golden brown and set on top, and a cake tester comes out clean. Allow the cake to fully cool before serving. This cake is best served the same day it is prepared, but can be made one day in advance if needed. Top with powdered sugar, or whipped cream before serving if desired.

Manti (meat dumplings) in brothy tomato sauce

Originally shared on The Nosher
From Turkey to Armenia, Uzbekistan to Ukraine, manti are a popular comfort food found across Central Asia and Eastern Europe. As an ancient form of dumpling, some trace manti’s origins back to the 1300s during the Mongol Empire in Turkey, while others credit the dish as a gift of the Silk Road; notably, Uyghurs from Northwest China have been making a version of bread prepared in steam known as “mantau” for centuries. Regardless of their origin, manti traveled East towards Korea, West towards the Caucuses, and everywhere in between.
While their popularity spans continents, the shapes and styles differ by region. In Turkey they’re often formed into small pyramid-like pouches, sometimes baked and simmered, sometimes boiled, often topped with yogurt, and served in a tomato-based broth or sauce. On the other hand, the ancient Bukharian Jewish community in Central Asia are known for large intricately shaped manti, generously filled with meat and always steamed – never boiled. There’s also a dairy version of Bukharian manti that’s filled with cheese and served with yogurt.
Like many celebratory old-world foods, these hand-formed dumplings take a bit of time and effort to prepare, making them ideal for calling a helping hand into the kitchen. Historically, this dish was even a communal activity. While making homemade dumpling dough can be deeply satisfying, you can simplify the manti-making process by using store-bought wonton wrappers – a tip I happily discovered in Gabrielle Hamilton’s “Prune” cookbook. Given the labor, whether it’s with store-bought or homemade wrappers, when I make manti I often double the recipe, freezing extras for future enjoyment.
Let me preemptively warn you, this manti recipe may not look or taste like the manti you’re familiar with. After exploring different shapes, sizes and toppings, my preference is for smaller-sized manti shaped into pouches. I serve mine in a Turkic-inspired brothy tomato sauce topped with fresh herbs and a sprinkle of lemony sumac. I’ve provided directions for steaming or boiling your manti, depending on your preferred technique. If you find yourself hoping for a larger sized manti, the dough can be filled and shaped according to your family’s custom. Whether you stick to the recipe as written or try something more traditional to you, the joy of manti lies not in their size or shape, but in their pillowy soft tenderness, and the inherent comfort they bring to every table.
Note: I use Diamond brand kosher salt for this recipe, if using Morton’s or sea salt use ⅓ less.
Manti in brothy tomato sauce
Makes 48 dumplings, serves 4-6
Prep time: 1 hour 15 minutes
Cook time: 30 minutes
Ingredients
For homemade dough:
3 cups (380 g) all-purpose flour
1½ tsp Diamond Crystal brand kosher salt*
¾ (175 ml) cup water
1 large egg, beaten
If using store-bought dough:
50 3” square wonton wrappers
For the filling:
1 lb ground beef or lamb
1 small onion, grated or very finely diced
½ cup parsley, chopped
2¼ tsp Diamond Crystal brand kosher salt
1 tsp sweet paprika
For the tomato broth:
¼ cup olive oil
4 cloves garlic, minced
1 (6 oz) can (⅔ cup) tomato paste
2 large beefsteak tomatoes, or 4 large Roma tomatoes, diced
2 tsp sweet paprika
½ tsp red pepper flakes or Aleppo pepper, or to taste
4 cups chicken or beef stock
1 Tbsp sherry vinegar or red wine vinegar
Salt and pepper to taste
For garnish (optional):
Chopped parsley, mint, or cilantro
Sumac or Aleppo pepper
Extra virgin olive oil
For the dough:
Add the flour and salt to a large bowl and stir together. If you are measuring your flour by cup instead of by weight, remove ¼ cup of flour and reserve.
Make a well in the center of the flour, and add the water and egg. Stir to combine into a shaggy ball, then transfer onto a clean surface and knead. If the dough feels too sticky, add a little more flour 1 tablespoon at a time. Knead until smooth and elastic, about 8-10 minutes.
Cover the dough with a bowl, and allow it to rest for 30 minutes. While your dough is resting, prepare your tomato broth.
For the tomato broth-
In a deep skillet or large pot, add the olive oil over medium heat. Once hot add the minced garlic and sauté until just fragrant, about 1 minute.
Add the tomato paste to the skillet, and stir and sauté for about 4-5 minutes. The tomato paste will turn a darker color as it caramelizes, which will add depth of flavor to the broth.
Add the diced fresh tomato, paprika, red pepper flakes, salt, and pepper, and sauté and stir for 1 minute.
Add the broth, and let it come to a boil, then gently simmer for 30 minutes. Once it’s done simmering, taste, and adjust the seasoning if needed. Turn off the heat and reserve for serving. If you want a thicker consistency, simmer for longer; if you want a brothier consistency, add more stock or water.
Tomato broth can be made several days in advance and reheated as needed.
For the filling:
To a medium bowl, add the ground beef, grated onion, chopped parsley, salt, and paprika.
Mix until just combined; be careful not to overwork the filling or it can become tough.

To assemble and cook the manti with homemade dough:
Line a baking sheet with parchment paper, and sprinkle flour on top of the paper. Fill a small bowl with water.
Lightly flour your surface. Divide the dough into 4 equal parts. Take one quarter to roll out, and make sure the remaining dough is covered so that it doesn’t dry out.
Roll out the dough into a thin 11-12” square, about as thin as a sheet of lasagna. Cut the dough into 12 even squares, each will be about 2.5-3”.
Add 1½ teaspoons of the filling to the center of each square. Dab a little water along the edges, then bring two opposite corners towards the center of the dough, and then bring the remaining two corners towards the center. Pinch down the edges of the dough, to form a pyramid shape. Alternatively, you can shape the manti however is most desirable or easiest for you. Make sure the edges are very secure, then place the formed manti onto the floured baking sheet.
Repeat the manti forming process with the remaining dough
At this point you can immediately cook your manti, or you can place the baking sheet into the freezer. Once the manti are frozen, transfer them to a Ziplock bag or airtight container. They can be cooked from frozen the same way as they are from fresh.
Boil or steam your manti.
To boil – Fill a large pot with water and bring to a boil. Add 20-30 manti to the pot, depending on their size. Be careful not to overcrowd the pot; you will likely need to cook them in batches. Cook until they all float to the top and are tender and cooked through, about 5-6 minutes. If cooking from frozen this may take an additional 3-4 minutes.
To steam – Use a multi-tiered steamer or add water to the bottom of a large pot with a steamer basket placed above the water line. Lightly brush the bottom of the steamer basket with oil, bring the water up to a simmer then place the manti in a single layer into the basket and cover with a lid; if you do not have a multi-tiered steamer you will need to cook them in batches. Steam for 30-40 minutes or until tender and cooked through.
Serve immediately, topped with a ladle full of hot brothy tomato sauce. Garnish with chopped fresh herbs, a drizzle of olive oil, and a sprinkle of sumac or Aleppo pepper if desired.
To assemble and steam the manti with wonton wrappers:
Line a baking sheet with parchment paper. Fill a small bowl with water.
Place 6 wonton squares onto a clean surface, keep the remaining squares covered so that they don't dry out.
Add 1½ teaspoons of the filling to the center of each square. Dab a little water along the edges, then bring two opposite corners towards the center of the dough, and then bring the remaining two corners towards the center. Pinch down the edges of the dough, to form a pyramid shape. Make sure the edges are very secure, then place the formed dumplings onto the lined baking sheet.
Repeat the dumpling forming process with the remaining wrappers, six at a time. At this point you can immediately cook your manti, or you can place the baking sheet into the freezer. Once the manti are frozen, transfer them to a Ziplock bag or airtight container. They can be cooked from frozen the same way as they are from fresh.
Steam your manti using a multi-tiered steamer, or add water to the bottom of a large pot with a steamer basket placed above the water line. Lightly brush the bottom of the steamer basket with oil, bring the water up to a simmer then place the manti in a single layer into the basket and cover with a lid; if you do not have a multi-tiered steamer you will need to cook them in batches. Steam for 10 minutes until tender and the wrapper becomes soft and translucent; if cooking from frozen you will need to steam for 3-4 additional minutes.
Serve immediately topped with a ladle full of the hot brothy tomato sauce. Garnish with chopped fresh herbs, a drizzle of olive oil, and a sprinkle of sumac or Aleppo pepper if desired.
Golden Chicken Soup with Matzo Balls

I learned how to make chicken soup by calling my mother and having her walk me through it over the phone. Over time, I developed my own far more involved recipe. But, my mom’s chicken soup will always be the best chicken soup. When I want something quick, simple, and familiar, I make her recipe. When I want something richer and deeper, and I have the time, I make this recipe.
I would argue that chicken soup is as central to Jewish cooking as pastrami, brisket, or challah. Also affectionately called “Jewish penicillin,” chicken soup is as comforting as it is healing. My chicken soup starts with a rich broth that takes time to simmer and develop flavor. I love to put a pot of it on the stove on a rainy day, and putz around the house as it quietly bubbles. Once you have your stock, you can quickly turn that stock into soup. Matzo balls were born to be included, but I also like to serve this soup with pelmeni or egg noodles.
GOLDEN CHICKEN SOUP
Serves 6-8
For the stock:
1 4-5 pound chicken, cut up or whole
½ pound chicken wings or chicken feet (or both)
3 medium yellow onions, peeled and halved
3 stalks celery, cut into thirds
3 medium-size carrots, cut into thirds
1 large parsnip, peeled and cut into thirds
1 head garlic, cut in half horizontally
3 bay leaves
1 Tablespoon peppercorns
1 bunch fresh flat-leaf parsley
1 bunch fresh dill
1 bunch fresh thyme (optional)
For the soup:
2-3 stalks celery, sliced thin
2-3 medium carrots, peeled and cut into rounds
2-3 teaspoons turmeric powder
Fresh chopped parsley
Fresh chopped dill
Oil or schmaltz, as needed
Salt and pepper, to taste
Make the stock:
Place all of the stock ingredients into a large (10-16 quart) stockpot. Fill the pot with cold water. Bring the water up to a simmer, avoid letting the water boil. Let the stock simmer on low for 1 hour, removing any scum that floats to the top during that time. After an hour of simmering, remove the whole chicken; if using a cut-up chicken, remove the breasts only. Allow the stock to continue to simmer.
Allow the chicken to cool slightly, and then remove the chicken breasts from the chicken. Shred the cooked chicken breast and reserve. Place the rest of the chicken and bones back in the pot, and allow the broth to continue to simmer for at least 2 more hours or up to 6 hours. The longer the broth simmers, the richer the flavor. The broth will reduce as it cooks.
Strain the broth and reserve until ready to make the soup. If making stock ahead of time, a layer of fat will form on top of the broth once you chill it. You can discard it or skim it to use as schmaltz, or you can keep it and it will add more richness to your soup. Stock keeps for up to 1 week in the fridge and up to 6 months in the freezer.
Make the soup:
Add a drizzle of oil or a spoonful of schmaltz to a large pot on medium heat and sauté the carrots and celery until just starting to soften, about 3-4 minutes. Add the turmeric and sauté for an additional minute. Add the stock to the pot. Season generously with salt and pepper. Allow the soup to simmer for 20-30 minutes, taste, and adjust the seasoning as needed. Turn off the heat and add the chopped parsley and dill.
Serve hot with reserved shredded chicken breast, matzo balls, pelmeni, egg noodles, or rice. Both the broth and the soup can be frozen for up to 6 months.
Variations:
You can use any additional vegetables you like in the broth: rutabaga, sweet potato, turnips, leeks, green garlic, and any good vegetable scraps all work here. I also keep a bag of vegetable scraps and herb stems in the freezer, and I love to add those to my stocks too.
If you don’t have a whole chicken, this will work with cut up chicken parts. Remove the breasts after one hour, but you can leave the rest of the chicken in the pot as it simmers.
Turmeric adds flavor and color to the soup, but it also makes the broth darker and less clear. It can be omitted if you want a clearer broth.
Whether you make matzo balls from scratch, or opt for a box mix, doctor them up with fresh herbs and schmaltz and you’ll have a truly exceptional matzo ball every single time.
MATZO BALLS
Makes 9-11 matzo balls
1 cup matzo meal
1½ teaspoons kosher salt
¼ teaspoon baking powder
¼ teaspoon baking soda
4 large eggs
¼ cup oil/schmaltz
2 Tablespoons finely chopped dill/parsley
In a large bowl, whisk together the matzo meal, salt, baking powder, and baking soda. In a separate bowl, beat the eggs. Add the eggs, oil, and herbs to the matzo meal mixture. Mix until just incorporated (be careful not to overmix). Refrigerate for at least 30 minutes and up to 8 hours.
Once the batter has chilled and rested, get ready to form and cook the matzo balls. Bring a large pot of lightly salted water to a boil. Adding a little oil to your hands will help prevent the batter from sticking as you form the matzo balls. Using a small ice cream scoop or a spoon, scoop out 1-tablespoon of batter. Gently roll the batter into balls of equal size.
Add the matzo balls to the boiling salted water. Cover the pot with a lid and cook for 25-30 minutes or until just cooked through. Test one to make sure it is cooked through. Simmer longer if the matzo ball looks dry in the center. Serve balls immediately in soup, or store matzo balls in their liquid, and reheat as necessary. Matzo balls keep for up to 1 week in the fridge; you can freeze them, but their texture will change.
Sheet-Pan Crispy Harissa Tofu, Chickpeas, and Broccolini
I always keep a jar of harissa paste in my fridge as a quick way to add flavor to simple protein or vegetable dishes. NY Shuk makes my favorite go-to premade harissa, but thankfully this condiment is so popular that you can even find it at many grocery stores. Each brand has its own flavor profile and spice level; taste your harissa and assess its heat before adding it in the amount indicated in the recipe.
Like all sheet pan meals, this is a simple cook-it-all-together kind of dinner. If you take a little time to press your tofu before roasting it, it will end up crispy-edged. This recipe can be doubled and placed on two sheet pans if you’re cooking for a larger family or group. Depending on your sides, this is an abundant meal for two or a modest meal for 4.

Sheet-Pan Crispy Harissa Tofu, Chickpeas, and Broccolini
Serves 2-4
Prep time: 20 minutes
Cook time: 30 minutes
Ingredients:
1 (14-ounce) container extra firm tofu
1 (15.5-ounce) can chickpeas, or 1½ cups cooked chickpeas
¼ cup harissa paste, divided, or to taste (I use NY Shuk brand)
¼ cup potato starch or cornstarch
1 bunch broccolini or rapini, ends trimmed (or 1 head of broccoli cut into florets)
Salt and pepper, to taste
Oil, as needed
Directions:
Drain the tofu, then wrap it in a clean kitchen towel or paper towels. Place a heavy skillet, or another heavy flat object on top to press the tofu and remove its excess moisture. Let it sit for 15-30 minutes. While the tofu is being pressed, drain a can of chickpeas and place it on a separate clean kitchen towel or paper towel to remove excess moisture.
Preheat the oven to 400°F, and line a sheet pan with parchment paper.
Slice the tofu into equal-sized cubes or pieces. Add them to a medium bowl with 2 Tablespoons of harissa (or more/less, depending on the spice level of your harissa and preference), 2-3 teaspoons of oil, salt, and pepper. Toss gently so the tofu pieces are all evenly coated. Add the potato starch to a small bowl, and dip each piece of tofu in the starch, so that it is covered on each side. Place the dipped tofu onto the baking sheet.
Add the chickpeas to the same bowl the tofu was in with 2 more Tablespoons of harissa, 2 teaspoons of oil, and salt and pepper. Toss the chickpeas until they are well-coated. Transfer them to the sheet pan so that they are spread out around the tofu. Make sure the tofu also has room to brown and isn’t cramped too closely to the other tofu or chickpeas.
While the tofu and chickpeas are in the oven, toss the broccolini in the same bowl, with an additional generous drizzle of oil, salt, and pepper.
Roast the tofu and chickpeas for 15 minutes, or until starting to crisp and brown on the bottom. Take the sheet pan out of the oven, and flip the tofu pieces over. Rearrange the tofu and the chickpeas so they fill only ⅔ of the sheet pan. Add the broccolini to the remaining ⅓ of the sheet pan. Place back in the oven for an additional 10-15 minutes, or until the broccolini is fully cooked and the tofu is crisped and browned on both sides.
Serve immediately with a simple side like rice, quinoa, or orzo. Tahini sauce also makes an excellent topping for this dish along with fresh herbs of your choice.
Cara Cara Orange Olive Oil Cake
Hanukkah is a celebration of all things oil, and is celebrated by both lighting candles each night of Hanukkah, as well as by eating oil-rich foods during the holiday.

Sometimes, I need a break from the typical fried foods of Hanukkah, like latkes and donuts. I started making this simple olive oil cake as a way to honor the holiday without deep frying, adapting recipes from both Dorie Greenspan and Melissa Clark. After the holiday ended, I kept making it throughout the winter when Cara Cara oranges are in season. While I love the floral notes of a Cara Cara, any type of orange will work with this recipe. This cake is easy to make, even for a novice baker. I love to serve it with a dollop of whipped cream or a spoonful of tangy labneh.
Cara Cara Orange Olive Oil Cake
Makes 1 (9”) cake, serves 8
Ingredients:
2 large Cara Cara oranges
Zest of 1 orange
1 cup sugar
2 large eggs, at room temperature
⅓ cup orange juice
⅓ cup buttermilk (or milk with ½ a teaspoon of apple cider vinegar added)
½ teaspoon vanilla extract
1¾ cups (230 grams) all-purpose flour
1¼ teaspoon baking powder
¼ teaspoon baking soda
½ teaspoon kosher salt
⅔ cup extra virgin olive oil
Preheat the oven to 350°F. Grease and line a 9 inch springform pan (or 9 inch cake pan) with parchment. You can also use a standard-sized loaf pan, but will need to bake for 10-15 minutes longer.
Supreme one orange: cut off the bottom and top, place on the cutting board so the cut bottom is flat on the board, then cut the peel and pith from all sides. Next, carefully slice each segment naturally between the pith, leaving only a crescent of fruit. Reserve.
Zest the remaining orange with a microplane or zester, and reserve. Halve, then squeeze ⅓ cup worth of juice from the zested orange.
In a large bowl, whisk together the orange zest, sugar, eggs, orange juice, buttermilk (or milk and apple cider mixture), and vanilla together.
In a medium bowl, sift together the flour, baking powder, baking soda, and salt.
Add the flour mixture to the orange juice/buttermilk mixture, and mix until just incorporated and smooth. Using a spatula, gently fold the olive oil into the batter until just incorporated. Transfer the batter to the greased and lined pan, and then place the orange segments on top of the batter.
Bake for 30-35 minutes, or until a small skewer or cake tester comes out clean. Cool and serve topped with powdered sugar, whipped cream, or a dollop of labneh.
Easy Roast Turkey for Thanksgiving

I have been using my mother’s method for roasting turkey since I began hosting Thanksgiving in my twenties. The main difference between this and other roast turkey recipes is that you cover the bird for part of the cooking time. The skin may not get super crispy, but it stays incredibly juicy and flavorful. No bland dry turkey here. In recent years, I’ve been doing a dry brine a day or two before roasting for added flavor and tenderness, but you can skip that step if desired.
And all that said… when in doubt, just follow Tante Marie’s advice.
Thanksgiving Roast Turkey
Ingredients:
1 14-16 lb turkey, giblets removed
3 Tbsps kosher salt
1 Tbsp brown sugar
3 onions, quartered
3 carrots, cut into large chunks
3-4 apples or quinces, quartered
1 head garlic, halved
1 bunch thyme, rosemary, sage, or all three
1 large lemon, halved
1-2 cups white wine or chicken/turkey broth
Olive oil, as needed
Remove the giblets and anything inside the turkey.
Combine the salt and brown sugar to make a dry brine. Generously season the outside of the bird and the inside cavity with the brine. Place in a roasting pan/baking dish and refrigerate, uncovered, for 24-48 hours before roasting. If you do not want to dry brine your bird, simply season it with the salt and sugar mixture on the day of roasting.
Preheat the oven to 350°F.
To the bottom of your roasting pan add the onion, carrot, and apples/quince. Place the turkey on top of the aromatics.
Stuff the inside of the turkey with the lemon, garlic, and herbs.
Rub the turkey with oil. Add the wine or stock to the roasting dish.
Cover the roasting dish tightly with foil.
Place in the oven, estimate about 1 hour for every 5 pounds. After half of the cooking time, remove the foil and uncover the turkey. Baste it with any juices in the bottom of the roasting dish. Continue to baste and check on the bird every 30-45 minutes until the internal temperature reaches 165°F when tested with a meat thermometer.
Let the turkey rest for at least 30 minutes before carving, and up to an hour. While it's resting I throw other things in the oven that need to get roasted or heated.
Carve and serve!

Apple and Honey Dumplings

I first shared this story and recipe with The Nosher in 2023.
Old-fashioned apple dumplings are made with peeled and cored-out apples that get encased in pastry or biscuit crust and are baked until golden and tender. This dessert has remained popular in the United States for hundreds of years, from New England to the deep South.
The concept of delicate dough plus apples can also be found in the Czech Republic, where the dumplings are also sometimes made with whole plums or apricots. In Germany and Ukraine, you might find apple dumplings that are made with dough that is simmered instead of baked. A dumpling is still a dumpling whether it’s baked or boiled, and a dumpling is universally loved across cultures and countries.
These apple dumplings work best with very small, tart firm varieties like Granny Smith or Winesap. The flavor of the apple deepens as it becomes fork-tender in its buttery blanket of dough, and it’s sweetened by a honey sauce that can be whisked together in minutes. Best of all, this dessert serves a crowd of eight, can be made up to two days ahead, and can be easily reheated when you’re ready to serve.
Apple & Honey Dumplings
Serves 8
Prep time:15-30 minutes
Cook time: 55-60 minutes
Total time: 1 hour 15 minutes
Ingredients
For the dumplings:
8 small, chilled apples, 100-130 g each (Granny Smith, Pink Lady, Honeycrisp or an heirloom apple)
4 tsps unsalted butter or plant-based butter
2 tsps cinnamon
2 9” pie crusts, store bought or from scratch (recipe attached)
For the sauce:
1 cup water
½ cup honey
¼ cup brown sugar
¼ tsp salt
For the double crust pie dough (optional):
2½ cups (340 g) all-purpose flour
1 Tbsp sugar
1 tsp kosher salt
1 cup (225 g) cold butter, cubed
1 Tbsp apple cider vinegar
5-6 Tbps ice water
Directions:
Start by making the pastry (optional, if using store-bought pie crust skip to Direction 4). In a food processor: pulse the flour, sugar and salt together. Add the cubed cold butter and pulse until pea-sized crumbs form. Add the apple cider vinegar and 5 Tbsp ice water and pulse, it will look a little bit crumbly at first and then as you pulse it will begin to form into a ball. If it doesn’t clump together easily, add another Tbsp water, or as needed. Be careful not to overmix and once it forms a bowl, transfer it out of the processor and divide into two equal-sized pieces.
By hand: whisk together the flour, sugar and salt. Add the cubed cold butter and combine with the flour with a pastry cutter or by hand until pea-sized crumbs of dough form. Add the apple cider vinegar and ice water and incorporate quickly with your hands until a ball of dough is formed. Be careful not to overmix. Once the ball is formed, divide the dough into two equal-sized pieces.
Form each piece of dough into a square shape, and tightly cover with plastic wrap or a beeswax wrap. Allow the dough to chill for at least 1 hour, or overnight before using.
Preheat the oven to 350°F. Grease a 9x13” baking dish.
Peel and core your cold apples; it is easier to wrap the dough around the apple if they are chilled as opposed to at room temperature.
Roll out one piece of dough into a large, thin 12x12” square. Divide the dough into 4 even-sized 6x6” squares. Repeat the process with the second piece of dough.
Place a cored apple upright into the center of each square. Add a ½ tsp of butter to the center of the apple. Sprinkle the tops of the apple with cinnamon, about ¼ teaspoon per apple. Bring the corners of the dough up and over the apple, firmly pressing the edges together to fully encase the dough. If there are any scraps of dough, shape them into leaf shapes to decoratively top the dumplings.
Place the apple dumplings into the greased baking dish, and bake for 30 minutes.
While the apple dumplings are baking, make the sauce by combining the water, honey, sugar, and salt in a small pan. Bring to a simmer, and simmer until sugar is fully dissolved, about 3-4 minutes.
Pour the sauce over the apple dumplings, then place them back in the oven to bake for an additional 25-30 minutes, or until the dough is golden brown, and the apples are tender when tested with a skewer or thin knife.
Allow to cool for at least 15 minutes, then serve warm or room temperature.
To make ahead: Slightly underbake the dumplings for 10 minutes. Let them cool, then store covered with foil in the fridge. The next day, reheat them covered in foil for 10-15 minutes in a 350°F oven. Apple dumplings can be made up to 2 days in advance of serving.

Galette with any kind of fruit
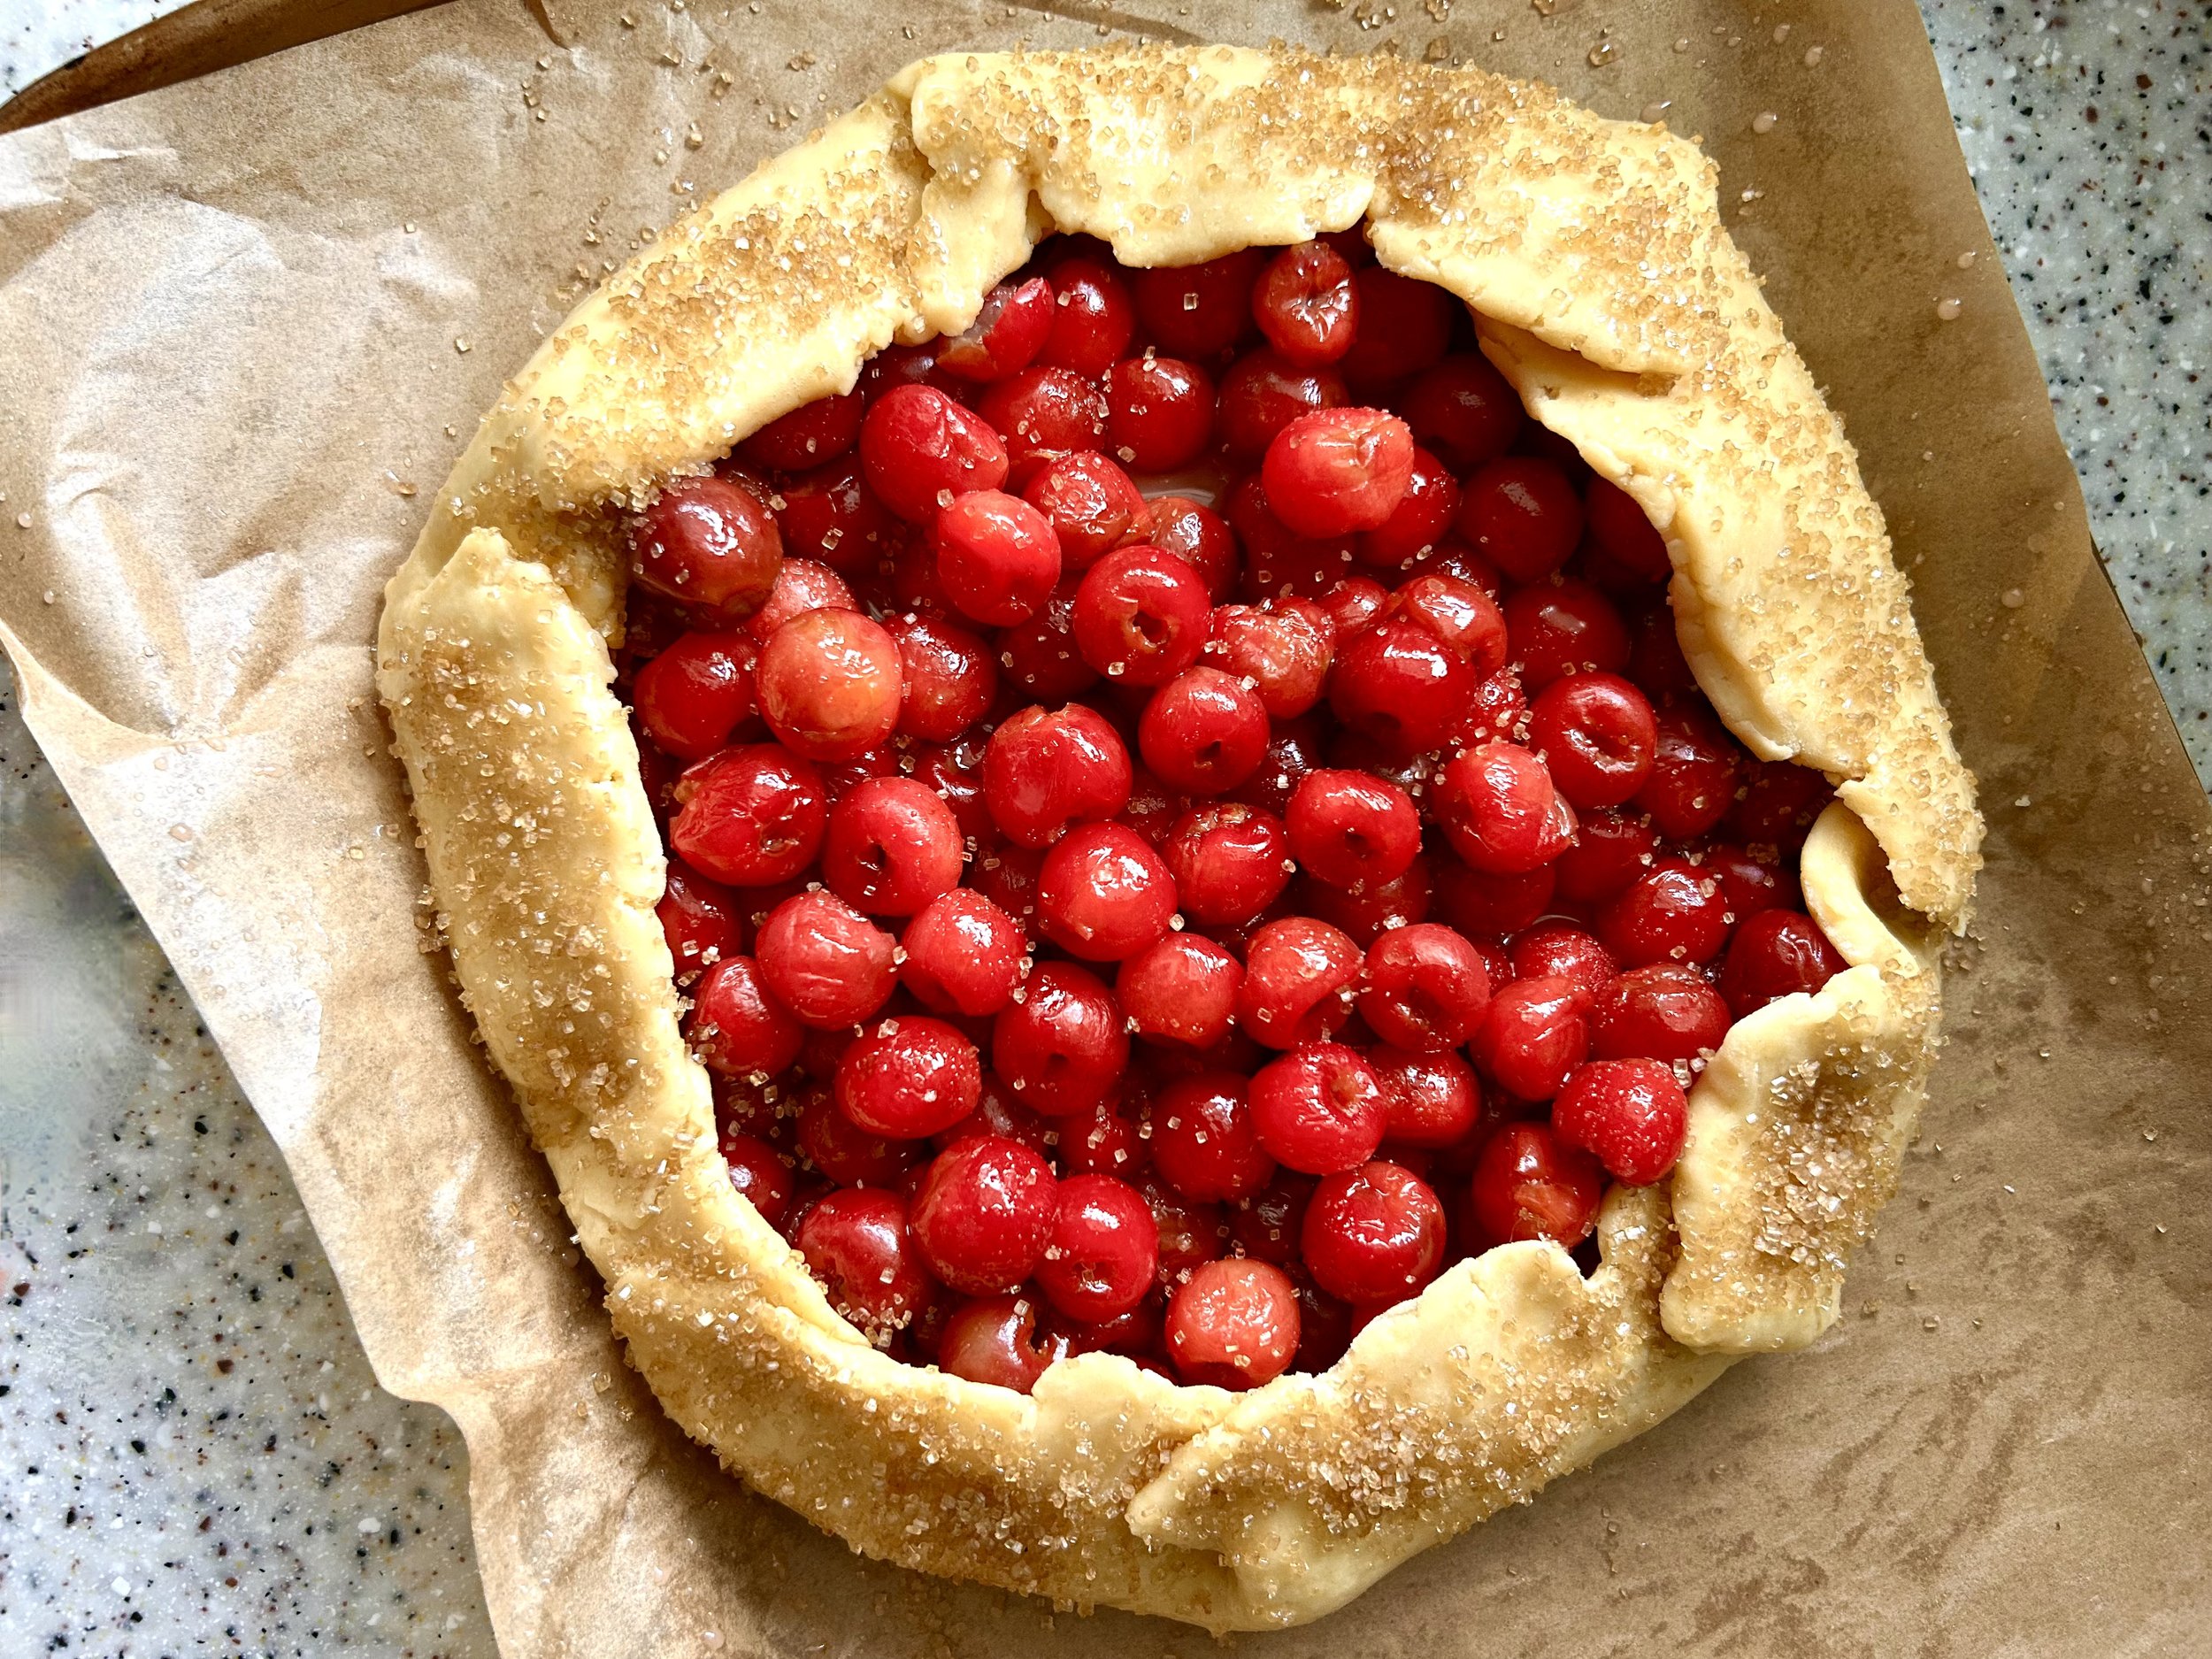
Over on my free Substack, I’ve been sharing recipes and seasonal reflections — like this updated galette recipe that you can make with any kind of fruit.
The dough is made with an all-butter crust (and yes, you can make it in the food processor OR by hand). I fill it with all kinds of summer fruit like sour cherries, peaches, berries, or plums. Lately, I’ve been adding a layer of frangipane underneath the fruit for a touch of almondy richness.
Sign up for my substack to find this recipe and many more…

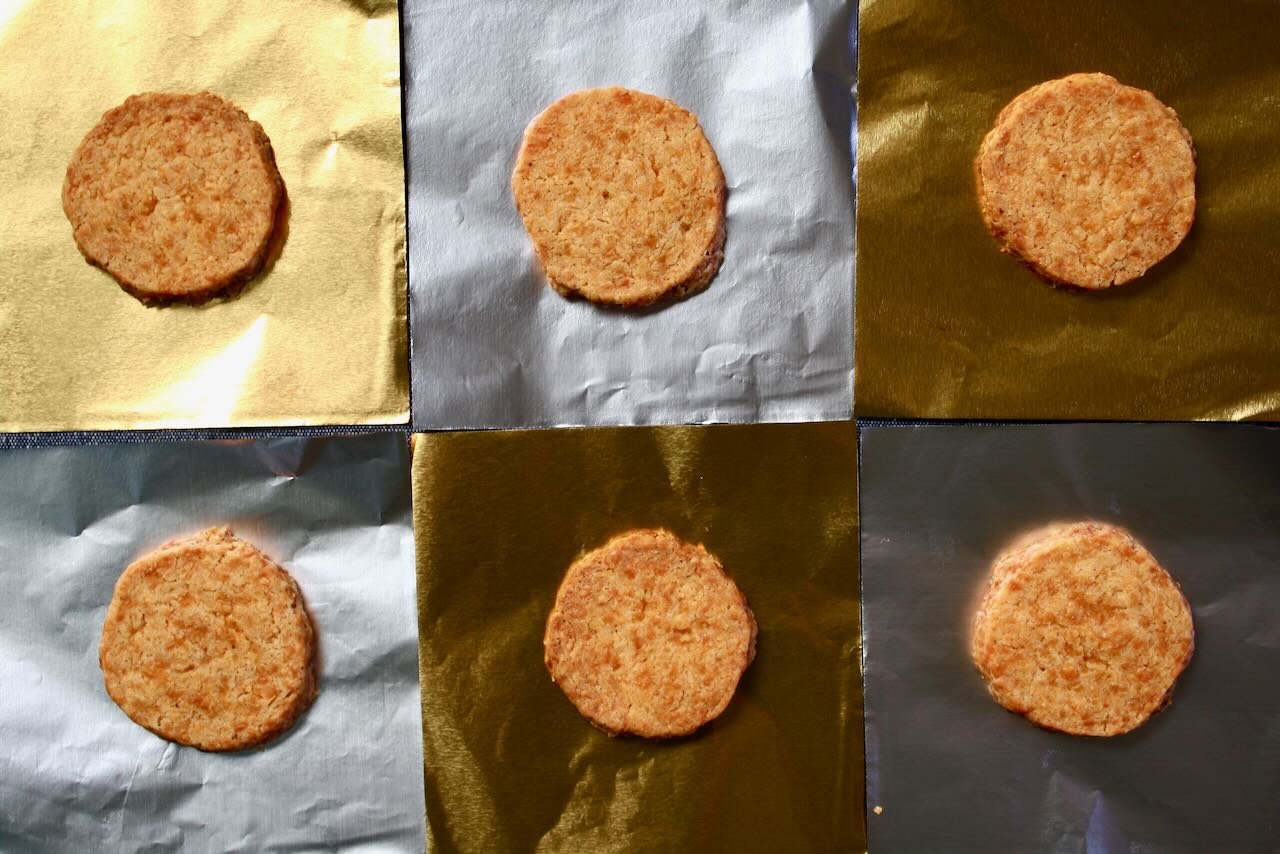
Cheddar Cheese Coin Crackers

I am an unabashed cracker enthusiast, and I am always pleasantly surprised by how simple it can be to make them at home. Cheddar cheese coins (also called cheese pennies) have the addictive savory tanginess of a Cheez-It, with the hardiness of a homemade cracker.
This retro snack is made with just a few simple ingredients like good cheddar cheese, flour, and butter. They’re quick to whip up and store well in an airtight container. Cheese coins are flavorful enough to be served and eaten all on their own, ideally as a light nibble accompanied by a fizzy beverage before dinner. These crackers are extra delightful topped with a fruity fig or plum preserve, or even a slice of cheese on top. What’s not to love about salty, cheesy, crispy crackers?
Notes:
This recipe works best with hand grated cheese, as opposed to the store-bought pre-shredded variety, which has a powdery coating on the outside.
You can store the cheese coins in an airtight container for up to one week.
Cheddar Cheese Coins
Yield: 48 crackers
Prep time: 10 minutes + 2 hours chill time
Cook time: 12-14 minutes
Ingredients
5 oz (140 g) extra sharp cheddar cheese, grated, about 2 cups
½ cup (1 stick) unsalted butter, very cold
1⅓ cups all-purpose flour
1 Tbsp cornstarch
2 tsp dry mustard powder
1 tsp sweet paprika
¼ tsp salt
1 Tbsp apple cider vinegar
2-3 Tbsp ice cold water
Directions
Start by grating your cheese. Cube your butter very small.
To the bowl of a food processor add the flour, cornstarch, dry mustard powder, paprika, salt and grated cheese. Pulse 2-3 times to mix.
Add the cubed butter and pulse 5-6 times, or until the mixture forms pea-sized crumbs.
Add the vinegar and 2 Tbsp water. Pulse until the dough is like the texture of fine crumbly sand and easily holds together when balled up in your hand. If the mixture looks too dry and doesn’t stick together, add one more Tbsp water and pulse a few more times.
Transfer to a clean surface and form into a ball. Divide the ball into two equal halves, and form each half into a log, about 1½” in diameter, and about 7-8” long. Wrap each log in plastic wrap and chill for at least 2 hours or overnight.
Preheat the oven to 375°F, arrange the oven racks so there is one on the top third and one on the bottom third of the oven (alternatively, you can bake the crackers in the center of the oven, one baking sheet at a time).
Line two baking sheets with parchment paper. Slice the chilled dough into ¼” rounds. Place them on the baking sheets, leaving an inch or two between each coin.
Place the baking sheets on the top third and lower third of the oven, and bake for 6 minutes. Rotate the baking sheets, and bake for 6-8 more minutes, or until they are just starting to turn golden brown at the edges. If you like them crispier, bake until slightly deeper brown on the edges and on top.
Let the coins completely cool on a baking rack. Once cool, serve or store in an airtight container for up to one week.
Asparagus, Gruyere & Swiss Tart

This classic Spring tart is flavorful and buttery and is easy to whip up for a brunch spread or Mother’s Day. When possible, I try to use an all-butter puff pastry and fresh local asparagus — you can even often find good quality puff pastry sold by the sheet at your local bakery. The combination of Gruyere and Swiss is rich and nutty, and the whole grain Dijon adds a bright complexity to the flavor. If you’re not a fan of either cheese, you can swap them for a sharp cheddar or aged Gouda. This tart is a crowd-pleaser and is great served alongside a bright and citrusy salad.
I recently had the pleasure of being back on KATU’s AM NW and you can find a full demo of this recipe here.

Asparagus Gruyere & Swiss Tart
Serves 6-8
Ingredients
1 sheet of puff pastry, defrosted
1 (1 lb/500 g) bunch asparagus
1¼ cups (3 oz / 85 g) shredded Gruyere cheese
1¼ cups (3 oz / 85 g) shredded Swiss cheese, or substitute with additional Gruyere
2 Tablespoons whole-grain Dijon mustard (optional)
Drizzle of olive oil
1 egg, beaten (for egg wash)
Flaky salt, as desired
Freshly ground pepper, to taste
Directions
Preheat the oven to 400°F (200°C). Line a baking sheet with parchment paper.
Depending on the brand of puff pastry you use, your tart might be slightly larger or smaller in size. Gently roll out your puff pastry until it’s roughly 11-13” (28-33 cm) in length, and 6-9” (15-23 cm) wide. Transfer the rectangle onto a parchment-lined baking sheet.
With the tip of a sharp knife, score a border around the pastry dough, about 1” (2.5 cm) from the edge, forming a rectangular frame.
Using a fork, lightly pierce the pastry evenly across the inside of the rectangle. This will help prevent excessive puffing in the center while allowing the edges to rise evenly.
Trim the tough ends off the asparagus spears to fit them within the inner rectangle of the tart. To do this, gently bend each asparagus spear near its base until it naturally snaps; discard the tough ends or reserve them for making stock if desired.
To assemble the tart: evenly spread 2 tablespoons of the whole grain mustard in the inner rectangle of the tart. Top evenly with shredded cheese. Arrange the asparagus, like straight soldiers, on top of the cheese. Lightly drizzle or brush the asparagus with olive oil. Brush the edges of the tart with beaten egg. Sprinkle the tart with flaky sea salt and freshly ground pepper.
Bake for 22-25 minutes, or until puffed up and golden brown at the edges and the asparagus spears are tender and cooked through.
Allow to cool for at least 15 minutes prior to serving. Tart can be served warm or at room temperature. This tart is best served the same day it’s baked, but you can store it in the fridge for up to 3 days. The tart can be reheated at 350°F (175°C) until warmed through.

Yemenite White Bean Soup with Zhoug

This classic Yemenite white bean soup is designed to be topped with herby, cardamom-rich zhoug. Zhoug is spicy, floral, and very springy — it’s worth a try if you’ve never had it before, even if you’re slightly spice-averse (I recommend using less jalapeno if that’s the case). While you can make this soup with canned beans, if you take the time to cook up beans from scratch and save their cooking liquid, that bean broth adds tons of flavor to the final soup.
Yemenite White Bean Soup with Zhoug ( hot sauce)
Originally published on The Nosher
Serves 6
For the soup-
1 cup dry white/Cannellini beans, or 2 15oz cans (about 3.5-4 cups)
Olive oil, as needed
1 large onion, diced small
1 large leek, diced small
1 carrot, diced small
1 celery, diced small
1 Roma tomato chopped small (or 1 tablespoon tomato paste)
6 cloves garlic, peeled and divided
2 large bay leaves, divided
3 sprigs thyme, leaves removed from stem
10 cups (2.5 Qts) liquid (chicken broth, vegetable broth, or water)
A spoonful of finely chopped parsley or cilantro stems from the zhug
Salt and pepper to taste
Juice of ½ a lemon, or to taste
For the zhoug-
5-10 small Jalapenos (5 for mild, 10 for hot), sliced in half and deseeded
1 bunch cilantro
1 bunch parsley
1 large clove garlic, peeled
1 tablespoon ground cardamom
2 teaspoons caraway seeds (optional)
1 teaspoon kosher salt
Juice of ½ a lemon
¼ cup oil (a mild neutral oil: light olive oil, sunflower, canola, etc.
Directions:
For the soup:
If using dry beans: soak the beans overnight. In a large pot or in an Instapot, cover the dried beans with 2-3 inches of water. Add a large bay leaf and 4 peeled cloves of garlic to the pot. Simmer beans until tender.
To a large pot add a generous drizzle of olive oil over medium heat, and add the diced onion, leek, carrot, and celery. Sauté the vegetables until softened, about 6-8 minutes. Add the chopped tomato (or tomato paste if using), 2 peeled garlic cloves to the pot, 1 bay leaf, thyme, and chopped herb stems to the pot. Add the liquid to the pot; I like to add a few cups of the bean cooking liquid in addition to the broth if I’ve made the beans from dried. Add salt and pepper to taste. Bring to a simmer, and allow to simmer for 20 minutes.
Add the cooked or canned beans to the pot and simmer for another 20-25 minutes. Taste, and season accordingly. Turn off the heat, and add the lemon juice.
At this point, you can serve the soup as is. I however prefer to remove about a third of the soup from the pot. I blend the remaining soup until light and creamy. I add the remaining soup back to the pot. This makes the soup smooth and creamy, with pops of beans and vegetables. Serve topped with as much zhug as desired.
For the zhoug:
To a food processor add the deseeded jalapenos, parsley, cilantro, garlic, cardamom, caraway, and salt. Pulse until finely chopped. If you don’t have a food processor, you can also chop the ingredients finely by hand. Transfer the chopped chili and herb mixture to a bowl. Add the oil and lemon juice and stir until combined. Zhoug will last up to 2 weeks in a well-sealed container, or it can be frozen for up to 3 months.
Celery, kohlrabi, date salad with toasted almond and sesame

Summer salads often get all the hype, but I’m here for winter vegetables. I’m even a proud celery enthusiast. This salad is crunchy, lemony, sweet , and nutty. It keeps well in the fridge, just make sure to add the nuts right before serving so they keep their satisfying crunch.
Celery and Kohlrabi Salad with Dates and Toasted Nuts
Serves 4-6
Ingredients:
6-7 stalks celery, plus any leaves if attached
1 large kohlrabi or 2 small
5-6 large Medjool dates, pitted
Juice of 1 lemon, or to taste
2 Tbsps extra virgin olive oil
¾ tsp kosher salt
Black pepper, to taste
½ cup toasted almonds, chopped
2 Tbsps toasted sesame seeds
Directions:
Thinly slice celery stalks on the bias.
Peel the kohlrabi, then julienne it by slicing it into thin rounds, and then slicing the rounds into thin strips.
Chop the dates.
Combine the sliced celery, kohlrabi, and chopped dates in a bowl.
Add lemon juice, olive oill, salt, and pepper to the salad. Toss until well combined. If making ahead, place in an airtight container in the fridge. Salad keeps for 2-3 days.
Right before serving top the salad with chopped almonds and toasted sesame seeds.
Suggested dditions and substitutions:
- Add feta cheese crumbles
- Swap kohlrabi for 3 additional stalks celery, or for 1 head of fennel, or for 1 apple
- Swap almonds for toasted hazelnuts or walnuts
- Swap toasted sesame seeds for 1 Tbsp nigella seeds

Sweet potato latkes with cranberry salsa

To get a crispier sweet potato latke, I like to make mine with a combination of half Russet potatoes and half sweet potatoes; adding some starchy potato to another vegetable helps any fritter or latke crisp up.
I love making the most of cranberries while they’re in season, and this cranberry salsa comes together in minutes in a food processor and is the perfect compliment to crispy fried sweet potato or even a good quality tortilla chip. One important note, make the salsa in advance of whipping up a batch of these latkes.
Happy latke season!
Sweet Potato Latkes with Cranberry Salsa
Serves 4-6
For the salsa -
12 oz fresh cranberries
1 large jalapeno
½ small red onion
2-3 scallions
1-inch piece of fresh ginger
Juice of 1 lime
¼ cup sugar
1 tsp kosher salt
Rinse the cranberries; fresh cranberries work best, but you can use thawed frozen cranberries, but there will be a wetter consistency to the salsa. Trim the stem of the jalapeno, then dice it; for a milder salsa remove the seeds. Cut the onion and scallions into 1-inch chunks. Peel the ginger, and dice it.
Add the cranberries, jalapeno, onion, scallions, lime juice, sugar, and salt to a food processor. Pulse until the cranberries are very finely diced, be careful not to overmix or the salsa will just turn to juice.
Refrigerate for at least 2 hours, or ideally overnight. Salsa lasts up to one week in an airtight container in the fridge
Sweet potato + potato latkes
1 lb (450 g) sweet potato, about 2 large
1 lb (450 g) Russet potato, about 2 large
1 small white or yellow onion
2 large eggs
½ cup potato starch
1½ tsps kosher salt
Black pepper, as desired
Oil as needed (e.g. sunflower, avocado, or canola)
Peel the Russet potato and shred it using a box grater (you can also shred it in a food processor if desired). Transfer the potato shreds to a clean kitchen towel or cheesecloth, and squeeze out excess liquid, then add the dry potato to a large bowl.
Peel and shred the sweet potato, and add it to the bowl with the potato.
Grate the onion on the box grater (or food processor) and add it to the potatoes.
Add the egg, potato starch, salt, and pepper to the potato batter. Mix until combined.
Add about a ½-inch of oil to a large heavy-bottomed skillet over medium-high heat. Once the oil is hot, add a heaping tablespoon of the batter to the pan, and press down to flatten. Cook the latkes in batches, and make sure not to overcrowd the pan. Let each latke fry on one side for 3-4 minutes until golden, flip, and continue to cook until golden on the opposite side, about 2-3 minutes. Transfer the latkes onto paper towels or a baking rack to drain any excess oil. Season with a little extra salt if desired, while the latkes are still hot.
Serve hot topped with cranberry salsa, and sour cream if desired.

Ukrainian Summer Fruit Kompot
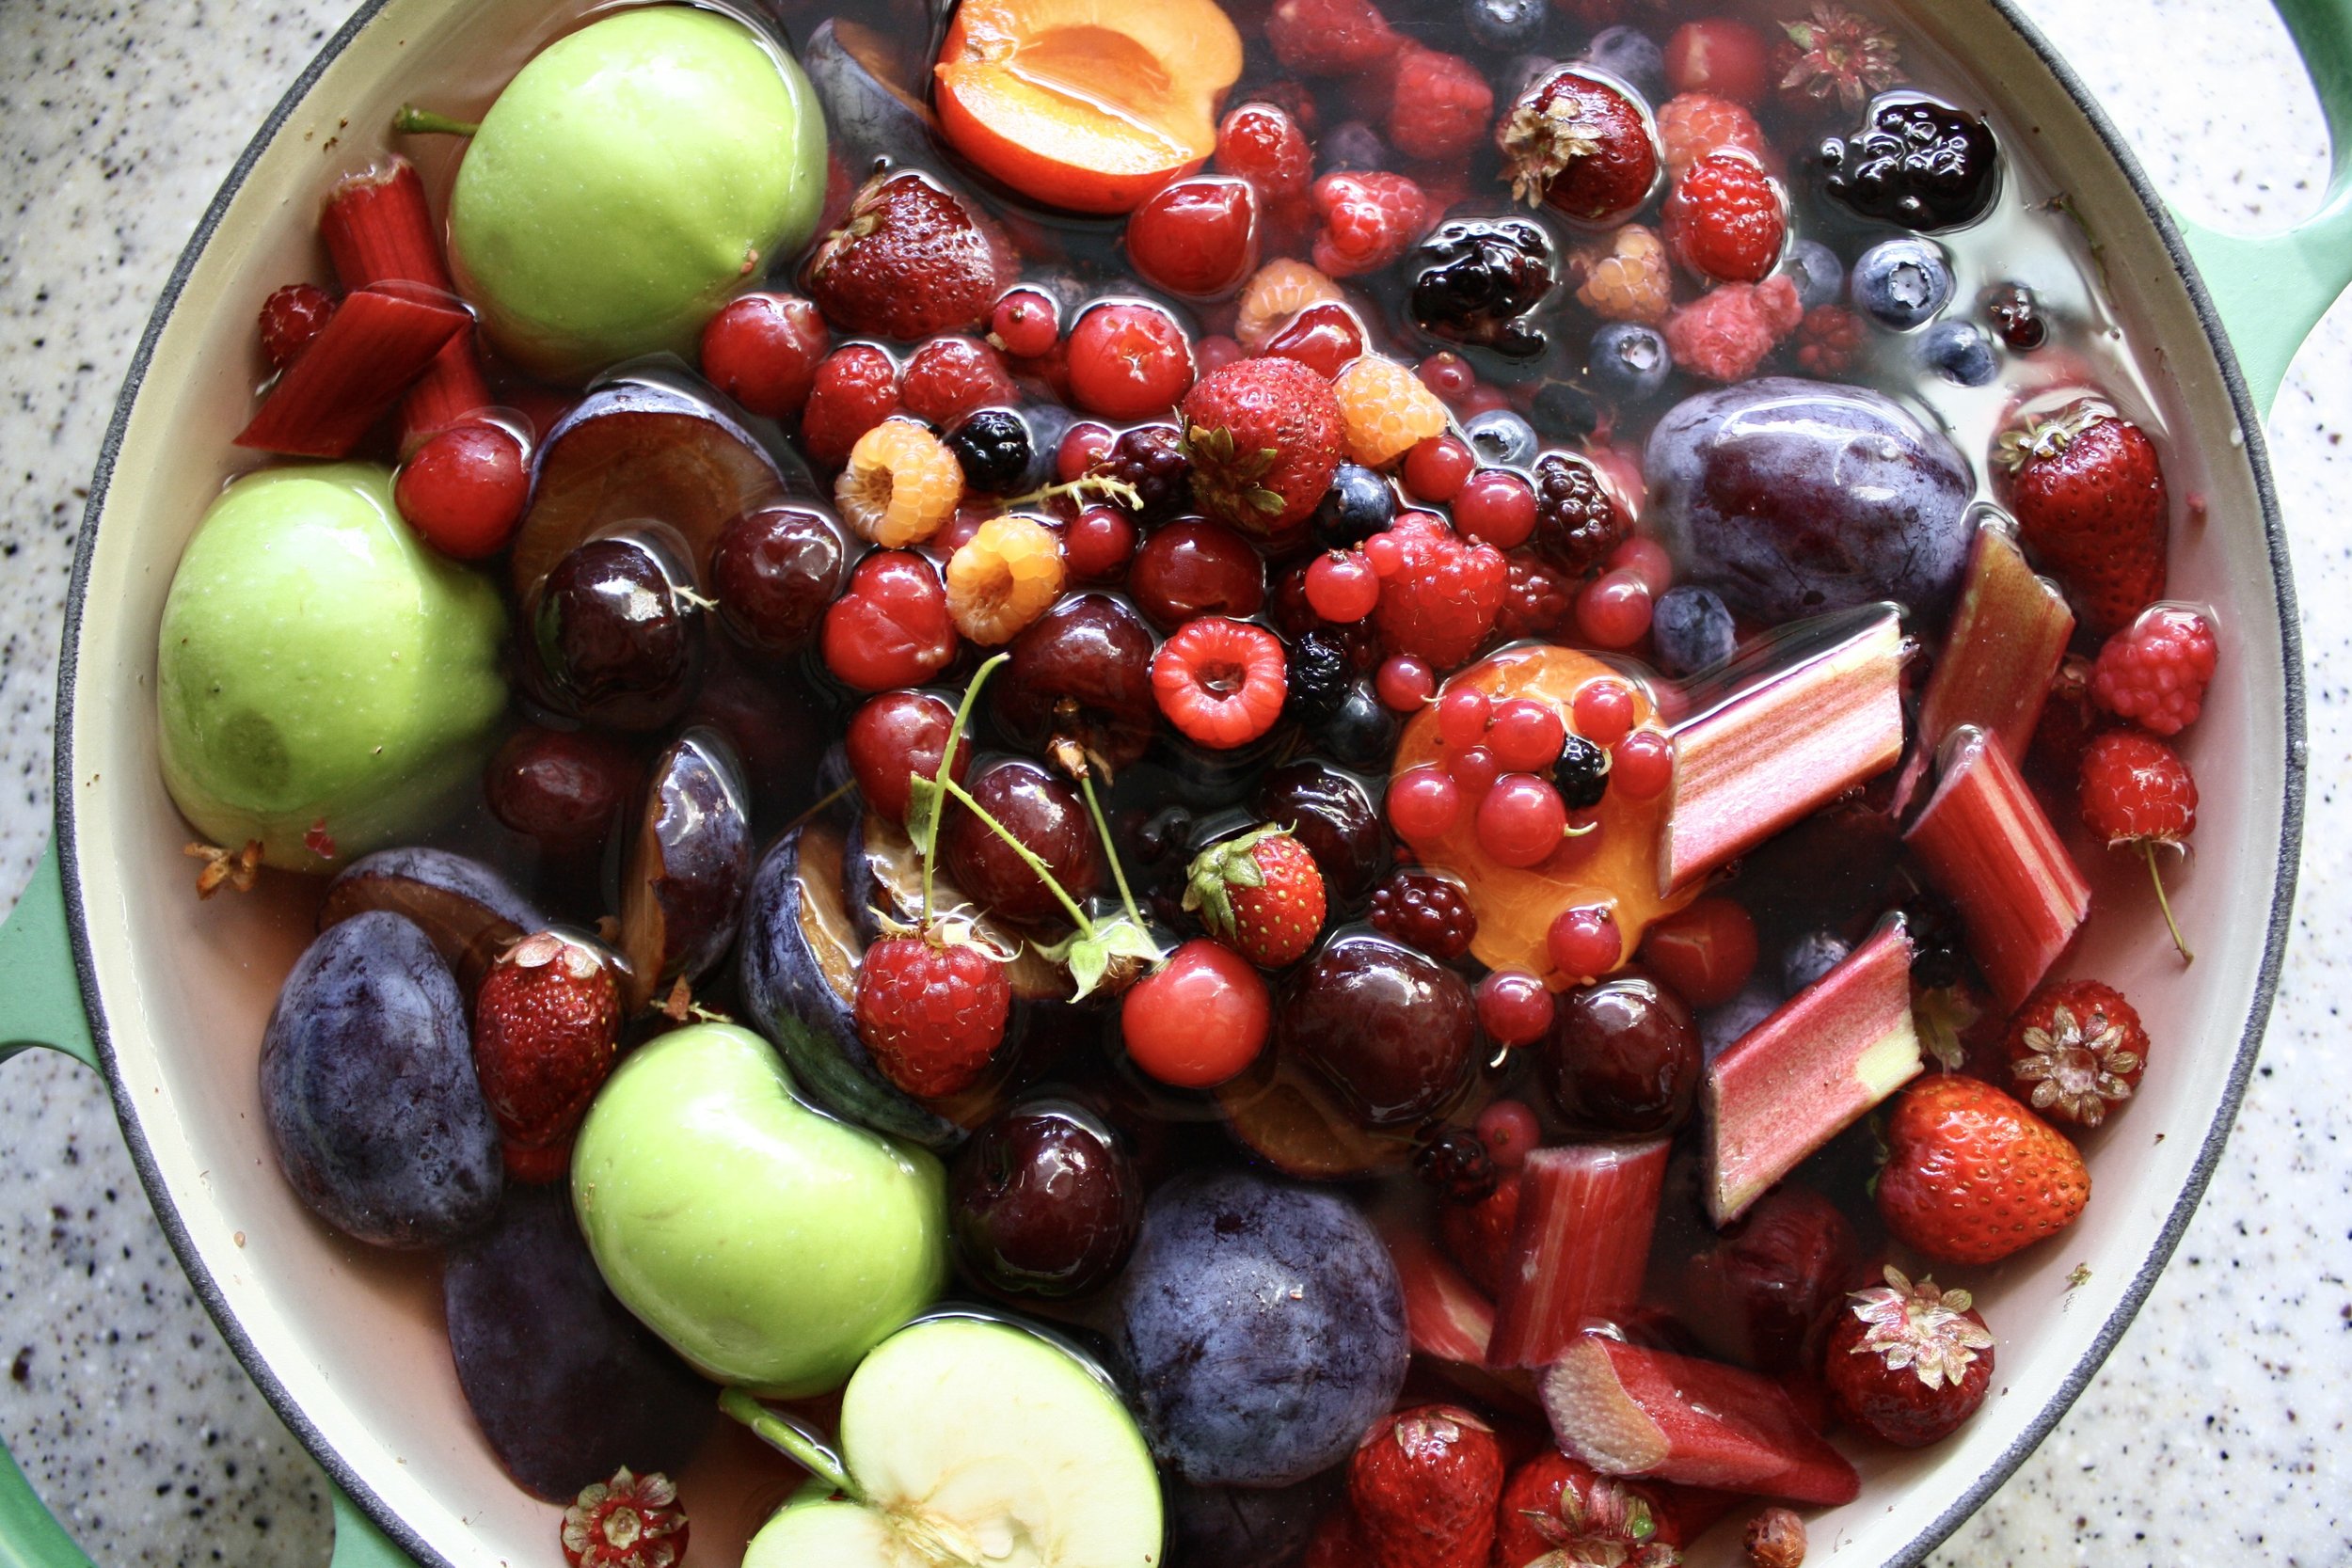
My grandmother would always make a vibrant, fragrant, ice-cold kompot (compote) in the dog days of summer, often with fruit my family had foraged or harvested in the Pacific Northwest. Kompot is essentially stewed fruit that can be strained and enjoyed as a beverage, or it can be ladled into deep mugs and served like a fruit soup. Rich with berries and stone fruit, the deep purple liquid would cool us down as the temperature climbed.
Kompot is very popular in Ukraine, where my family comes from, and across the former Soviet Union and Eastern Europe. Each home has its own recipe, and it can be made with fresh or even dried fruit. Keeping with tradition, I often squirrel away foraged fruit in the freezer; preserving berries and stone fruit from throughout the season waiting for the right time to make this family recipe. Inevitably, an August heat wave will arrive, and that’s when I take out my grandmother’s big enamel pot and fill it with all that saved fruit. The house will slowly fill with the smell of simmering fruit, and I’ll eagerly wait for the satisfaction of sipping on chilled kompot.
This recipe is very simple and endlessly modifiable and can be made year-round from fresh or frozen fruit.
Ukrainian Summer Fruit Kompot (Compote)
Serves 6-8
Ingredients
1½ lbs, mixed berries, fresh or frozen (raspberries, blackberries, currants, strawberries, etc.)1 lb mixed stone fruit, fresh or frozen (cherries, plums, peaches)
2-3 small apples, cored and halved
1 cup sugar or honey, or to taste
8 cups of water
Juice of 1 lemon, optional
Directions:
Clean off the fruit and remove any stems.
Add the fruit, sugar, and water to a large pot.
Bring the liquid up to a boil, then lower the heat and gently simmer for 10 minutes; you want the fruit to release its juices but still hold its shape.
Taste and add more sugar or honey if you like it sweeter. If adding extra sweetener, let it simmer for another 2-3 minutes to let the sugar dissolve. Add lemon juice if desired for a more tart flavor.
Allow the kompot to cool then transfer it to the fridge to fully chill before serving.
If you prefer a strained kompot, use a mesh strainer, and transfer the kompot into a pitcher to serve cold. If you prefer the kompot with the fruit still in it, serve it ladled into deep cups or bowls with a spoon.

Cherry Vareniki
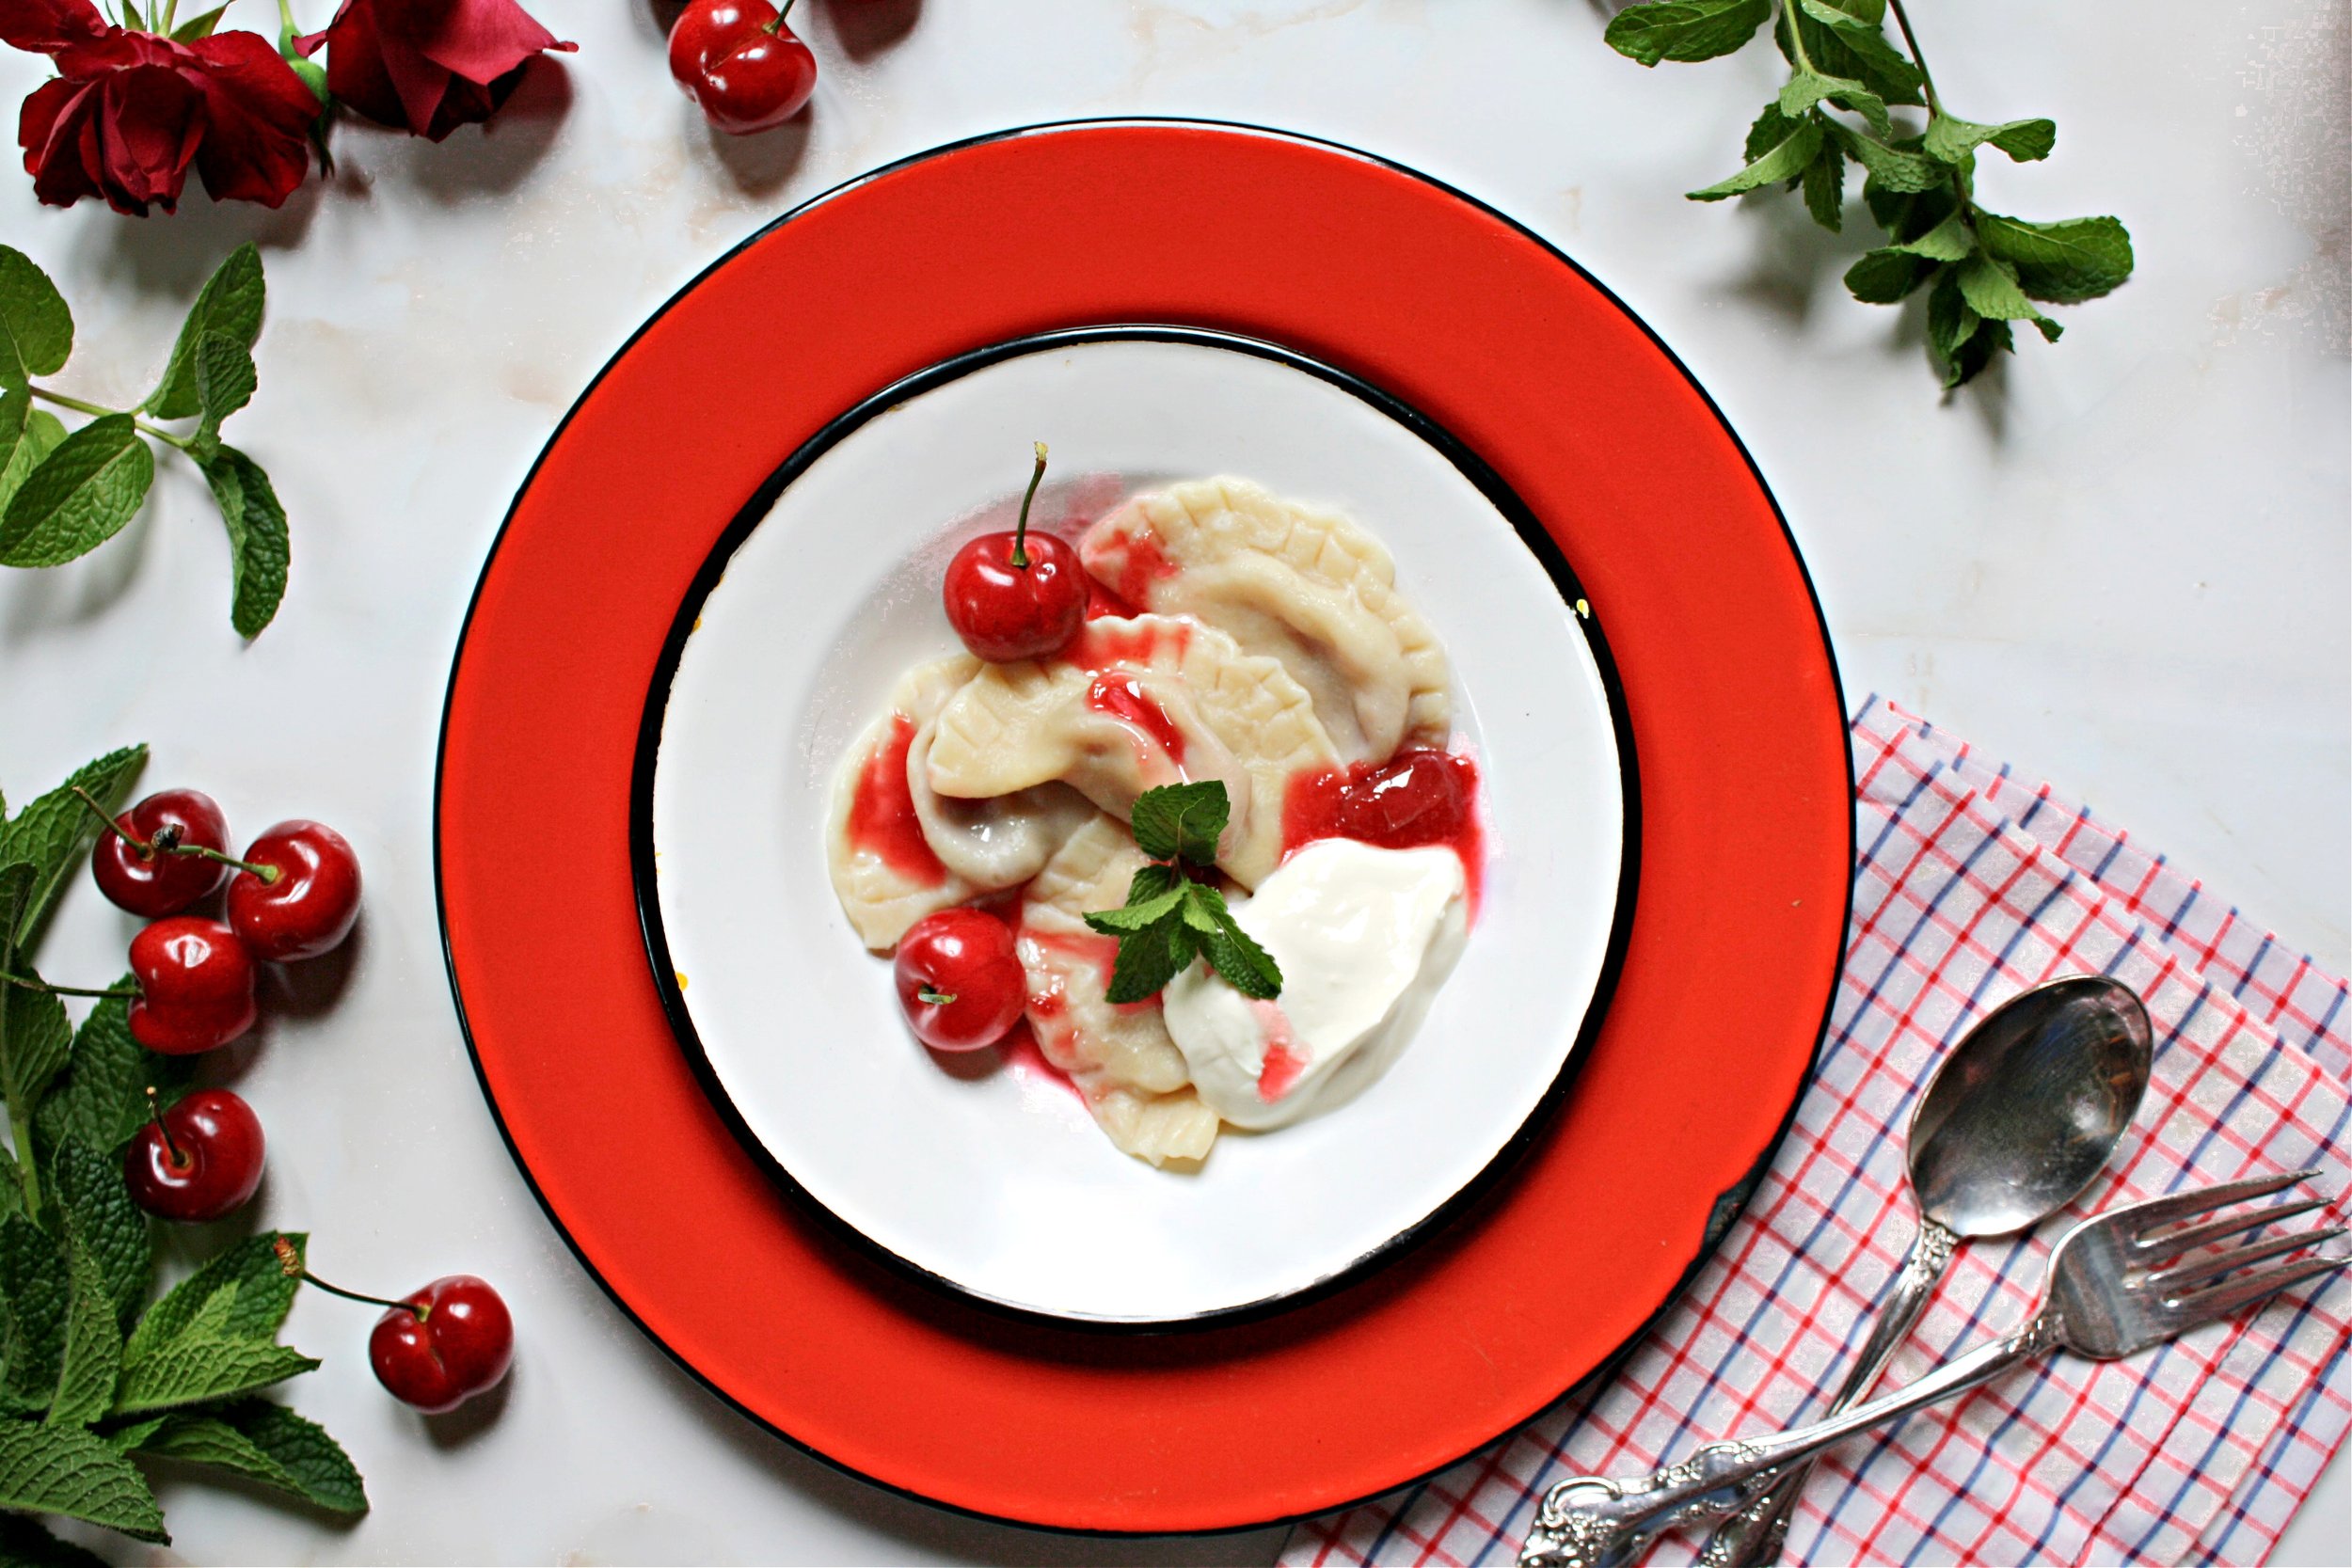
Cherry vareniki (half-moon-shaped dumplings) in Ukraine are typically made with sour cherries, known as vishnya. They are nostalgic for many from the region — including my family — and were famously novelist Nikolai Gogol’s favorite food. My family immigrated from Soviet Ukraine to Seattle, and after almost a decade of building a new life in America, my parents were able to buy their first home. It had an enormous garden, with an established cherry tree. Soon after moving, when I was a very small child, my grandparents came to visit us from out of town. That summer, the cherry tree was loaded with fruit. I vividly remember picking glossy, red cherries off the tree with my grandmother and brother by my side. There was more fruit than could be eaten fresh, and my grandmother decided to use some of the harvest to make a large batch of cherry vareniki. We sat outside and ate bowls of the dumplings – pillowy and bursting with tart, sweet fruit.
Vareniki are similar to pierogi or pelmeni; the dough is tender and soft, and the filling is only lightly sweetened so that the flavor of the fruit shines. This dish straddles the line between sweet and savory; topped with smetana (sour cream), one can eat cherry vareniki either as a main course or as a dessert. When using sour cherries, I eat my vareniki as a savory dish; you can get sour cherries fresh for a few weeks each year, otherwise, I pick them up frozen or preserved from Eastern European or Russian markets. When I fill the vareniki with Bing or Rainier cherries, I enjoy these dumplings as a sweet treat.
I love to serve cherry vareniki with a simple cherry sauce made from the extra filling, topped with big dollops of sour cream to balance out the sweetness. Like any kind of homemade dumpling or ravioli, vareniki take some effort to make, but are unquestionably worth the work. They’re ideal to make with a group of friends, and you can double or even triple the recipe as needed.
Notes:
Vareniki freeze extraordinarily well, offering a way to preserve the best of fleeting cherry season for future bowls of sweet dumplings. Freeze uncooked in a single layer, then transfer them to a bag or airtight container for three months.
Cherry Vareniki (Dumplings)
Serves: 4-6, makes about 50 vareniki
Prep time: 1 hour
Cook time: 10 minutes
Ingredients:
For the dough:
3 cups + 2 Tbsp (400 g) all-purpose flour, plus more for dusting or as needed
¾ cup water
2 Tbsp sour cream or plain Greek yogurt
1 large egg, beaten
1 tsp kosher salt
For the filling and sauce:
1½ lb (680 g) cherries or sour cherries
½ cup sugar
1 tsp cornstarch
juice of ½ a lemon
sour cream, as desired, for serving
Directions:
Start by making your dough: In a large bowl, combine the 3 cups of flour, water, sour cream, egg and salt. Mix until a shaggy dough forms, then transfer to a clean surface and knead until very soft, smooth and elastic, about 8-10 minutes. If the dough is very sticky, add additional flour 1 Tbsp at a time until it’s easy to knead and doesn’t stick to your hands.
You can also make this dough in a stand mixer with the dough hook attachment by adding all of the ingredients to the bowl, and mixing on the lowest speed until a shaggy dough forms. Turn up the speed to medium-low, and mix until smooth and soft, about 4-5 minutes.
Transfer the dough to a bowl and cover it with a lid or plastic wrap. Allow the dough to rest at room temperature for 1 hour.
While the dough is resting, start on your filling. Wash, dry and pit all of your cherries. If using a cherry pitter, cut the cherry in half after removing the pit. Add the cherries to a bowl with ½ cup of sugar, and let them sit and start to release their juices for a minimum of 30 minutes, or as the dough rests.
Once your dough has rested for an hour and your cherries have been sitting for at least 30 minutes, you can begin shaping your vareniki.
Line a baking sheet with parchment, and heavily dust it with flour.
Divide the dough into 4 pieces. Liberally dust both your rolling pin and your surface with flour. Roll out each piece of dough very thin, almost as thin as pasta; if you lift it up the dough light should come through it.
Cut out 2-inch rounds of dough using a water glass or biscuit cutter, lightly flour the rim of the glass or cutter before making rounds. Gather up the scraps into a ball and reserve to re-roll the dough one time, after that discard any scraps. Fill each round of dough with about a teaspoon of cherry, about 1-1½ cherries. Seal the dumplings into half-moon shapes, if needed dab the edges with water to help it stick, but the dough should be sticky enough to press together on its own. Using the tines of a fork, press the edges of the dough to ensure they’re properly sealed.
Transfer the formed dumplings onto the lined baking sheet. Reserve any remaining cherries for sauce. Repeat the process until you have used up all of the dough, and then place the dumplings in the freezer for a minimum of 15 minutes before cooking. While your vareniki are in the freezer you can bring a large pot of water to a boil.
While the water is coming to a boil, add the remaining cherries to a small pot. Bring the cherry mixture up to a boil, lower the heat and simmer the cherries for 10-15 minutes or until they are very soft and broken down. In a small bowl, combine 1 tsp of cornstarch with the juice of half a lemon. At the end of cooking the cherries, add the starch slurry, and simmer for an additional minute or until just thickened. If the sauce thickens too much, you can always thin it with water.
Add vareniki, in batches if needed, to the pot of water (be careful not to overfill).. Once the vareniki float to the top, simmer them for an additional 5 minutes. If using frozen vareniki, it may take a few minutes longer for them to float to the top. Remove the vareniki from the pot and serve immediately.
Top the vareniki with sour cream and cherry sauce.

One-Bowl Tzimmes Cake

Tzimmes cakes, muffins, and desserts pop up in community cookbooks, cooking blogs, and even on the popular Food Network competition show “Chopped.” It’s not surprising – American tzimmes is often sweet, made with many of the ingredients that can be found in a classic carrot cake — like carrots, cinnamon, and dried fruit. And tzimmes is just one dish in a longstanding Ashkenazi tradition of sides and desserts made from carrots, like carrot rings, kugels, and carrot puddings.
Growing up, tzimmes was served for special occasions; it was always made with simmered, very soft carrots, with orange juice concentrate mixed in. At Thanksgiving, sweet potatoes were swapped for carrots, making for a non-traditional, very Ashkenazi side dish at the table. As I began hosting Jewish holidays at my own table, my tzimmes recipe evolved over the years to include carrots drizzled with honey, tossed with ginger and cardamom, studded with dates, and roasted in the oven to give the dish more texture and caramelization. This recipe takes my favorite version of tzimmes and turns it into a simple one-bowl cake, with no special equipment or complicated techniques required. Think of it as a cross between honey cake and carrot cake, with an Ashkenazi twist. Of course, it’s perfect for Rosh Hashanah, but in my house, it’s a year-round treat.
Combining both sweet potato and carrot results in a slightly lighter texture than pure carrot, and there’s a burst of welcome tartness from the addition of dried cherries that rounds out the sweetness of honey and warming spices. You can top this dairy-free cake with powdered sugar or a simple glaze if desired.
Note: This tzimmes cake tastes even better the next day, and lasts up to five days stored covered at room temperature.
One-Bowl Tzimmes Cake
Serves 10-12
Ingredients:
2 large eggs
½ cup olive oil
½ cup sugar
⅓ cup honey
⅓ cup orange juice
zest of 1 orange
1 tsp grated fresh ginger
1 tsp vanilla extract
1¾ cup (230 g) all-purpose flour
1¼ tsp baking powder
1 tsp cinnamon
½ tsp kosher salt
¼ tsp baking soda
¼ tsp cardamom (optional)
1 cup (150 g) shredded carrot, packed
1 cup (100 g) shredded sweet potato, packed
¼ cup dried tart cherries
¼ cup chopped prunes, raisins or currants
powdered sugar for topping (optional)
Directions:
Preheat oven to 350°F. Grease and line a 9” springform pan (or 9” cake pan) with parchment. You can also use a bundt or loaf pan, but baking times may be slightly longer.
In a large bowl, whisk together the eggs, olive oil, sugar, honey, orange juice, orange zest, fresh ginger and vanilla extract.
Into the same bowl, using a mesh sieve or flour sifter, add the flour, baking powder, cinnamon, salt, baking soda and cardamom. Using a spatula or wooden spoon, stir until the dry and wet ingredients are just combined; be careful not to overmix.
Add the shredded carrot, shredded sweet potato and dried fruit to the bowl. Fold the vegetables and fruit into the batter until just combined and evenly distributed.
Transfer the batter to the greased and lined pan, and bake for 40 minutes, or until a small skewer or cake tester comes out clean.
Cool and top with powdered sugar or a simple glaze, if desired.

Shawarma Eggplant

Shawarma eggplant is a satisfying plant-based entrée that has all the spices and flavors of your favorite grilled meat. This vegetarian main is versatile and customizable and can be prepared in advance, making it ideal for hosting. A slather of Michael Solomonv’s herbaceous, spicy Yemenite zhug on top adds the necessary zing and heat. For a little extra protein, drizzle the roasted eggplant with tahini, serve it on a swirl of labneh, or add roasted chickpeas on top.
Olive oil is eggplant’s best friend, making it satisfyingly rich. First, you’ll brush oil onto the eggplant before it’s roasted, then drizzle it mid-bake, and again when it comes out of the oven. Crusted with spices, the eggplant emerges from the oven browned and fork-tender. You can swap the homemade shawarma spice blend with your favorite store-bought mix; and if you’re not an eggplant fan, you can swap it for thick-cut cauliflower steaks or large zucchini and summer squash.
Eggplant Shawarma with Zhug
Serves 6
For the shawarma spice blend:
1½ tsp ground coriander
1½ tsp ground cumin
1½ tsp sweet paprika
1 tsp turmeric
1 tsp garlic powder
½ tsp red pepper flakes or Aleppo pepper (optional)
¼ tsp ground allspice
¼ tsp smoked paprika
1 tsp brown sugar (optional)
For the eggplant:
3 large eggplants (2½-3 lb)
¼ cup olive oil, plus more for drizzling
salt, as needed
chopped parsley, mint or cilantro, for garnish
Directions:
Start by slicing your eggplants in half from top to bottom. Score the eggplant diagonally in a crosshatch pattern, slicing toward the bottom without piercing all the way through. Generously salt, then rub salt into the scored eggplant halves. Let the eggplants sit while the oven preheats and you prep the rest of the ingredients, at least 20 minutes.
Preheat the oven to 400°F.
For the shawarma spice blend, whisk everything together in a small bowl. Alternatively use 3 Tbsp of your favorite shawarma spice blend, and add the brown sugar to the blend.
Once the oven is preheated and the eggplant has rested, pat the tops of the eggplant dry, then brush each half of the eggplant with oil until the entire ¼ cup of oil is absorbed evenly.
Rub about 1½ teaspoons of the spice blend into each of the 6 halves of the eggplant. Top with a drizzle of olive oil.
Roast the eggplant for 30 minutes, then drizzle with more oil. Roast for an additional 20-30 minutes, or until deep golden brown and completely tender. Cooking times may vary depending on your oven and the size of the eggplant; begin to check for doneness after 40 minutes.
While the eggplant is roasting, prepare the zhug, if desired.
Drizzle the eggplant with oil just prior to serving, and garnish with fresh herbs. Eggplant can be made in advance, stored in the refrigerator, and reheated in a covered baking dish until warm.
