Tahini Coffee Cake

Full article is up on The Nosher.

Tahini Coffee Cake

Makes 1 9x13 cake, serves 15-20

 Prep time: 30 minutes

Baking time: 40-45 minutes

Ingredients:

 For the cake-

  • 10 Tbsps (141 g) unsalted butter, at room temperature

  • 1¾ cup sugar

  • ⅓ cup tahini

  • 4 large eggs, at  room temperature

  • 1 cup sour cream or Greek yogurt

  • 1 Tbsp sesame oil

  • 2 tsps vanilla extract

  • 3 cups (375 g) all-purpose flour

  • 2 tsps baking powder

  • 1 teaspoon kosher salt

  • ½ tsp baking soda

  • ½ cup milk

For the brown sugar ribbon-

  • ½ cup brown sugar

  • ¼ cup (62 g) all-purpose flour

  • 1 tsp cinnamon

  • ½ tsp cardamom

For the tahini streusel topping-

  • 1 cup (125 g) all-purpose flour

  • ¼ cup brown sugar

  • ¼ cup tahini paste

  • 4 Tbsps (56 g) unsalted butter, melted

  • ½ tsp cinnamon

  • ½ tsp cardamom

  • Pinch of salt

Directions:

Preheat the oven to 350°F, and generously grease a 9 x 13 baking dish.

For the cake - To a large bowl, or to the bowl of a stand mixer, add the room temperature butter, sugar, and tahini. Beat together the butter mixture using a handheld mixer, or the paddle attachment on the stand mixer, until light and fluffy, about 2-3 minutes.

To the bowl, add 2 eggs, and beat until incorporated. Add 2 more eggs and beat until they are incorporated. Add the sour cream, sesame oil, and vanilla extract, and mix until smooth.

 In a separate bowl, whisk together the flour, baking powder, salt, and baking soda. Add half of the flour mixture to the batter, with half of the milk. Stir until just combined. Add the remaining flour mixture to the batter, and the rest of the milk. Stir until just combined, be careful not to overmix (your batter may be slightly lumpy).

For the brown sugar ribbon - In a small bowl, combine the brown sugar, flour, cinnamon, cardamom.

For the tahini streusel- In a bowl, using a fork, combine the flour, brown sugar, tahini, melted butter, cinnamon, cardamom, and salt until the mixture comes together and forms pea-sized crumbles.

To assemble and bake- Add half of the batter to the greased baking dish. Smooth it into an even layer. Top the batter evenly with the brown sugar ribbon mixture. Dollop the remaining batter on top, then carefully smooth it over in an even layer with an offset spatula or knife. Top the cake with the streusel mixture.

Bake for 40-45 minutes, or until a cake tester or toothpick comes out clean. Allow to cool, then serve. Tahini coffee cake can be stored covered at room temperature for 4-5 days, or it can be frozen and defrosted as needed for up to 3 months.

Raspberry Danish Twist - Entenmann's Style

For the full article, head over to The Nosher!

topdownslicedcake.jpg

Entenmann’s Style Raspberry Danish Twist

Makes two danishes, or one large one

Ingredients: 

For the danish-

  • 1 cup milk, warmed
  • ⅓ cup sugar
  • 1 packet (7 g) active rise yeast
  • 3 cups (450 g) all purpose flour, plus more for dusting or as needed
  • 1 Tablespoon vanilla powder, or 1 vanilla bean (split, and seeds scraped out)
  • 1 teaspoon kosher salt
  • 2 large eggs, at room temperature
  • ½ cup (1 stick) unsalted butter, cubed and at room temperature
  • 1 cup raspberry jam
  • 1 egg yolk plus one teaspoon of water, for the egg wash

For the icing-

  • 1 cup sifted powdered sugar
  • 1½ Tablespoons milk or water
  • 1 teaspoon vanilla powder or ½ a teaspoon vanilla extract

Directions:

Grease two 8 x 6 baking dishes and line with parchment paper. You can also make one large danish in a 9 x 11 baking dish.

Heat the milk until warm to the touch but not too hot, about 100°F. Add the sugar and active dry yeast to the milk, and allow the yeast to proof for 5-10 minutes. The yeast will get foamy and bubbly, if it doesn’t your milk may have been too hot or too cold and it is best to start again.

In the bowl of a stand mixer with a paddle attachment, combined the flour, salt, and vanilla powder. Alternatively, you can make the dough by hand, you will just need to mix and knead for longer.

Add the milk and yeast mixture to the dough, along with the two eggs. On medium, mix until a very shaggy dough is formed. Next, with the mixer still on medium, add the room temperature butter one cube at a time; allow each piece of butter to incorporate before adding the next. Once all of the butter is incorporated, the dough will appear smoother and stickier. Switch the paddle attachment for the dough hook, and mix on medium speed for 5-6 minutes, or until a soft, smooth, elastic dough is formed. It will start out looking very sticky and wet, but will ball around the dough hook towards the end. If it looks too wet and does not start forming a ball, you can add a few tablespoons of flour to help with the consistency.

Gently transfer the dough to a lightly greased bowl (it will be very soft and pour out), and cover it with a damp clean kitchen towel. Allow the dough to rise until roughly doubled in size,1-2 hours, depending on the temperature in your kitchen.

Once the dough has risen, punch it down and divide it in half. You can make two 8 x 6 raspberry danish twists at this time, or freeze half the dough for future use (just allow it to defrost and come up to room temperature). Dust a clean surface with flour, then take one half of the dough and divide it into three equal balls. Roll each ball into a strand that is about an inch longer than the length of the baking dish, then gently twist each strand and fit them in lengthwise into the baking dish. Cover with a lightly damp clean kitchen towel, and let the dough rise again for another 15-20 minutes.

preovenraspberrydanish.jpg

Preheat the oven to 350°F. Add the jam to the danish. Between the 3 strands of dough, you’ll make two strips of jam, each about a ¼ cup of worth of jam, or ½ a cup per danish (if using a larger dish, simply evenly add jam between each strand). I gently nudge the stands apart, and with a spoon, fill with jam between the strands. Brush the top of the dough with the egg wash. Bake for 25-30 minutes or until deep golden brown on top. Rotate once halfway through baking.

Once baked, allow to cool on a rack. While the cakes are cooling make the icing. Once mostly cooled, you can ice the cakes by drizzling the icing free form with a spoon, or you can fill a small ziplock back with the icing, and snip off a small piece of the corner to ice in any design you prefer.

wholerasberrydanish.jpg

Classic Banana Pudding


I have a soft spot in my heart for classic American food: meatloaf, mashed potatoes and gravy, biscuits, mac n' cheese, all kinds of pie (especially chocolate cream pie), and banana pudding. I have a sort of false nostalgia for these foods. In my Russian immigrant house growing up, we rarely saw any dishes that could be featured in a Norman Rockwell painting or on a typical Southern table. It wasn't all borscht and pirozhki (although certainly I saw those things more than fried chicken or hamburgers), both my parents were and are adventurous cooks, but they veered more into Mediterranean, Italian, and Chinese directions when they prepared food that didn't exist in the motherland.

I don't think this sentimental affection of Americana has to do with filling an empty void of some childhood I wish I had... it's just that when I think of these foods they evoke feelings of warmth, youth, and family. Growing up, I ate these foods at friends' houses with glee. I read about these foods in my favorite childhood books, saw these dishes being served in my favorite movies and TV shows, and watched them being prepared on PBS and the Food Network. Most importantly, classic American dishes are so often comforting in their richness and belly-filling qualities.

I can't advocate for the nutritional benefits of banana pudding, but sometimes you just need a mood-boosting plate full of something delicious. Sometimes, special occasions demand a little indulgence. Sometimes, your favorite sports team loses the big game and you need something to ease the pain of loss. Sometimes, you just want vanilla pudding mixed with bananas and 'Nilla wafers.

The pudding recipe for this dessert is infinitely interchangeable (and if you haven't made homemade pudding before it's much easier than you think and you will be thrilled with the fruits of your minor labor). You could make just the pudding and call it a dessert. You could add vanilla wafers to the pudding and skip the banana (or vise versa). But when you combine the pudding, the wafers, the bananas, and you let that all sit and soften and meld together in the fridge... well, very good things happen.

Banana Pudding
Serves 14-16 (this generously fills a DEEP 9 x 13 casserole dish, you can easily halve the recipe)
Slightly adapted from this recipe in Bon Appétit (June 2014)

For the pudding-
8 eggs
1 1/3 cups sugar
½ cup cornstarch
8 cups whole milk (you can use low/non-fat, but this is a treat and whole milk tastes better)
1 vanilla bean, split in half lengthwise and seeds scraped out with the back of a knife (or substitute 2 tablespoons vanilla extract)
4 tablespoons unsalted butter
pinch of kosher salt

To assemble-
 11oz. boxes vanilla wafers, plus extra for crushing
6 ripe bananas, sliced

½ cup banana chips (optional)


For the pudding-
In a large bowl, start by whisking your eggs until they are just blended. In a large pot combine the sugar and cornstarch and whisk together. Over medium heat, slowly whisk the milk into the sugar mixture. Add the seeds from a vanilla bean to the pot (if you are using vanilla extract instead, you will add the vanilla later). Whisk continuously until the mixture is warm to the touch, but not quite simmering. 

Slowly add a third of the warm milk into the beaten eggs. Whisk constantly as you add the milk to the eggs; this stage is called tempering. You want to gently raise the temperature of the eggs so that they do not scramble when combined with the rest of the hot milk and are heated over the stove. Again, SLOWLY add the warm egg and milk mixture back to the pot whisking as you add. 

You're going to keep on whisking as the mixture heats over a medium flame. You want to cook the pudding until it thickens. The whisk should leave a visible trail in the pudding, and should be thick like yogurt. This will take 8-10 minutes for this amount, or 4-6 minutes if you halve the recipe. 

Once thickened, remove the pot from the heat. Add the butter and a pinch of salt to the pot. Stir until everything is just combined, the butter is melted, and the pudding is smooth.  If you didn't use a vanilla bean, this is when you add your vanilla extract. 

Using a large fine-meshed sieve, strain the pudding into a large bowl. Tightly cover the bowl with plastic wrap; you want the wrap to touch the top of the pudding so that it doesn't develop a thick film. Refrigerate the pudding for at least 2 hours. The pudding can be made 1-2 days ahead of time (great for parties).

To assemble-
After the pudding has chilled for at least 2 hours, you can assemble the final dish. In a deep 9 x 13 baking dish, or in a large trifle dish, start by placing about a third of the pudding into an even-ish layer at the bottom of the dish. Top the pudding with a layer of vanilla wafers, and top the wafers with a layer of sliced bananas. I added a few banana chips to this layer, too.  Add another layer of a third of the pudding, wafers, and the rest of the bananas. Top with the final third of the pudding. Garnish with banana chips and crushed vanilla wafers. You could even do chocolate shavings or a caramel drizzle if so inclined.

Let the assembled pudding chill for at least 4 hours or up to 2 days before you intend to serve it. The more it sits the more the flavors come together.

Edith's Chocolate Babka


Over the Thanksgiving weekend, I had the great pleasure of learning how to make babka.

At 87, Edith still loves to bake and cook in her kitchen for her children, grandchildren, family and friends. Edith has more spunk than most people have at half her age. Her baking, like many talented cooks, is imprecise and relies on experience and feeling. I was deeply inspired by Edith, her food, and her stories.

That afternoon, Edith taught me her recipes for chocolate babka and walnut cake (both use the same dough) while telling me me stories about her family and her life. At first I was concerned about asking Edith difficult questions about her past. Her daughter, who was with us, assured me that Edith was happy to talk about her experiences. That's one of the many amazing things about this woman - she is incredibly open about her life. She will tell you like it is or like it was, but she does so without anger or hostility. She is aware and grateful for her fortunes even in the context of unfathomable unfairness and inhumanity. I only got to spend one afternoon with her, but it was clear that this is a woman who has an incredible sense of humor, sharpness, wit, and a deep understanding of humanity and the complexities of life. The Shoah foundation recorded Edith's holocaust survival story in full; I'm happy to help you locate it if you want to hear more about her story.


This short synopsis will hardly do justice to her full story, but nonetheless...

Born in 1926, Edith grew up in Lastovce, Czechoslovakia. In 1942, Hitler decreed that all Jewish girls 16 years of age and older had to be reported to the Slovakian government. At that time, 16 year old Edith was sent to live at her aunt's house in Hungary. Many Slovakian Jewish girls fled to Hungary at the time, and the Hungarian police were instructed to hunt them down. Edith hid in the basement of her family's home during that time. After six months, Edith was sent to Budapest; her family felt her chances of survival were better in a big city where she could get lost. Edith worked at an undergarment factory where she somehow managed to get her hands on the birth certificate of a Hungarian non-Jew. She also dyed her hair blonde. One day on a train, Edith was caught by two detectives. Unimaginably, during a time of war and bloodshed, not one but two detectives were on the case of tracking down a single Jewish girl in Budapest. Edith was sent to what was essentially a holding camp. She was there for about 6 months. Whenever the Germans were bombing, all the Jews were sent upstairs to the upper level of the building so that if the building were to be bombed they would perish. After 6 months, Edith was sent to Auschwitz. From Auschwitz, Edith was sent to the Liebau concentration camp. At the camp, there were approximately 200 women and 200 men that were kept separate from each other. The men and women were mostly young, and were forced to do excruciatingly hard labor. When Edith speaks of this, she talks about how impossible it is to explain the pain of hunger, the pain of the particularly horrible lice, among all the other types of pain. Edith managed to survive, and her camp was liberated by the Russians. In fact, Edith was liberated by a Russian Jewish general who made it his mission to protect the girls from being raped by other Russian soldiers (something that was happening), and made sure that they did not eat the food the Germans left behind (which was often poisoned).

After the war, Edith returned to Czechoslovakia. Two of her brothers had also survived the war. Back in Czechoslovakia, Edith was set up on a blind date. Edith and her future husband clicked right away. They were married for 65 years (what's the secret? there's no secret. But don't go to bed angry, don't think relationships are a perfect 50/50 partnership, be willing to ungrudgingly compromise, and it helps if your husband tells you you're beautiful in the middle of an argument). Her husband passed away a few years ago at the age of 90. In 1948, Edith and her husband left Czechoslovakia for Israel where they lived for 10 years before immigrating to the United States to start a new life with their two daughters.

Edith originally got this recipe from a friend of hers. To the delight of her family and friends, Edith has been making this babka for many years. I have never seen babka prepared in a bundt pan, but it's pretty genius (and beautiful). This is a dense, chocolate-y, rich dessert with a lovely dough. If you need an exact recipe, I recommend you google "babka." If you're looking for a recipe with room for error and customization, see below.

I am so grateful to have heard Edith's stories and to have learned this recipe.

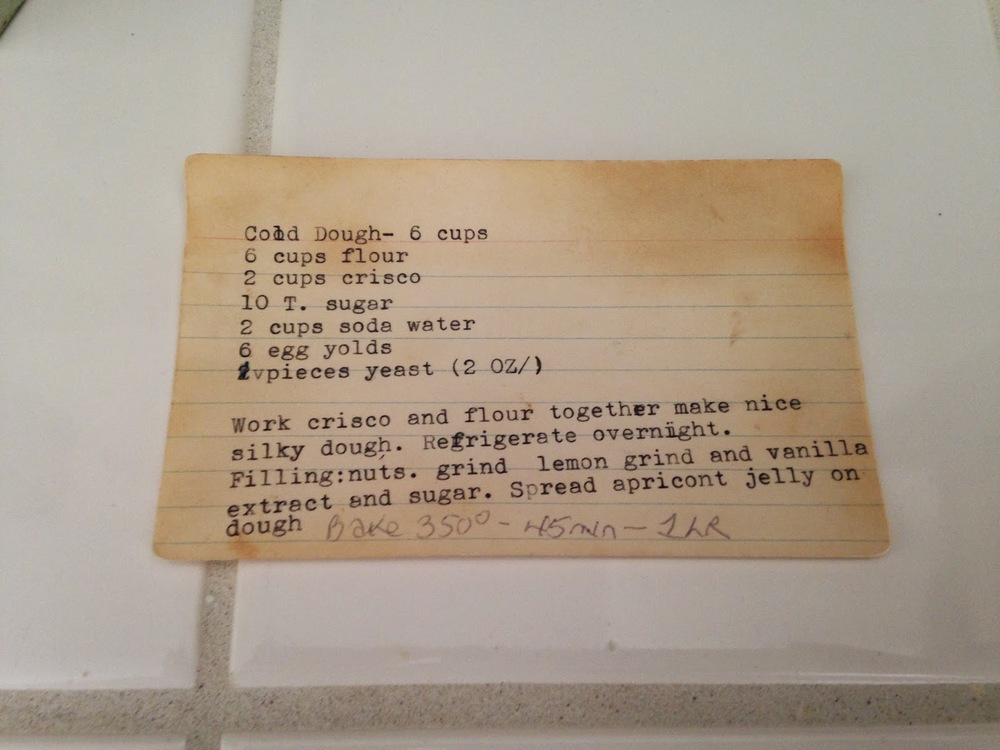
(The above recipe is for the dough for both the babka and a walnut cake. The filling is for the walnut cake. Edith has altered this recipe slightly. See below.)

Edith's Chocolate Babka

for the dough-
3.5-4 cups of flour
1 packet yeast (or 1.5 tablespoons)
5 tablespoons sugar, divided
1/4 cup water
2.5 sticks crisco or margarine, at room temp, cubed
5 egg yolks
1 cup seltzer water (secret ingredient)

for the filling-
finely ground walnuts
unsweetened cocoa powder
vanilla extract
sugar
strawberry jam
mini-chocolate chips

for the dough-
Combine the yeast with 1 tablespoon of sugar and a 1/4 cup of warm tap water (no more than 110°F). Let the yeast activate for 10-15 minutes.

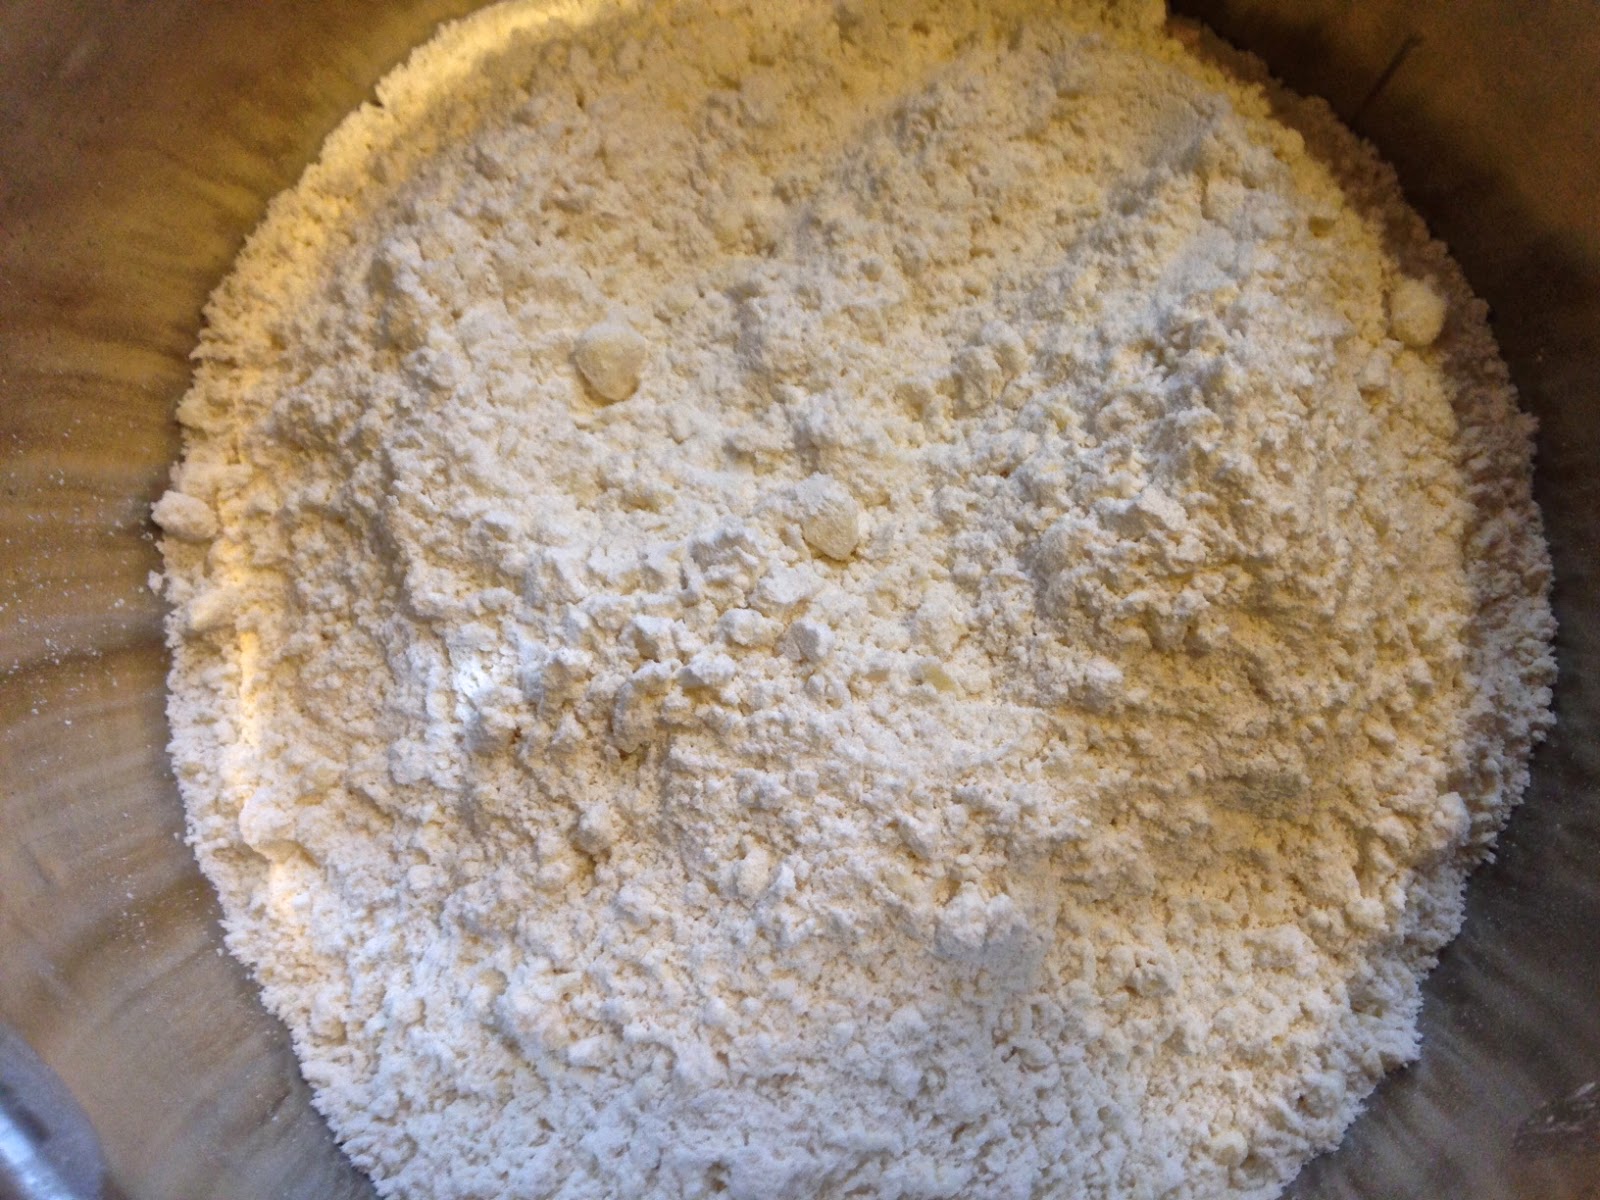
In the bowl of a stand mixer fitted with the paddle attachment, combine 3.5 cups of flour (you can add more flour later if the dough feels too wet). To the flour, add the cubed crisco. On level 1 or 2, mix the crisco and flour together until pea sized pieces form and you have a coarse meal.

Add the egg yolks, sugar,  activated yeast, and seltzer water to the mixer.

Mix on low until a dough forms, this will take a few minutes. Scrape down the sides periodically to make sure all of the dry ingredients are incorporated with the wet ingredients. If the dough seems too dry, add more seltzer. If the dough seems too wet, add more flour. You want a sticky silky dough (similar to challah dough in texture).

Add a little oil to a mixing bowl (either olive or vegetable is fine). Transfer the dough to the oiled bowl. Kneed the dough 5 or 6 times in the bowl. Cover the bowl with foil or plastic wrap, place a towel over the bowl. Let the dough rest overnight in the fridge.

 for the babka-
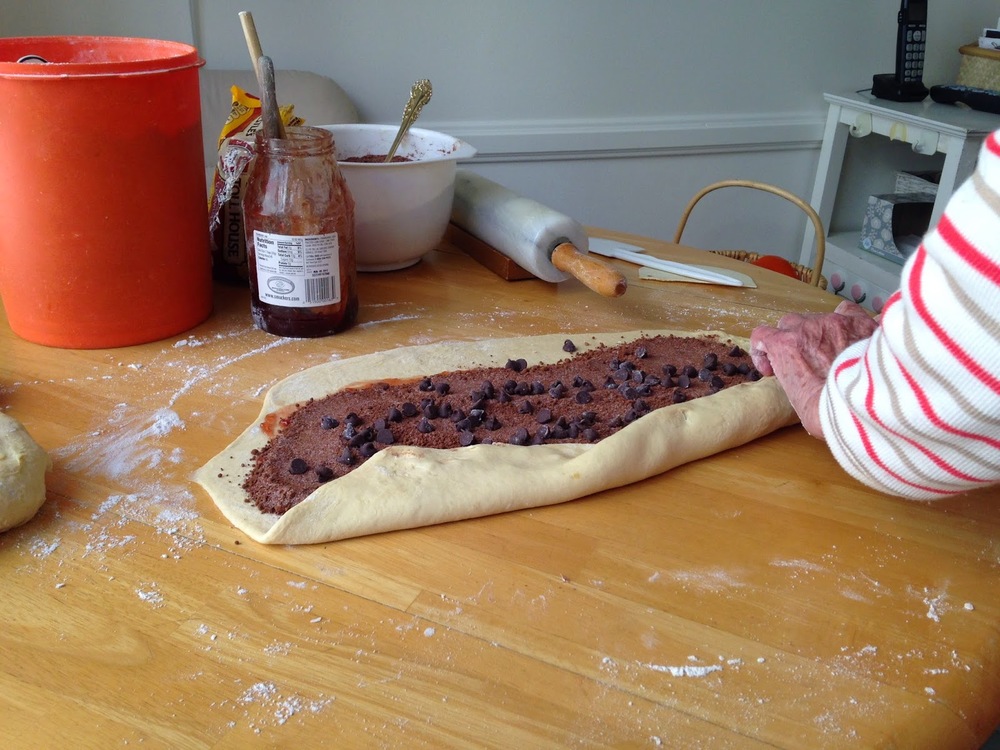
Dust a flat surface with flour, and place the dough on the flat surface. Cut the dough in half, and roll the dough out into a large rectangle, about 15 inches long and 1/4-inch thick.


Spread a thin layer of jam onto the dough leaving a 1-inch border around the sides.


GENEROUSLY top the dough with the cocoa and nut mixture. (I do not have amounts for this. Edith combines cocoa powder with sugar, walnuts and vanilla extract. I would blitz all of this in a food processor until it's finally ground. You could do: 1 cup nuts, 1/2 cup of sugar, 1/4 cup cocoa powder, 1 tsp vanilla - taste and adjust to your liking).


Don't be stingy! Add a handful of chocolate chips on top of the cocoa and nut mixture. Edith prefers mini-chocolate chips, but we had regular-sized that day. Once you've topped the dough, wrap it tightly into a roll.


You're almost there. Place this rolled up dough, into the bottom of a greased Bundt pan in a ring formation. 


Now, repeat that process with the second half of the dough. Once you've made a second roll of chocolate and jam filled goodness, place it on top of the first ring in the Bundt pan. Press the edges together with your fingers. Make sure the dough is sealed.


Now, your  babka is ready to go in the oven. 

Preheat the oven to 350°F. Bake for 45 minutes uncovered, and then cover the pan with foil and bake for another 45 minutes.

Let the babka cool on a rack in the Bundt pan for at least 20 minutes. Then, hope and pray that it will easily come out of the pan when you try to pop it out onto a serving plate. It seems to be easier to get the cake out of the pan after it cools for a bit.

Dust the babka with powdered sugar, slice, and serve with a hot cup of coffee or tea!

This babka freezes well. It can be baked, then frozen and reheated when ready to eat. 

Berry Trifle


I made this red, white, and blue dessert for the 4th, but I don't see any reason why one shouldn't want to make this at any point when berries are in season. Actually, you could make this all year with whatever seasonal fruit you find delicious and complimentary to cake and cream.

The thing about trifle is there are a lot of cheats and its endlessly versatile. Certainly, there are trifle purists out there who know better than I do, but in my humble opinion, make trifle however you please. If you aren't in the mood to make things from scratch, you can buy pre-made pound/sponge cake and whipped cream (or whipped topping). If you don't feel like using traditional jelly or custard, you can skip those things (I did). If you don't have fancy liqueur on hand, use fruit juice instead. Then it's just a matter of layering the things you have chosen to use in a dish or bowl. It's nice if the serving dish you're using is clear so that you can see the pretty layers, but anything that will hold cake, fruit, and cream will suffice.

For this recipe, I made my own lemon pound cake (recipe below), I chose to drizzle the cake with Chambord instead of Cointreau (raspberry liqueur instead of orange liqueur), and I made a whipped cream with very little sugar. The mix of subtle lemon and raspberry flavors worked well together, and although certainly decadent, there's something refreshing about this this dessert.

Berry Trifle with Lemon Cake
Serves 10-12

1 8-inch loaf lemon cake (or vanilla pound cake), cut into 2 x 2 x 1.5-inch pieces
1 16-ounce container organic whipping cream (you'll end up with extra)
1 teaspoon vanilla extract
1-2 teaspoons sugar
1 1/2 quarts strawberries
3 pints blueberries
2 pints raspberries
6 tablespoons Chambord (or Cointreau, or another fruit liqueur)

Start by prepping your trifle ingredients.

Wash your berries, and lay them out to dry on paper towels. Trim the ends off of the strawberries.

Cut your cake into squares or any shape you like best.

In a stand mixer or using a handheld blender or whisk, whip together 1 16-ounce container of organic whipping cream, with 1 teaspoon vanilla extract, and 1-2 teaspoons sugar. I don't like super sweet whipped cream, if you prefer yours sweet, add more sugar. You can taste the mixture as it whips and add more accordingly. Once whipped, reserve in the fridge. You can substitute homemade whipped cream with a store bought whipped topping.

In a trifle dish or medium sized glass bowl, or whatever thing you want to put all these delicious ingredients into, start layering your ingredients in the following way:

  1. Layer the cut up cake in the bottom of the dish. Drizzle 3 tablespoons of Chambord over the cake. 
  2. Slice strawberries and layer them evenly over the first layer of cake.
  3. Put another layer of cut up cake over the strawberries. Drizzle the cake with 3 more tablespoons of Chambord. 
  4. Add a layer of blueberries on top of the cake
  5. Add a layer of whipped cream onto the berries 
  6. Add another layer of sliced strawberries onto the whipped cream
  7. Add another layer of whipped cream onto the strawberries
  8. Decoratively top the the cake with raspberries, remaining strawberries and blueberries


Chill 2-3 hours before serving, or up to 8 hours. 
Scoop and serve!

For the Lemon Cake...
I adapted Ina's recipe and it makes 2 loaves. I only needed one loaf for the trifle, so you could halve this recipe, or make the whole thing and have the joy of an extra cake in the house.

Lemon Cake
Very slightly adapted from Ina Garten

Makes 2 (8-inch loaves)

for the cake:
1/2 lb. (2 sticks) unsalted butter, at room temperature
2 1/4 cups granulated sugar, divided
4 extra-large eggs, at room temp
zest of 4-5 large lemons
3 cups flour
1/2 teaspoon baking powder
1/2 teaspoon baking soda
1 teaspoon kosher salt
3/4 cup freshly squeezed lemon juice, divided
3/4 cup buttermilk, at room temperature
1 teaspoon pure vanilla extract

Preheat the oven to 350°F. Grease and flour 2 (8.5 x 4.25 x 2.5-inch) loaf pans.

Cream the butter and 2 cups granulated sugar in the bowl of a stand mixer fitted with the paddle attachment, until light and fluffy, about 5 minutes (you can also do this with a hand mixer).

Don't skip this step. Having your ingredients at room temp, and taking the time to whip your sugar and butter into something light and fluffy are two key components to successful cake baking.

With the mixer on medium speed, add the eggs 1 at a time, and then add the lemon zest. Beat together for another 30 second or 1 minute.

Sift together the flour, baking powder, baking soda and salt into a bowl. In another bowl combine 1/4 cup of lemon juice, the buttermilk and the vanilla. Add the flour and buttermilk mixtures alternately to the batter. Begin and end with the flour mixture. Blend until just incorporated and be careful not to over mix at this stage. Divide the batter evenly between the two loaf pans, and bake for 45 minutes to an hour, or until a cake tester (or bamboo skewer) comes out clean)


While the cake is baking, combine 1/4 cup of granulated sugar with the remaining 1/2 cup of of lemon juice. In a small saucepan over low heat, heat the mixture until the sugar has fully dissolved. Turn off the heat and reserve.

Once the cakes are done, allow them to cool in their pans for 10 minutes. Take them out of their pans and place them on a cooling rack set on a sheet pan. Spoon the lemon syrup over the cakes while they are still warm. Allow the cakes to cool completely.

Strawberries with Balsamic and Basil


This simple strawberry salad is one of my favorite ways to end a meal. Especially now, when the days are long, warm, and the markets are overflowing with super ripe sweet berries and fruit. Best of all, this dessert is as delicious as as it is beautiful, and it requires zero baking, measuring, and very little time.

Balsamic macerated strawberries are a classic, and yet I've met many who have never tried them. The acidity and murky sweetness of the balsamic (real, good balsamic - read the bottle carefully, make sure it doesn't have artificial coloring or high fructose corn syrup) goes so nicely with the perfectly ripe summer strawberries. I also added juice from an orange, and fresh mint in addition to basil - both those ingredients did something special to the salad. Really, you can mix and match any of the ingredients below and you'll have something that's sooo good. At the end of the day, how can you go wrong with fresh strawberries and cream?


Strawberries with Balsamic, Basil, and Mint, served with Mascarpone Topping
Serves 6

3 pints strawberries, lightly rinsed and dry
3 tablespoons very good aged balsamic vinegar (or to taste, depends on your vinegar)
Juice of 1/2 an orange
1 1/2 teaspoons sugar (or to taste)
8-10 basil leaves, sliced thin (i.e. a chiffonade)
5-6 large mint leaves, chopped fine
1 cup mascarpone
1 tablespoon half and half
1 teaspoon maple syrup.

Slice your berries into halves or quarters, depending on the berry's size and your preference. Add them to a bowl. Add the balsamic vinegar, orange juice and sugar to the berries. Gently toss the berries. Add the basil and mint to the coated berries, lightly toss again. Be careful not to bruise the berries too much. Let the berries for marinate for at least 30 minutes or up to 3 hours.

In a small bowl, combine the mascarpone, half and half, and maple syrup.

Guests can top their serving of berries with a dollop of the very lightly sweetened mascarpone.

The berries should be eaten the same day you make them. They'll last for an afternoon or an evening, but not much more than that. I hardly expect you'll have leftovers.