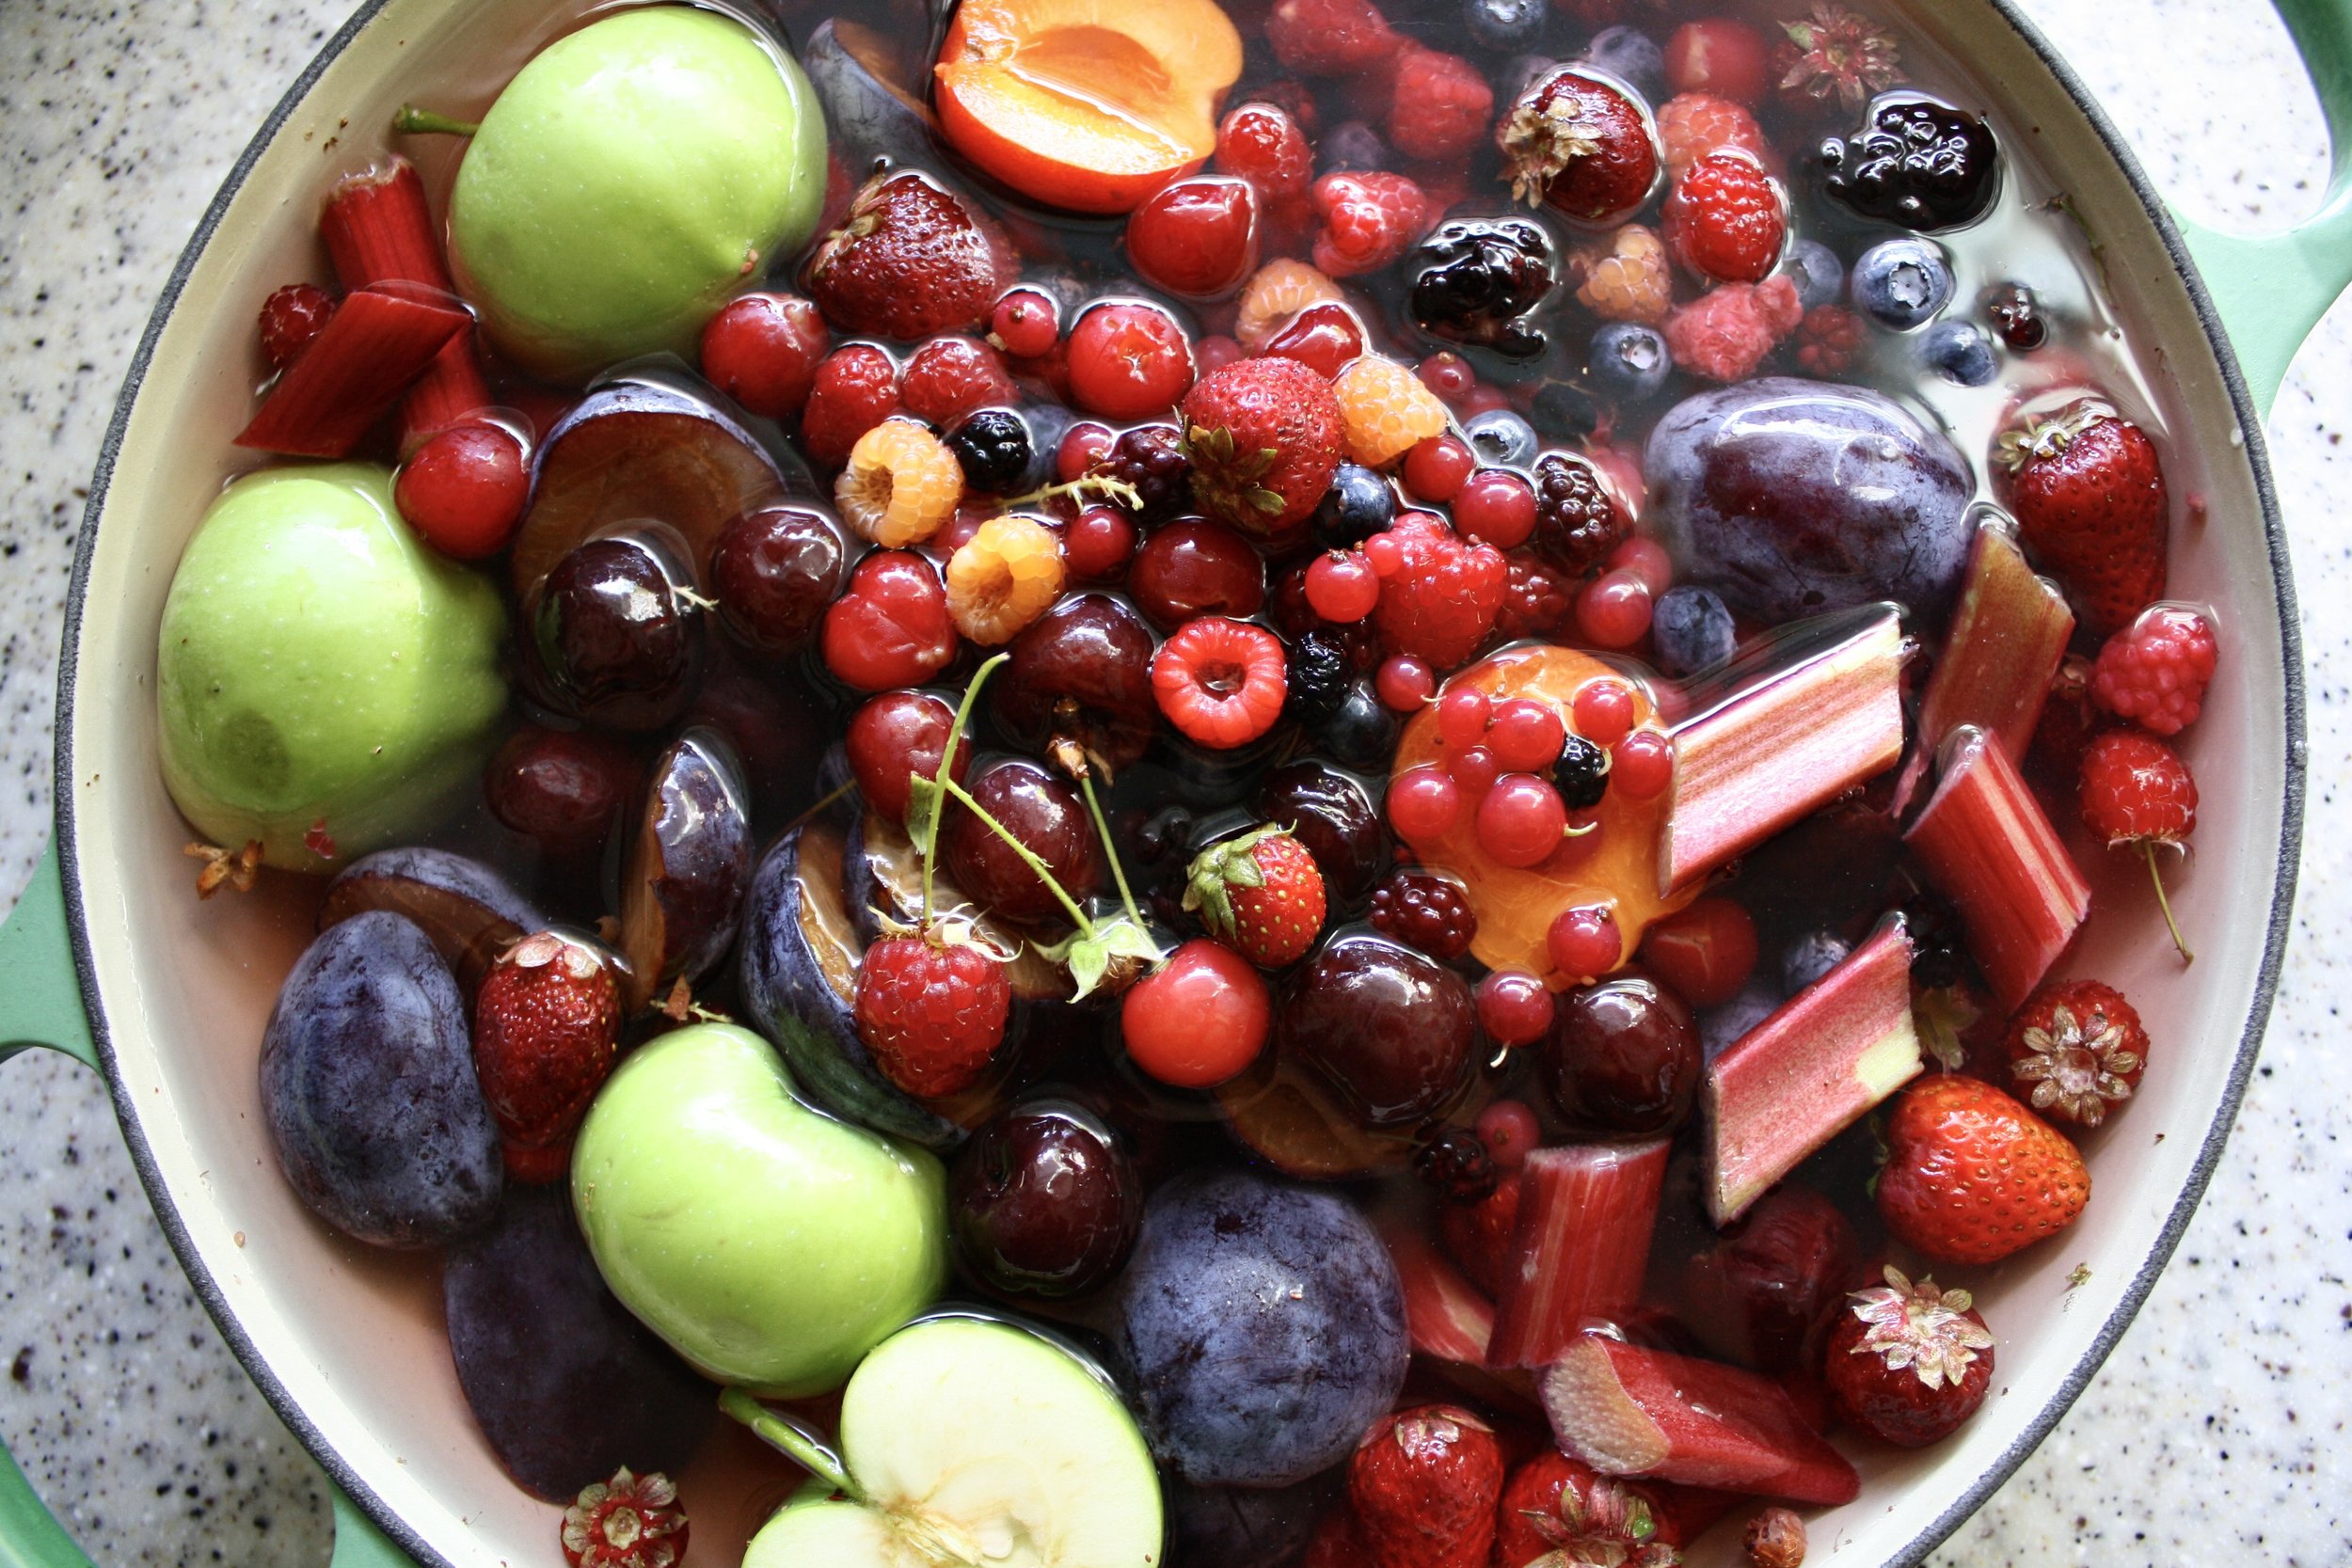
Easy Homemade Vegetable Stock


There's nothing like homemade stock. That boxed kind from the store is certainly useful, and can be a necessary evil, but it usually just makes me disappointed with its sad, dull and muted flavors. Of the store bought stocks I've often found that veg stock is the worst in terms of flavor. The brands wildly differ in taste, and some of them are just straight up bad.

I think making stock seems daunting, but while it take a few hours of simmering it's pretty much one of the easiest things to make and the pay off is huge.

The other bonus of stock is that it can utilize a lot of the odds and ends of veggies that you normally throw out (or compost?). I hate seeing bags of green things go into the trash. When I'm prepping veggies during the week, I keep a bag of trimmings and stuff I know I won't use: leek tops, cauliflower ends (not the leaves which are great to eat), carrot ends, parsley stems without the leaves, green onion roots, celery leaves, veggies that are a little wilted and past their prime. I keep a lot of those guys in one bag and at the end of the week I fill a pot with water and dump the veggies into the pot. I also usually add a few whole onions or shallots with the skin still on too. Onion skin gives stocks a lovely rich brown color.

Basically, stock is about throwing a bunch of stuff in a pot, letting it simmer in a lot of water for hours, or until the stock reduces by half so that the flavor gets concentrated and yummy, and then you strain it using a mesh strainer (or cheese cloth if you're fancy).

Once the stock is done, I store some in the fridge for immediate use, but I also like to keep mine in pint size freezer-safe glass mason jars labeled with the type of stock and the date. Then I take them out and defrost as necessary. Stock keeps for about 3-4 months in the freezer and about 1 week in the fridge.

Also, while you're making stock, if there are some veggies you want to blanch that day, you can throw them into the pot too. They'll add extra flavor to the stock, and the stock will add extra flavor to them. It's a win a win for all the veggies involved (see pic of cabbage below).

And, the smell of simmering stock on the stove always makes everything feel cozier and like delicious things are on their way...

Easy Way to Clean Out the Fridge and Use Up Veg Scraps Stock
Makes half of whatever amount of water you add
  • 1-2 onions, cut in half with peel still on
  • 1-2 shallots (if you have them), cut in half with peel still on
  • 2-3 celery stalks with leaves
  • 2 carrots, or a bunch of carrot ends 
  • Any of the following: fennel outside layers (or whole fennel), leek tops (or whole leeks), parsley or parsley stems, dill stems, garlic, cabbage, 10-12 crimini or shitake mushrooms (will make richer browner stock), green beans (in moderation), parsnip ends (or whole)... pretty much any veggie you like... beets will make everything pink so I usually don't use that. Also broccoli florets are too strong of a taste for me, but sometimes I include the stalk which I find doesn't have the same broccoli-ish taste...  but play around and see what you like...
  • 3-4 quarts water
  • salt to taste - I only throw in a few big  pinches so that I can control sodium levels later when I use the stock
Fill a large stock pot with water (at least 3 quarts/12 cups). Throw all of your vegetables into the pot.
Bring the liquid to a boil, reduce the heat and simmer for 1.5-2 hours, or until the liquid reduces by half. Once simmered and reduced, strain the stock through a fine-meshed sieve, or a cheesecloth-lined sieve.

Use immediately or store for later use.


Big Colorful Summer Salad


My dad is visiting from Jerusalem, and inspired by the salads that he loves to eat on a daily basis, I whipped this up as a main component for a light summer dinner. Along with the salad, I served smoked salmon and turmeric spiced basmati rice. The cool bright vegetables were a perfect compliment to the smoky salmon and aromatic rice.

I don't want to be misleading. This isn't an Israeli salad. For one, most Israeli salads are made up of a combination of tomatoes, cucumbers, onions, and olive oil. Traditionally, these salads don't have lettuce, but in this case, I had a beautiful head of red leaf lettuce, and I wanted to include it to make the salad a more substantial dinnertime dish. Also, dressing for Israeli salads are super simple, and this salad includes a Dijon based vinaigrette. This salad is inspired-by, not in-the-tradition-of.

Those bright magenta things are thin slices of watermelon radish. Watermelon radish tastes similar to regular radish, but has a subtle sweetness to it. They are delicious and gorgeous and I love when they are in season. I found these at my local supermarket, but usually I spot them at the Hollywood Farmers' Market. 

The point is, for this salad you can throw in all kinds of chopped veggies on top of crisp lettuce. Think: big, colorful, and well-dressed.

Big Colorful Summer Salad
Serves 4-6

for the salad-
1 medium head red leaf lettuce, chopped
2 medium tomatoes, diced
2 small persian cucumbers, diced
1 small red bell pepper, diced
3-4 red radishes, sliced thin
1 watermelon radish, peeled and sliced thin
2-3 scallions, sliced thin
1 generous bunch of dill, roughly chopped

for the dressing-
2 heaping teaspoons good quality Dijon
juice of 1/2 a large lemon (or a whole lemon depending on its size)
1 small garlic clove, finely minced (or you can use a press)
1/3 cup olive oil
1/2 teaspoon oregano
Drop of honey
pinch of salt and pepper

Wash and dice all of your veggies and herbs. Add them to a large salad bowl.

Whisk together all of the dressing ingredients (or put them in a mason jar with a tight lid and shake it up). Taste the dressing. Add more lemon, dijon, honey, oil or salt. Dressings are all about finding the balance YOU like. Ingredients differ in terms of flavor, and proportions may have to be adjusted. Dip a piece of lettuce into the dressing if you need a better idea of how it will taste on the salad. 

Right before serving, sprinkle salt over the salad and toss. Then add the dressing to the salad. Toss until all the components are evenly coated. 

You can add crumbled feta or grilled chicken to make a meal out of the salad itself. 

Simple Roasted Artichokes


I can never say no to an artichoke. They are easily my favorite food when they are in season. They are also extremely versatile. They can be cooked in a myriad of ways, and they are the perfect vehicle for condiments (the raison d'etre).

I grew up with boiled artichokes. They're not that bad, because they're still artichokes. Because I grew up eating artichokes that had been cooked in water, I too continued to cook my artichokes in water. Sometimes I steamed them, but mostly I just simmered them. The major downside of artichokes cooked in water is that they turn out waterlogged, and waterlogged foods can be improved upon.

I've made and had grilled artichokes, fried artichokes, and pan seared artichokes, and all are lovely. Those preparations involve a grill, or lots of oil, or lots of care. I wanted to make a crispy, super easy to cook artichoke in my own kitchen. I remember hearing about roasted artichokes, and I have no idea why it took me so long to try out this method.

Roasted artichokes are genius. I will never steam or simmer an artichoke again. Seriously. These are sooo good. The leaves become soft and tender, and crispy on the edges. As an added bonus, they look golden and beautiful. They're good on their own, and even better served along with your favorite artichoke dipping sauce. This is a perfect elegant spring and summer dish.

Roasted Artichokes
Serves 4, 1 artichoke per person

4 medium globe artichokes (or 2 large) cleaned, trimmed, choke removed, split in half
1 large lemon, cut in half
olive oil
salt and pepper

Preheat the oven to 425°F.  Line a baking dish (9 x 11) with foil or parchment paper.

First things first, you'll need to clean and prepare your artichoke for roasting. Here's a great tutorial from Mark Bittman. Get a bowl of cold water ready. Squeeze half a lemon into the bowl of water, and then toss that lemon into the bowl. Reserve the other half of your lemon to serve with the artichoke once its cooked. To prepare the artichokes you'll need to trim and peel the ends of the artichoke, remove the tough outer leaves, trim the prickly tops, slice each in half, and remove the choke. Once you've cleaned and halved an artichoke, immediately place it in the lemon water so that it doesn't brown. Move on to the next artichoke and repeat the process.


Once you've prepared and halved all of your artichokes, remove them from the water (it's fine if they are a little wet), and lay them cut side down in a lined baking dish. Any baking dish will do, as long as they all fit in a single layer.


Take the lemon that was sitting in the bowl of water, and squeeze its juice over the artichokes. The lemon should be extra watery. Add a few tablespoons of the lemon water from the bowl into the pan as well. I add a little (not too much) liquid to the pan so that the artichokes slightly steam as they roast. By the end of the cooking process, the water will evaporate, and the artichokes will start to brown. Next, drizzle the artichokes with olive oil. Season with salt and pepper.

Cover your baking dish tightly with foil. Roast the artichokes in the oven for 30-40 minutes or until the artichokes are tender and browned. You can check their doneness by removing them from the oven, unwrapping the foil, and testing a few leaves or piercing the stem. If they seem too al dente or not browned, just rewrap them and place them back in the oven. Cooking time will depend on the size and moisture content of the artichoke.

Once they are cooked, season with more salt and pepper. Serve warm with sliced lemon, or with a dipping sauce.

Some dipping sauces include: melted butter, melted butter with garlic, mayo mixed with lemon juice, or mayo mixed with lemon juice herbs/spices.

Whipped Coconut Cream (vegan)


There's nothing wrong with traditional whipped cream. It's pretty flawless in its classic form. I'm happy to eat something decadent if it's delicious and used to top something warm that's just come out of the oven. However, certain occasions and situations call for non-dairy/vegan desserts. On those occasions, I have often wondered what would be a good non-dairy alternative to classic whipped cream.

While working on the second season of Recipe Rehab I learned this trick from one of our chefs: take a can of regular coconut milk, put it in the fridge overnight, scoop out the creamy part that separates from the liquid, and whip it just as you would regular cream.

I figured coconut cream would work just as well as coconut milk, and it did! You can use either coconut milk or coconut cream to make this delicious vegan dessert topping. The texture is just like homemade whipped cream, and the taste is mildly coconut-flavored.


I served it with flourless chocolate cake and berries (recipe coming soon), but you could use it to top any dessert you'd like.

Whipped Coconut Cream
Serves 12-14 (this recipe can be easily halved)

2 cans of coconut cream, chilled overnight in the fridge
2 teaspoons agave syrup (or honey/sugar/maple syrup )
2 teaspoons pure vanilla extract

Start this recipe the day before (or days before) by putting your canned coconut cream in the fridge. At least an hour before you whip the cream, place the bowl you plan to use in the freezer. It helps if all of your tools and ingredients are very cold.

Add the coconut cream, agave (or other sweetener or none at all), and vanilla extract to the bowl you will use to whip the cream in.

Using a stand mixer fitted with a whisk attachment, or a hand mixer, or a whisk and lots of elbow grease, whip the coconut cream mixture on medium high until it is thick, fluffy, and looks like whipped cream:


Transfer the whipped coconut cream to a bowl, garnish if you feel like it, and keep it in the fridge until you're ready to serve it.