• Welcome
  • Book
  • Classes
    • Recipes
    • Index
  • Writing
  • Press
  • Shop
  • Contact
Menu

Sonya Michelle Sanford

  • Welcome
  • Book
  • Classes
  • Recipes
    • Recipes
    • Index
  • Writing
  • Press
  • Shop
  • Contact

Manti (meat dumplings) in brothy tomato sauce

February 24, 2025

Originally shared on The Nosher

From Turkey to Armenia, Uzbekistan to Ukraine, manti are a popular comfort food found across Central Asia and Eastern Europe. As an ancient form of dumpling, some trace manti’s origins back to the 1300s during the Mongol Empire in Turkey, while others credit the dish as a gift of the Silk Road; notably, Uyghurs from Northwest China have been making a version of bread prepared in steam known as “mantau” for centuries. Regardless of their origin, manti traveled East towards Korea, West towards the Caucuses, and everywhere in between. 

While their popularity spans continents, the shapes and styles differ by region. In Turkey they’re often formed into small pyramid-like pouches, sometimes baked and simmered, sometimes boiled, often topped with yogurt, and served in a tomato-based broth or sauce. On the other hand, the ancient Bukharian Jewish community in Central Asia are known for large intricately shaped manti, generously filled with meat and always steamed – never boiled. There’s also a dairy version of Bukharian manti that’s filled with cheese and served with yogurt.

Like many celebratory old-world foods, these hand-formed dumplings take a bit of time and effort to prepare, making them ideal for calling a helping hand into the kitchen. Historically, this dish was even a communal activity. While making homemade dumpling dough can be deeply satisfying, you can simplify the manti-making process by using store-bought wonton wrappers – a tip I happily discovered in Gabrielle Hamilton’s “Prune” cookbook. Given the labor, whether it’s with store-bought or homemade wrappers, when I make manti I often double the recipe, freezing extras for future enjoyment. 

Let me preemptively warn you, this manti recipe may not look or taste like the manti you’re familiar with. After exploring different shapes, sizes and toppings, my preference is for smaller-sized manti shaped into pouches. I serve mine in a Turkic-inspired brothy tomato sauce topped with fresh herbs and a sprinkle of lemony sumac. I’ve provided directions for steaming or boiling your manti, depending on your preferred technique. If you find yourself hoping for a larger sized manti, the dough can be filled and shaped according to your family’s custom. Whether you stick to the recipe as written or try something more traditional to you, the joy of manti lies not in their size or shape, but in their pillowy soft tenderness, and the inherent comfort they bring to every table.

Note: I use Diamond brand kosher salt for this recipe, if using Morton’s or sea salt use ⅓ less.

Manti in brothy tomato sauce
Makes 48 dumplings, serves 4-6

Prep time: 1 hour 15 minutes
Cook time: 30 minutes

Ingredients
For homemade dough:
3 cups (380 g) all-purpose flour
1½ tsp Diamond Crystal brand kosher salt*
¾ (175 ml) cup water
1 large egg, beaten

If using store-bought dough:
50 3” square wonton wrappers

For the filling:
1 lb ground beef or lamb
1 small onion, grated or very finely diced 
½ cup parsley, chopped
2¼ tsp Diamond Crystal brand kosher salt
1 tsp sweet paprika

For the tomato broth:
¼ cup olive oil
4 cloves garlic, minced
1 (6 oz) can (⅔ cup) tomato paste
2 large beefsteak tomatoes, or 4 large Roma tomatoes, diced
2 tsp sweet paprika
½ tsp red pepper flakes or Aleppo pepper, or to taste
4 cups chicken or beef stock
1 Tbsp sherry vinegar or red wine vinegar
Salt and pepper to taste

For garnish (optional):
Chopped parsley, mint, or cilantro
Sumac or Aleppo pepper
Extra virgin olive oil

For the dough:

  1. Add the flour and salt to a large bowl and stir together. If you are measuring your flour by cup instead of by weight, remove ¼ cup of flour and reserve. 

  2. Make a well in the center of the flour, and add the water and egg. Stir to combine into a shaggy ball, then transfer onto a clean surface and knead. If the dough feels too sticky, add a little more flour 1 tablespoon at a time. Knead until smooth and elastic, about 8-10 minutes. 

  3. Cover the dough with a bowl, and allow it to rest for 30 minutes. While your dough is resting, prepare your tomato broth.

For the tomato broth-

  1. In a deep skillet or large pot, add the olive oil over medium heat. Once hot add the minced garlic and sauté until just fragrant, about 1 minute. 

  2. Add the tomato paste to the skillet, and stir and sauté for about 4-5 minutes. The tomato paste will turn a darker color as it caramelizes, which will add depth of flavor to the broth. 

  3. Add the diced fresh tomato, paprika, red pepper flakes, salt, and pepper, and sauté and stir for 1 minute. 

  4. Add the broth, and let it come to a boil, then gently simmer for 30 minutes. Once it’s done simmering, taste, and adjust the seasoning if needed. Turn off the heat and reserve for serving. If you want a thicker consistency, simmer for longer; if you want a brothier consistency, add more stock or water. 

  5. Tomato broth can be made several days in advance and reheated as needed. 

For the filling:

  1. To a medium bowl, add the ground beef, grated onion, chopped parsley, salt, and paprika.

  2. Mix until just combined; be careful not to overwork the filling or it can become tough. 

To assemble and cook the manti with homemade dough:

  1. Line a baking sheet with parchment paper, and sprinkle flour on top of the paper. Fill a small bowl with water. 

  2. Lightly flour your surface. Divide the dough into 4 equal parts. Take one quarter to roll out, and make sure the remaining dough is covered so that it doesn’t dry out. 

  3. Roll out the dough into a thin 11-12” square, about as thin as a sheet of lasagna. Cut the dough into 12 even squares, each will be about 2.5-3”.

  4. Add 1½ teaspoons of the filling to the center of each square. Dab a little water along the edges, then bring two opposite corners towards the center of the dough, and then bring the remaining two corners towards the center. Pinch down the edges of the dough, to form a pyramid shape. Alternatively, you can shape the manti however is most desirable or easiest for you. Make sure the edges are very secure, then place the formed manti onto the floured baking sheet. 

  5. Repeat the manti forming process with the remaining dough

  6. At this point you can immediately cook your manti, or you can place the baking sheet into the freezer. Once the manti are frozen, transfer them to a Ziplock bag or airtight container. They can be cooked from frozen the same way as they are from fresh.

  7. Boil or steam your manti.

  8. To boil – Fill a large pot with water and bring to a boil. Add 20-30 manti to the pot, depending on their size. Be careful not to overcrowd the pot; you will likely need to cook them in batches. Cook until they all float to the top and are tender and cooked through, about 5-6 minutes. If cooking from frozen this may take an additional 3-4 minutes. 

  9. To steam – Use a multi-tiered steamer or add water to the bottom of a large pot with a steamer basket placed above the water line. Lightly brush the bottom of the steamer basket with oil, bring the water up to a simmer then place the manti in a single layer into the basket and cover with a lid; if you do not have a multi-tiered steamer you will need to cook them in batches. Steam for 30-40 minutes or until tender and cooked through.

  10. Serve immediately, topped with a ladle full of hot brothy tomato sauce. Garnish with chopped fresh herbs, a drizzle of olive oil, and a sprinkle of sumac or Aleppo pepper if desired.

To assemble and steam the manti with wonton wrappers: 

  1. Line a baking sheet with parchment paper. Fill a small bowl with water. 

  2. Place 6 wonton squares onto a clean surface, keep the remaining squares covered so that they don't dry out. 

  3. Add 1½ teaspoons of the filling to the center of each square. Dab a little water along the edges, then bring two opposite corners towards the center of the dough, and then bring the remaining two corners towards the center. Pinch down the edges of the dough, to form a pyramid shape. Make sure the edges are very secure, then place the formed dumplings onto the lined baking sheet. 

  4. Repeat the dumpling forming process with the remaining wrappers, six at a time. At this point you can immediately cook your manti, or you can place the baking sheet into the freezer. Once the manti are frozen, transfer them to a Ziplock bag or airtight container. They can be cooked from frozen the same way as they are from fresh.

  5. Steam your manti using a multi-tiered steamer, or add water to the bottom of a large pot with a steamer basket placed above the water line. Lightly brush the bottom of the steamer basket with oil, bring the water up to a simmer then place the manti in a single layer into the basket and cover with a lid; if you do not have a multi-tiered steamer you will need to cook them in batches. Steam for 10 minutes until tender and the wrapper becomes soft and translucent; if cooking from frozen you will need to steam for 3-4 additional minutes. 

  6. Serve immediately topped with a ladle full of the hot brothy tomato sauce. Garnish with chopped fresh herbs, a drizzle of olive oil, and a sprinkle of sumac or Aleppo pepper if desired.

In Dinner, Holiday, Old World Recipes Tags manti, dumplings, tomato broth, Turkish dumplings, Central Asian food, Soviet food
Comment

Golden Chicken Soup with Matzo Balls

January 20, 2025

I learned how to make chicken soup by calling my mother and having her walk me through it over the phone. Over time, I developed my own far more involved recipe. But, my mom’s chicken soup will always be the best chicken soup. When I want something quick, simple, and familiar, I make her recipe. When I want something richer and deeper, and I have the time, I make this recipe. 

I would argue that chicken soup is as central to Jewish cooking as pastrami, brisket, or challah. Also affectionately called “Jewish penicillin,” chicken soup is as comforting as it is healing. My chicken soup starts with a rich broth that takes time to simmer and develop flavor. I love to put a pot of it on the stove on a rainy day, and putz around the house as it quietly bubbles. Once you have your stock, you can quickly turn that stock into soup. Matzo balls were born to be included, but I also like to serve this soup with pelmeni or egg noodles. 

GOLDEN CHICKEN SOUP

Serves 6-8

For the stock:
1 4-5 pound chicken, cut up or whole
½ pound chicken wings or chicken feet (or both)
3 medium yellow onions, peeled and halved 
3 stalks celery, cut into thirds
3 medium-size carrots, cut into thirds
1 large parsnip, peeled and cut into thirds
1 head garlic, cut in half horizontally 
3 bay leaves
1 Tablespoon peppercorns
1 bunch fresh flat-leaf parsley
1 bunch fresh dill
1 bunch fresh thyme (optional) 

For the soup:
2-3 stalks celery, sliced thin
2-3 medium carrots, peeled and cut into rounds
2-3 teaspoons turmeric powder
Fresh chopped parsley
Fresh chopped dill
Oil or schmaltz, as needed
Salt and pepper, to taste

Make the stock:
Place all of the stock ingredients into a large (10-16 quart) stockpot. Fill the pot with cold water. Bring the water up to a simmer, avoid letting the water boil. Let the stock simmer on low for 1 hour, removing any scum that floats to the top during that time. After an hour of simmering, remove the whole chicken; if using a cut-up chicken, remove the breasts only. Allow the stock to continue to simmer.

Allow the chicken to cool slightly, and then remove the chicken breasts from the chicken. Shred the cooked chicken breast and reserve. Place the rest of the chicken and bones back in the pot, and allow the broth to continue to simmer for at least 2 more hours or up to 6 hours. The longer the broth simmers, the richer the flavor. The broth will reduce as it cooks. 

Strain the broth and reserve until ready to make the soup. If making stock ahead of time, a layer of fat will form on top of the broth once you chill it. You can discard it or skim it to use as schmaltz, or you can keep it and it will add more richness to your soup. Stock keeps for up to 1 week in the fridge and up to 6 months in the freezer.

Make the soup:
Add a drizzle of oil or a spoonful of schmaltz to a large pot on medium heat and sauté the carrots and celery until just starting to soften, about 3-4 minutes. Add the turmeric and sauté for an additional minute. Add the stock to the pot. Season generously with salt and pepper. Allow the soup to simmer for 20-30 minutes, taste, and adjust the seasoning as needed. Turn off the heat and add the chopped parsley and dill. 

Serve hot with reserved shredded chicken breast, matzo balls, pelmeni, egg noodles, or rice. Both the broth and the soup can be frozen for up to 6 months. 

Variations:

  • You can use any additional vegetables you like in the broth: rutabaga, sweet potato, turnips, leeks, green garlic, and any good vegetable scraps all work here. I also keep a bag of vegetable scraps and herb stems in the freezer, and I love to add those to my stocks too. 

  • If you don’t have a whole chicken, this will work with cut up chicken parts. Remove the breasts after one hour, but you can leave the rest of the chicken in the pot as it simmers.

  • Turmeric adds flavor and color to the soup, but it also makes the broth darker and less clear. It can be omitted if you want a clearer broth.


Whether you make matzo balls from scratch, or opt for a box mix, doctor them up with fresh herbs and schmaltz and you’ll have a truly exceptional matzo ball every single time. 

MATZO BALLS

Makes 9-11 matzo balls

1 cup matzo meal
1½ teaspoons kosher salt
¼ teaspoon baking powder
¼ teaspoon baking soda
4 large eggs
¼ cup oil/schmaltz 
2 Tablespoons finely chopped dill/parsley

In a large bowl, whisk together the matzo meal, salt, baking powder, and baking soda. In a separate bowl, beat the eggs. Add the eggs, oil, and herbs to the matzo meal mixture. Mix until just incorporated (be careful not to overmix). Refrigerate for at least 30 minutes and up to 8 hours. 

Once the batter has chilled and rested, get ready to form and cook the matzo balls. Bring a large pot of lightly salted water to a boil. Adding a little oil to your hands will help prevent the batter from sticking as you form the matzo balls. Using a small ice cream scoop or a spoon, scoop out 1-tablespoon of batter. Gently roll the batter into balls of equal size. 

Add the matzo balls to the boiling salted water. Cover the pot with a lid and cook for 25-30 minutes or until just cooked through. Test one to make sure it is cooked through. Simmer longer if the matzo ball looks dry in the center. Serve balls immediately in soup, or store matzo balls in their liquid, and reheat as necessary. Matzo balls keep for up to 1 week in the fridge; you can freeze them, but their texture will change.

In Holiday, Old World Recipes, Soup, Dinner Tags chicken soup, chicken broth, bone broth, matzo ball souo, matzah ball soup, matzo ball soup, soup, Jewish food
Comment

Ukrainian Summer Fruit Kompot

July 11, 2023

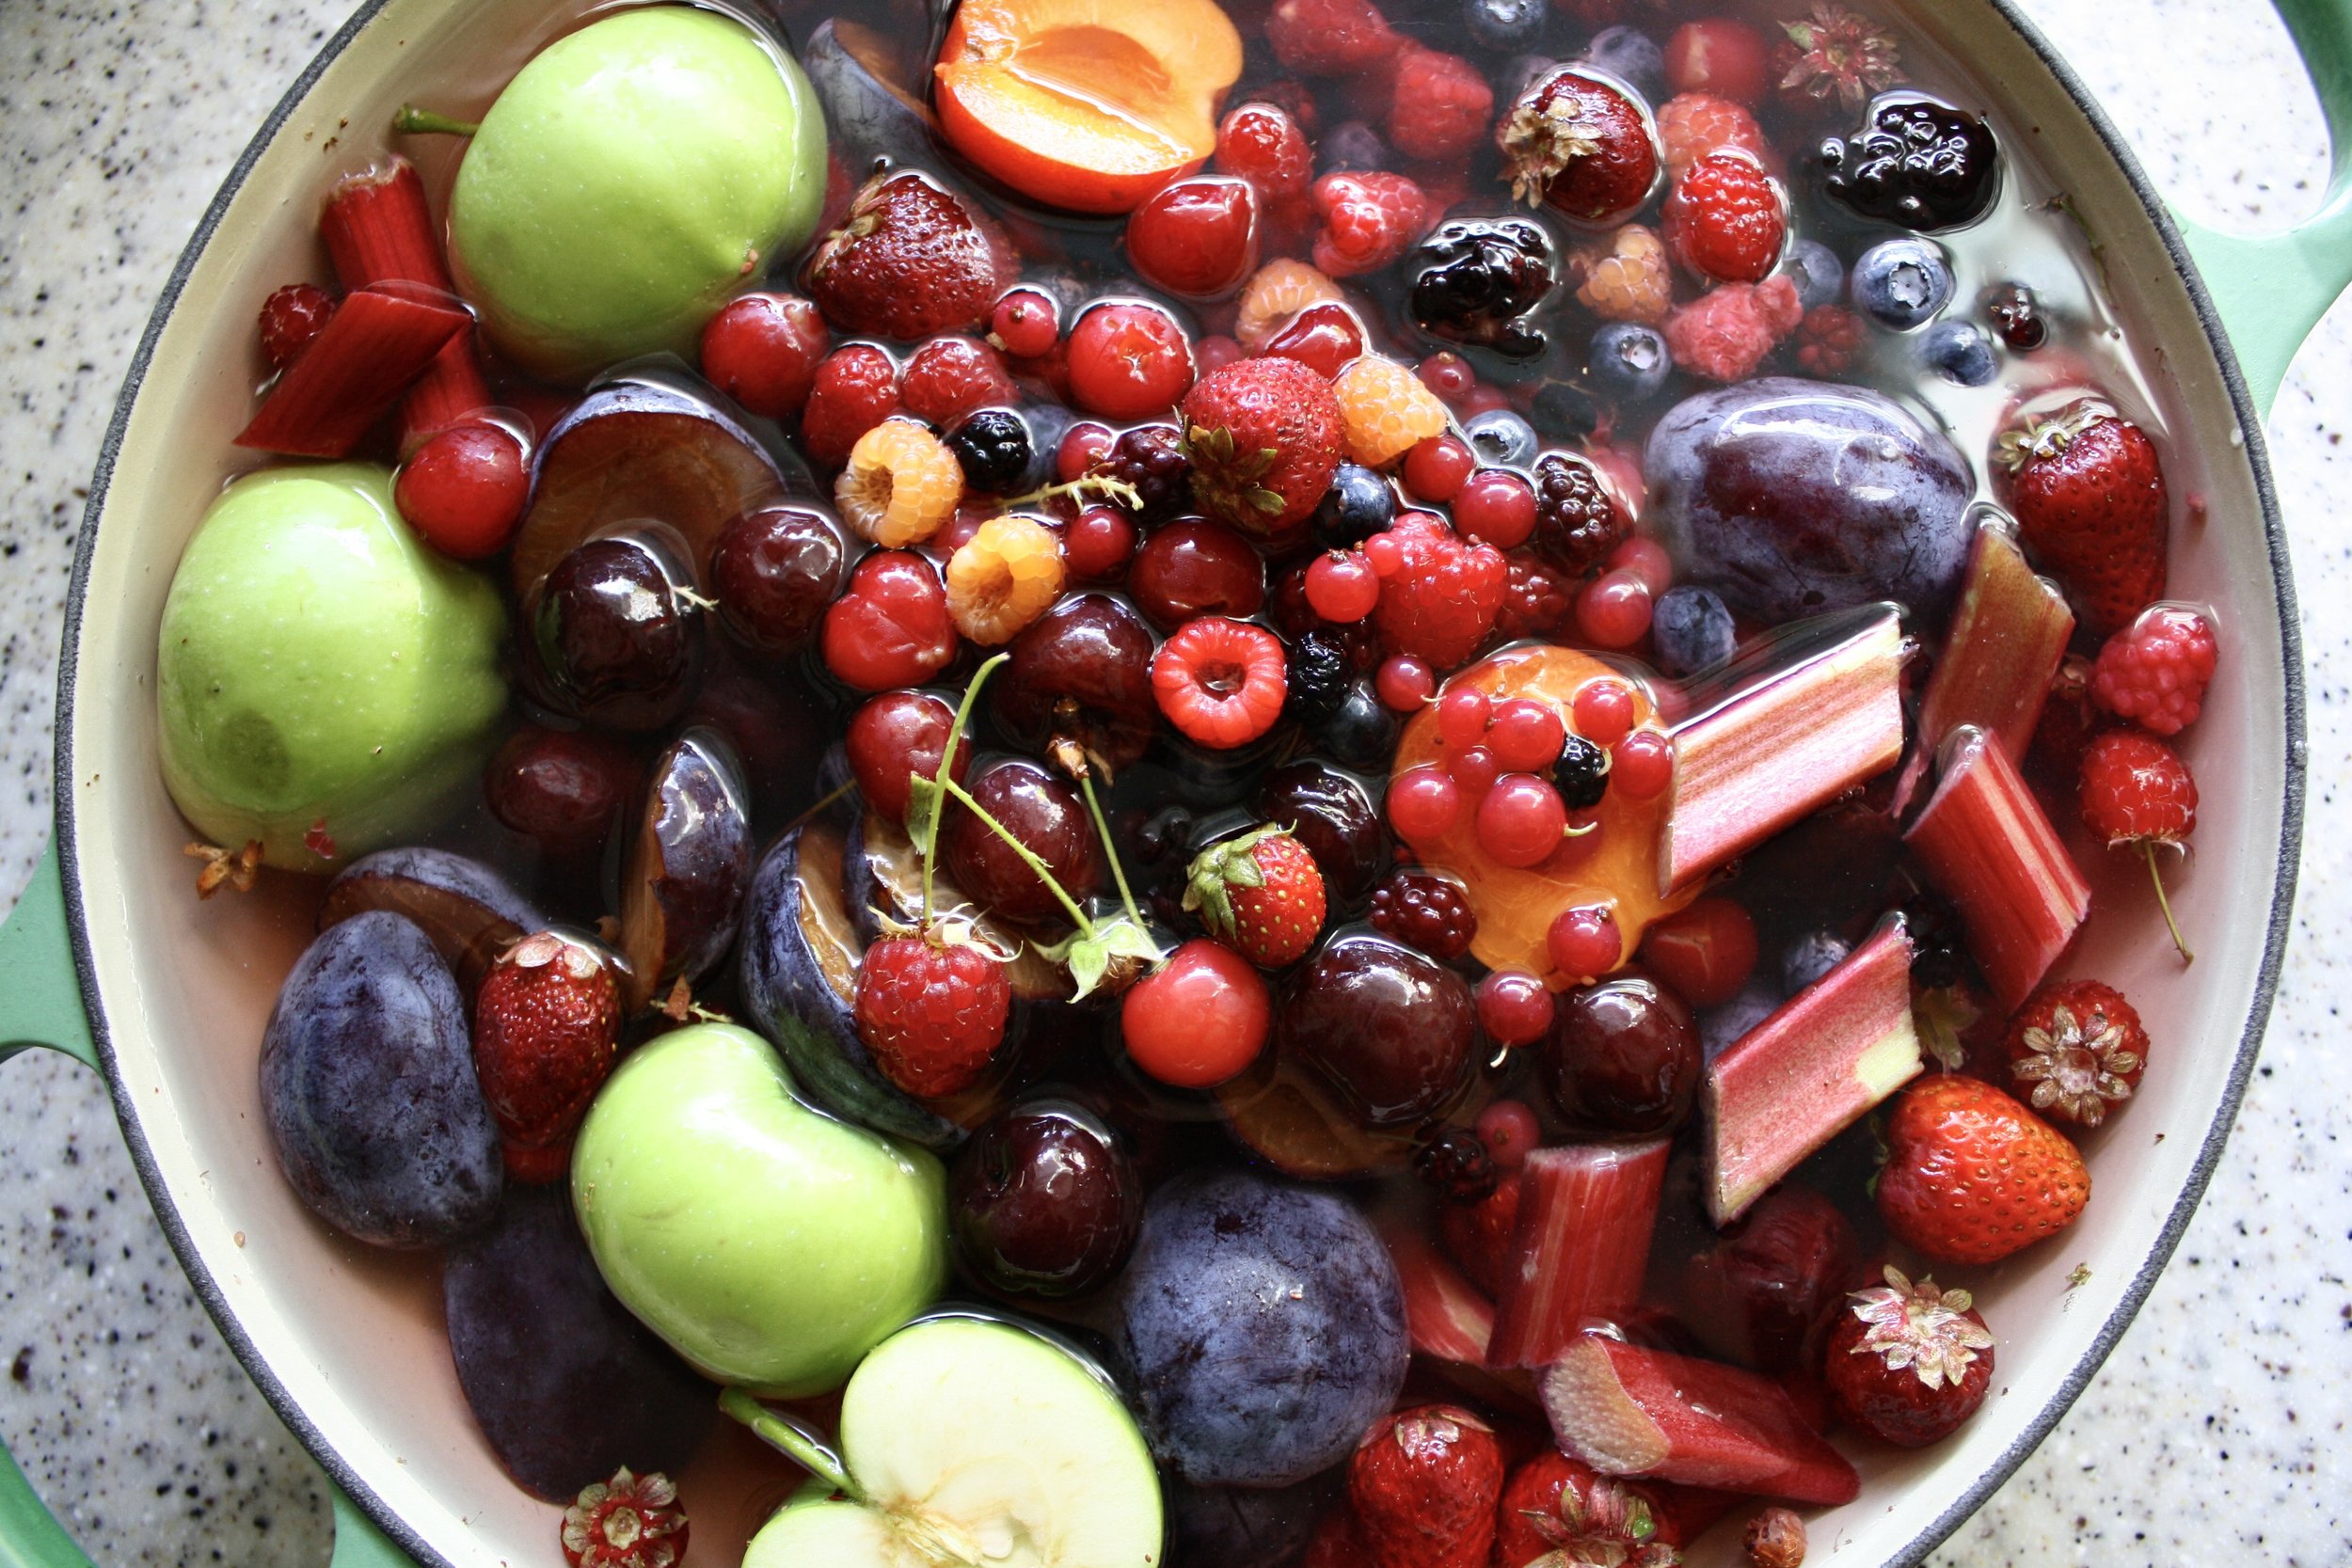
My grandmother would always make a vibrant, fragrant, ice-cold kompot (compote) in the dog days of summer, often with fruit my family had foraged or harvested in the Pacific Northwest. Kompot is essentially stewed fruit that can be strained and enjoyed as a beverage, or it can be ladled into deep mugs and served like a fruit soup. Rich with berries and stone fruit, the deep purple liquid would cool us down as the temperature climbed.

Kompot is very popular in Ukraine, where my family comes from, and across the former Soviet Union and Eastern Europe. Each home has its own recipe, and it can be made with fresh or even dried fruit. Keeping with tradition, I often squirrel away foraged fruit in the freezer; preserving berries and stone fruit from throughout the season waiting for the right time to make this family recipe. Inevitably, an August heat wave will arrive, and that’s when I take out my grandmother’s big enamel pot and fill it with all that saved fruit. The house will slowly fill with the smell of simmering fruit, and I’ll eagerly wait for the satisfaction of sipping on chilled kompot.

This recipe is very simple and endlessly modifiable and can be made year-round from fresh or frozen fruit.

Ukrainian Summer Fruit Kompot (Compote)
Serves 6-8

  • Ingredients
    1½ lbs, mixed berries, fresh or frozen (raspberries, blackberries, currants, strawberries, etc.)

  • 1 lb mixed stone fruit, fresh or frozen (cherries, plums, peaches)

  • 2-3 small apples, cored and halved

  • 1 cup sugar or honey, or to taste

  • 8 cups of water 

  • Juice of 1 lemon, optional 

Directions:
Clean off the fruit and remove any stems.

Add the fruit, sugar, and water to a large pot.

Bring the liquid up to a boil, then lower the heat and gently simmer for 10 minutes; you want the fruit to release its juices but still hold its shape.

Taste and add more sugar or honey if you like it sweeter. If adding extra sweetener, let it simmer for another 2-3 minutes to let the sugar dissolve. Add lemon juice if desired for a more tart flavor.

Allow the kompot to cool then transfer it to the fridge to fully chill before serving. 

If you prefer a strained kompot, use a mesh strainer, and transfer the kompot into a pitcher to serve cold. If you prefer the kompot with the fruit still in it, serve it ladled into deep cups or bowls with a spoon.

In Dessert, Old World Recipes, Ukrainian, Vegan Tags Kompot, Compote, Ukrainian food, Jewish food, Foraged fruit, Pacific Northwest, Pacific Northwest food, Summer Compote, Summer Kompot, Vegan, Vegetarian, Summer fruit
Comment

Cherry Vareniki

June 15, 2023

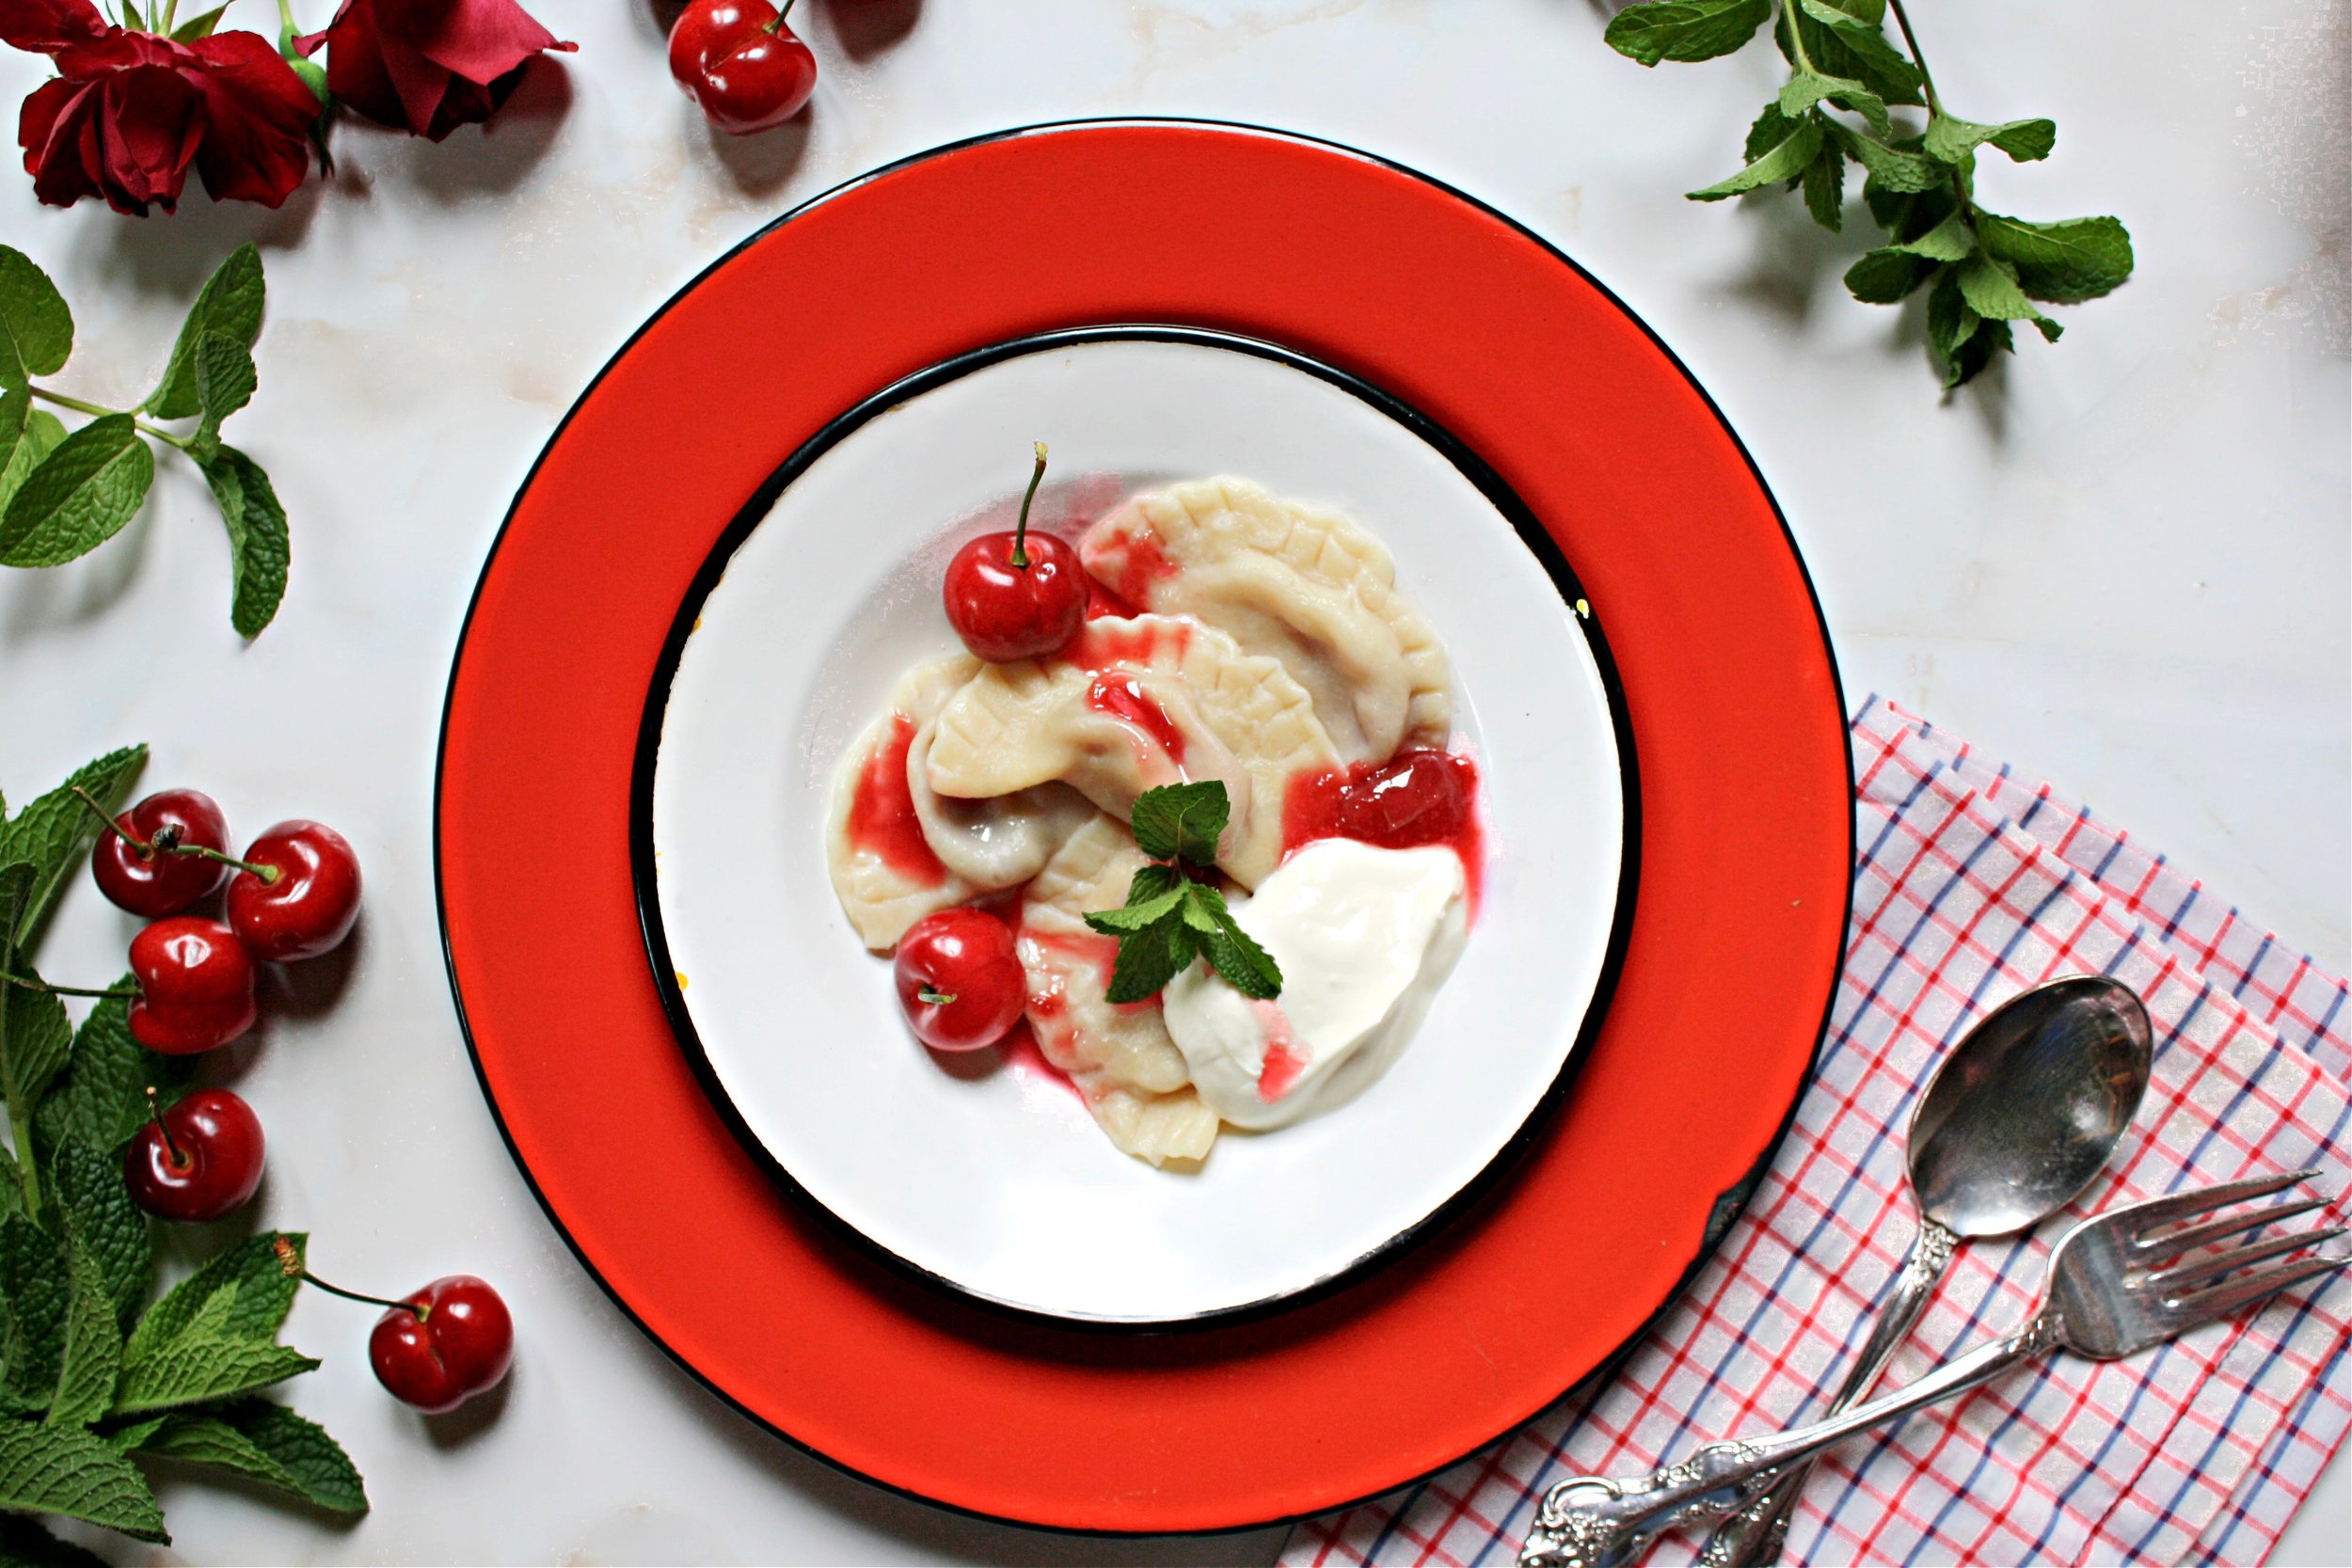
Cherry vareniki (half-moon-shaped dumplings) in Ukraine are typically made with sour cherries, known as vishnya. They are nostalgic for many from the region — including my family — and were famously novelist Nikolai Gogol’s favorite food. My family immigrated from Soviet Ukraine to Seattle, and after almost a decade of building a new life in America, my parents were able to buy their first home. It had an enormous garden, with an established cherry tree. Soon after moving, when I was a very small child, my grandparents came to visit us from out of town. That summer, the cherry tree was loaded with fruit. I vividly remember picking glossy, red cherries off the tree with my grandmother and brother by my side. There was more fruit than could be eaten fresh, and my grandmother decided to use some of the harvest to make a large batch of cherry vareniki. We sat outside and ate bowls of the dumplings – pillowy and bursting with tart, sweet fruit. 

Vareniki are similar to pierogi or pelmeni; the dough is tender and soft, and the filling is only lightly sweetened so that the flavor of the fruit shines. This dish straddles the line between sweet and savory; topped with smetana (sour cream), one can eat cherry vareniki either as a main course or as a dessert. When using sour cherries, I eat my vareniki as a savory dish; you can get sour cherries fresh for a few weeks each year, otherwise, I pick them up frozen or preserved from Eastern European or Russian markets. When I fill the vareniki with Bing or Rainier cherries, I enjoy these dumplings as a sweet treat.

I love to serve cherry vareniki with a simple cherry sauce made from the extra filling, topped with big dollops of sour cream to balance out the sweetness. Like any kind of homemade dumpling or ravioli, vareniki take some effort to make, but are unquestionably worth the work. They’re ideal to make with a group of friends, and you can double or even triple the recipe as needed. 

Notes:

  • Vareniki freeze extraordinarily well, offering a way to preserve the best of fleeting cherry season for future bowls of sweet dumplings. Freeze uncooked in a single layer, then transfer them to a bag or airtight container for three months. 

Cherry Vareniki (Dumplings)
Serves: 4-6, makes about 50 vareniki
Prep time: 1 hour
Cook time: 10 minutes


Ingredients:
For the dough:

  • 3 cups + 2 Tbsp (400 g) all-purpose flour, plus more for dusting or as needed 

  • ¾ cup water

  • 2 Tbsp sour cream or plain Greek yogurt

  • 1 large egg, beaten

  • 1 tsp kosher salt

For the filling and sauce:

  • 1½ lb (680 g) cherries or sour cherries

  • ½ cup sugar

  • 1 tsp cornstarch

  • juice of ½ a lemon

  • sour cream, as desired, for serving

Directions:

  1. Start by making your dough: In a large bowl, combine the 3 cups of flour, water, sour cream, egg and salt. Mix until a shaggy dough forms, then transfer to a clean surface and knead until very soft, smooth and elastic, about 8-10 minutes. If the dough is very sticky, add additional flour 1 Tbsp at a time until it’s easy to knead and doesn’t stick to your hands. 

  2. You can also make this dough in a stand mixer with the dough hook attachment by adding all of the ingredients to the bowl, and mixing on the lowest speed until a shaggy dough forms. Turn up the speed to medium-low, and mix until smooth and soft, about 4-5 minutes. 

  3. Transfer the dough to a bowl and cover it with a lid or plastic wrap. Allow the dough to rest at room temperature for 1 hour. 

  4. While the dough is resting, start on your filling. Wash, dry and pit all of your cherries. If using a cherry pitter, cut the cherry in half after removing the pit. Add the cherries to a bowl with ½ cup of sugar, and let them sit and start to release their juices for a minimum of 30 minutes, or as the dough rests.

  5. Once your dough has rested for an hour and your cherries have been sitting for at least 30 minutes, you can begin shaping your vareniki. 

  6. Line a baking sheet with parchment, and heavily dust it with flour.

  7. Divide the dough into 4 pieces. Liberally dust both your rolling pin and your surface with flour. Roll out each piece of dough very thin, almost as thin as pasta; if you lift it up the dough light should come through it. 

  8. Cut out 2-inch rounds of dough using a water glass or biscuit cutter, lightly flour the rim of the glass or cutter before making rounds. Gather up the scraps into a ball and reserve to re-roll the dough one time, after that discard any scraps. Fill each round of dough with about a teaspoon of cherry, about 1-1½ cherries. Seal the dumplings into half-moon shapes, if needed dab the edges with water to help it stick, but the dough should be sticky enough to press together on its own. Using the tines of a fork, press the edges of the dough to ensure they’re properly sealed. 

  9. Transfer the formed dumplings onto the lined baking sheet. Reserve any remaining cherries for sauce. Repeat the process until you have used up all of the dough, and then place the dumplings in the freezer for a minimum of 15 minutes before cooking. While your vareniki are in the freezer you can bring a large pot of water to a boil. 

  10. While the water is coming to a boil, add the remaining cherries to a small pot. Bring the cherry mixture up to a boil, lower the heat and simmer the cherries for 10-15 minutes or until they are very soft and broken down. In a small bowl, combine 1 tsp of cornstarch with the juice of half a lemon. At the end of cooking the cherries, add the starch slurry, and simmer for an additional minute or until just thickened. If the sauce thickens too much, you can always thin it with water.

  11. Add vareniki, in batches if needed, to the pot of water (be careful not to overfill).. Once the vareniki float to the top, simmer them for an additional 5 minutes. If using frozen vareniki, it may take a few minutes longer for them to float to the top. Remove the vareniki from the pot and serve immediately. 

  12. Top the vareniki with sour cream and cherry sauce. 

In Holiday, Old World Recipes, Ukrainian, Vegetarian, Dessert Tags Ukrainian food, Vareniki, Varenykiki, Dumplings, Cherry Vareniki, Cherry dumplings, Soviet food, Russian Dumplings, Soviet Dumplings, Ukrainian Dumplings, Jewish food, Cherry
Comment

Latest

Featured
IMG_3606.jpeg
May 27, 2025
Sheet-pan Lemony Potatoes and Baby Artichokes
May 27, 2025
May 27, 2025
IMG_3784.jpeg
May 12, 2025
The Secret to Crispy Tofu Every Time + A Sweet & Spicy Gochujang Glaze
May 12, 2025
May 12, 2025
snackingcakeslices copy.jpg
Apr 11, 2025
One-bowl blueberry lemon snacking cake (gluten-free/grain-free)
Apr 11, 2025
Apr 11, 2025
IMG_5075.JPG
Feb 24, 2025
Manti (meat dumplings) in brothy tomato sauce
Feb 24, 2025
Feb 24, 2025
matzoballsontablecloth.jpg
Jan 20, 2025
Golden Chicken Soup with Matzo Balls
Jan 20, 2025
Jan 20, 2025
harissatofuandchickpeas.jpg
Dec 18, 2024
Sheet-Pan Crispy Harissa Tofu, Chickpeas, and Broccolini
Dec 18, 2024
Dec 18, 2024
caracaracake.jpg
Dec 4, 2024
Cara Cara Orange Olive Oil Cake
Dec 4, 2024
Dec 4, 2024
IMG_0640.JPG
Nov 6, 2024
Easy Roast Turkey for Thanksgiving
Nov 6, 2024
Nov 6, 2024
IMG_3282.JPG
Sep 19, 2024
Apple and Honey Dumplings
Sep 19, 2024
Sep 19, 2024
IMG_7173.jpeg
Jul 31, 2024
Galette with any kind of fruit
Jul 31, 2024
Jul 31, 2024
IMG_4004.jpeg
May 9, 2024
Cheddar Cheese Coin Crackers
May 9, 2024
May 9, 2024
DSC02602.JPG
May 2, 2024
Asparagus, Gruyere & Swiss Tart
May 2, 2024
May 2, 2024
whitebeansoupwithzhug.JPG
Mar 11, 2024
Yemenite White Bean Soup with Zhoug
Mar 11, 2024
Mar 11, 2024
DSC02301 (1).jpeg
Jan 24, 2024
Celery, kohlrabi, date salad with toasted almond and sesame
Jan 24, 2024
Jan 24, 2024
DSC02138.jpg
Dec 3, 2023
Sweet potato latkes with cranberry salsa
Dec 3, 2023
Dec 3, 2023
kompot_main photo.JPG
Jul 11, 2023
Ukrainian Summer Fruit Kompot
Jul 11, 2023
Jul 11, 2023
cherryvareniki mainphoto.jpg
Jun 15, 2023
Cherry Vareniki
Jun 15, 2023
Jun 15, 2023
tzimmescaketopdown.jpg
Apr 19, 2023
One-Bowl Tzimmes Cake
Apr 19, 2023
Apr 19, 2023

Sign up with your name and email address to join my mailing list.

I respect your privacy.

Thank you!

Privacy Policy can be found here

All photos copyright of Sonya Sanford unless otherwise indicated