• Welcome
  • Book
  • Classes
    • Recipes
    • Index
  • Writing
  • Press
  • Shop
  • Contact
Menu

Sonya Michelle Sanford

  • Welcome
  • Book
  • Classes
  • Recipes
    • Recipes
    • Index
  • Writing
  • Press
  • Shop
  • Contact

Cherry Vareniki

June 15, 2023

Cherry vareniki (half-moon-shaped dumplings) in Ukraine are typically made with sour cherries, known as vishnya. They are nostalgic for many from the region — including my family — and were famously novelist Nikolai Gogol’s favorite food. My family immigrated from Soviet Ukraine to Seattle, and after almost a decade of building a new life in America, my parents were able to buy their first home. It had an enormous garden, with an established cherry tree. Soon after moving, when I was a very small child, my grandparents came to visit us from out of town. That summer, the cherry tree was loaded with fruit. I vividly remember picking glossy, red cherries off the tree with my grandmother and brother by my side. There was more fruit than could be eaten fresh, and my grandmother decided to use some of the harvest to make a large batch of cherry vareniki. We sat outside and ate bowls of the dumplings – pillowy and bursting with tart, sweet fruit. 

Vareniki are similar to pierogi or pelmeni; the dough is tender and soft, and the filling is only lightly sweetened so that the flavor of the fruit shines. This dish straddles the line between sweet and savory; topped with smetana (sour cream), one can eat cherry vareniki either as a main course or as a dessert. When using sour cherries, I eat my vareniki as a savory dish; you can get sour cherries fresh for a few weeks each year, otherwise, I pick them up frozen or preserved from Eastern European or Russian markets. When I fill the vareniki with Bing or Rainier cherries, I enjoy these dumplings as a sweet treat.

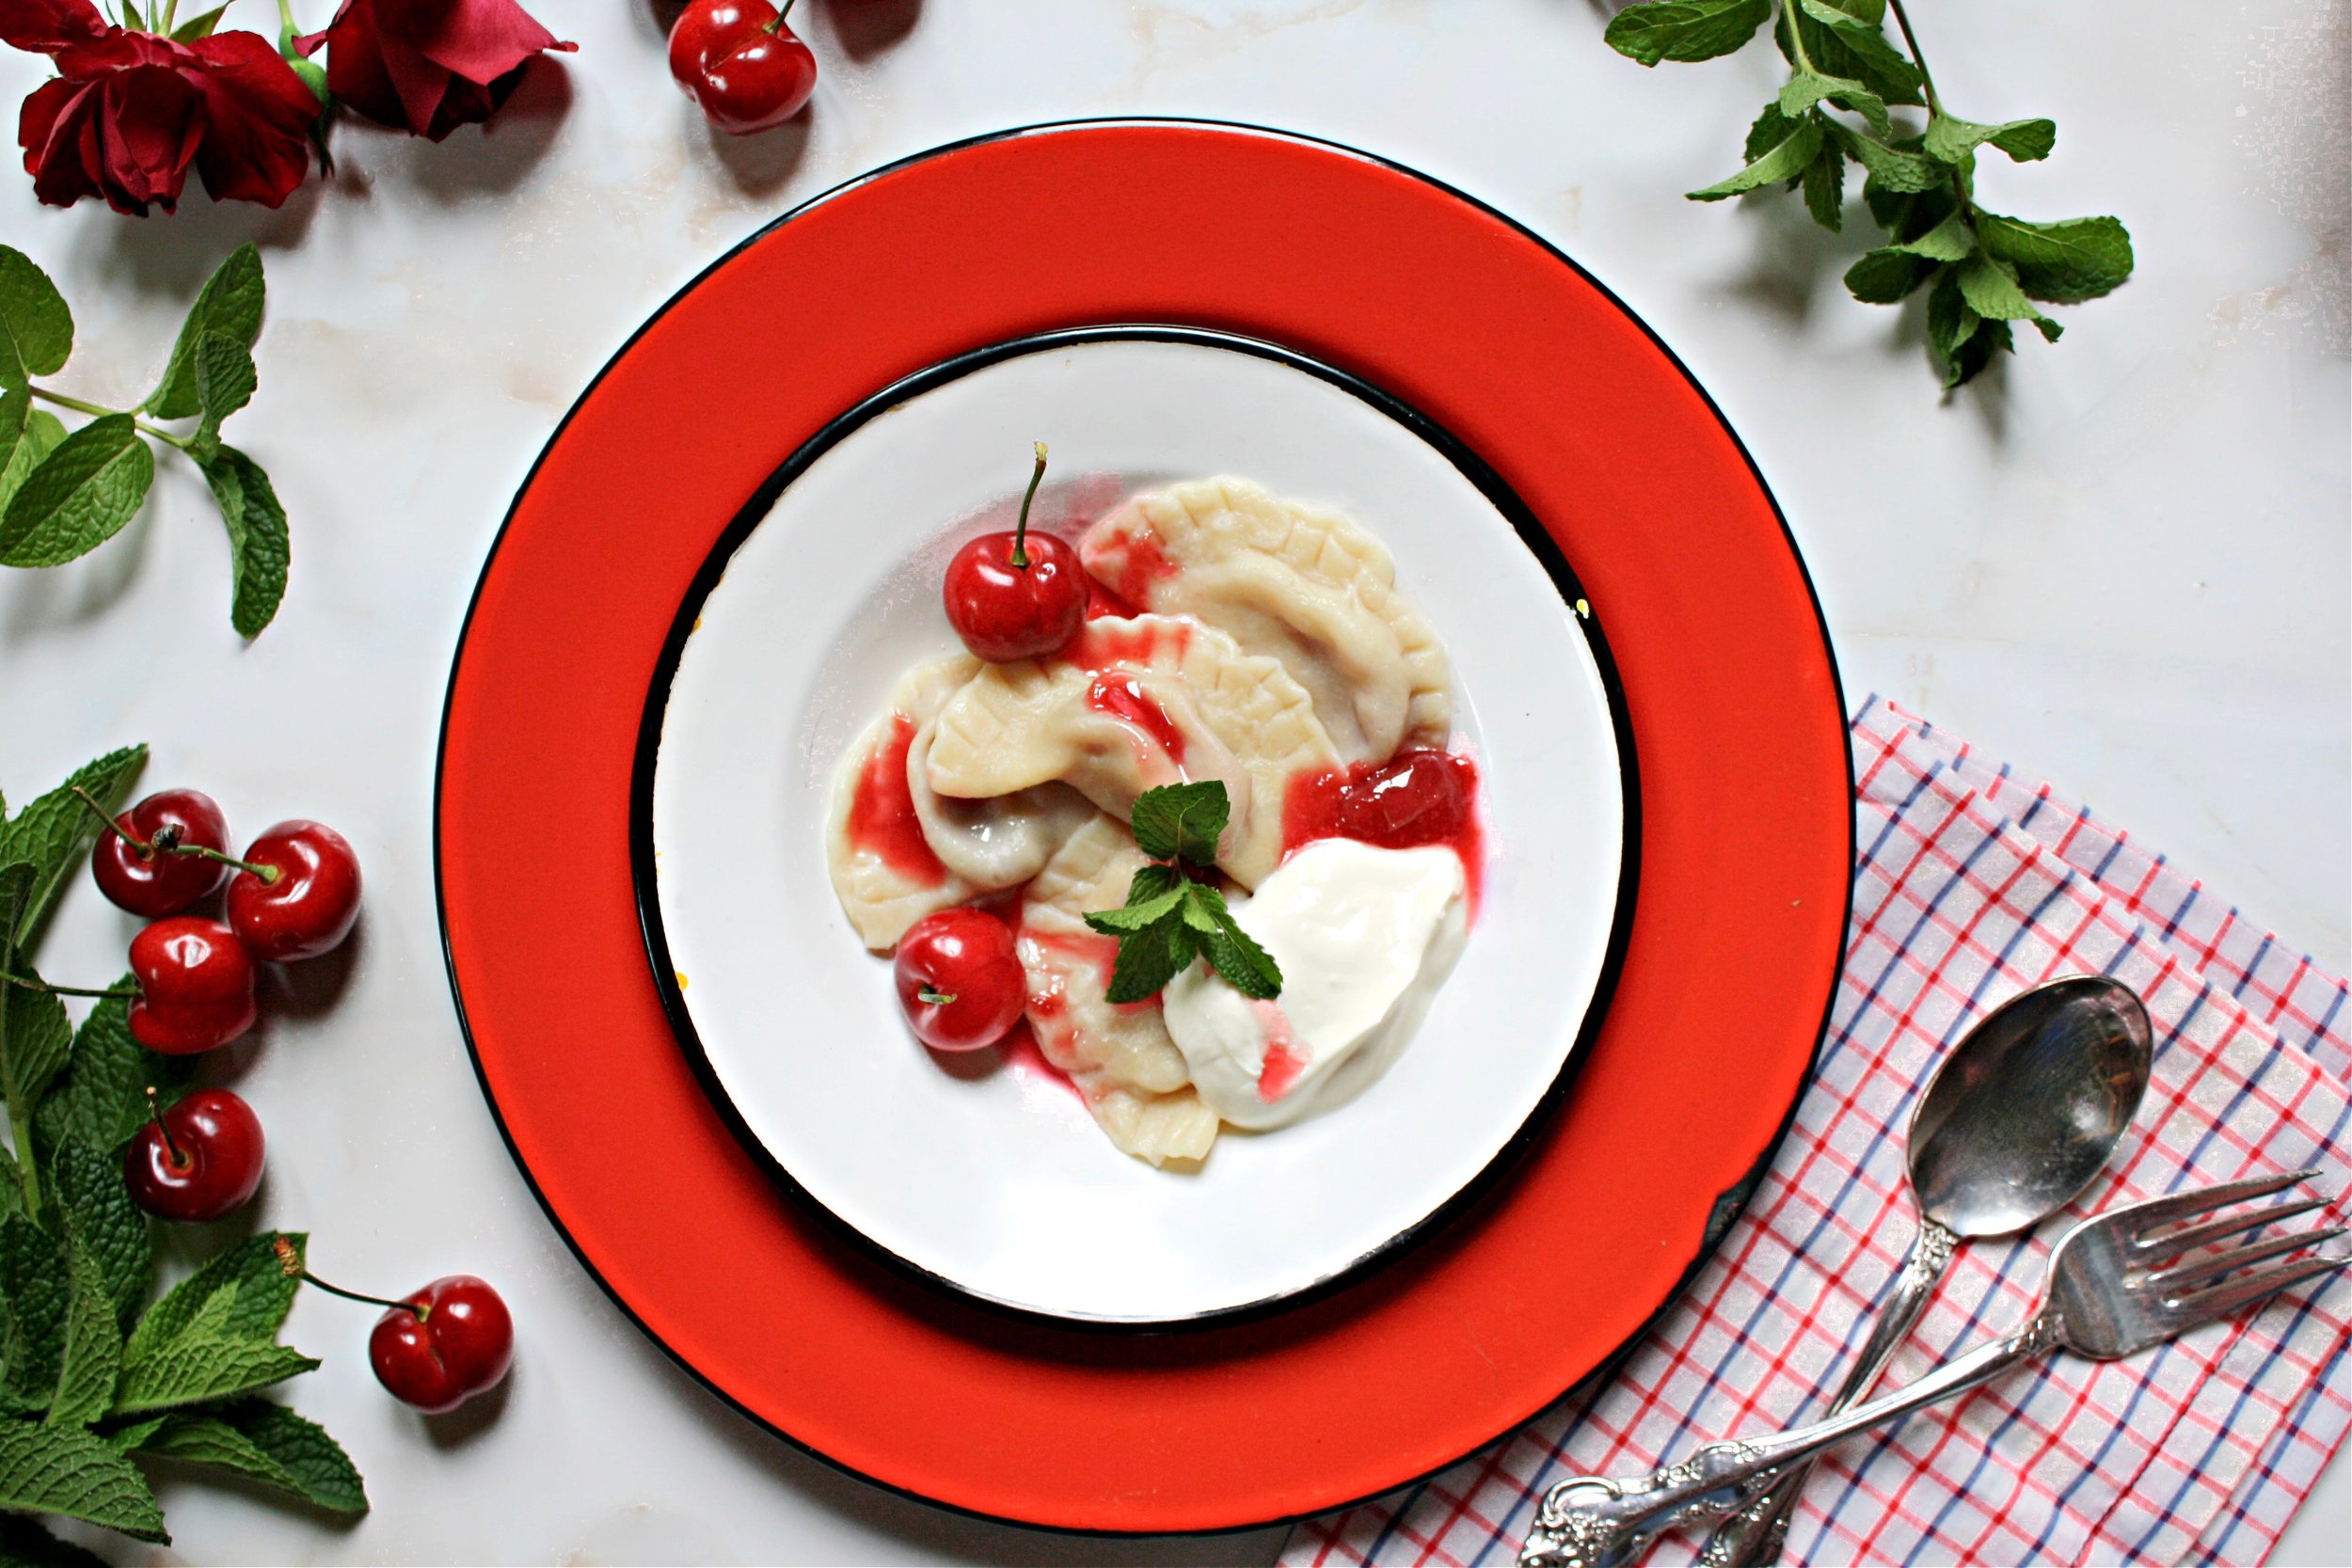
I love to serve cherry vareniki with a simple cherry sauce made from the extra filling, topped with big dollops of sour cream to balance out the sweetness. Like any kind of homemade dumpling or ravioli, vareniki take some effort to make, but are unquestionably worth the work. They’re ideal to make with a group of friends, and you can double or even triple the recipe as needed. 

Notes:

  • Vareniki freeze extraordinarily well, offering a way to preserve the best of fleeting cherry season for future bowls of sweet dumplings. Freeze uncooked in a single layer, then transfer them to a bag or airtight container for three months. 

Cherry Vareniki (Dumplings)
Serves: 4-6, makes about 50 vareniki
Prep time: 1 hour
Cook time: 10 minutes


Ingredients:
For the dough:

  • 3 cups + 2 Tbsp (400 g) all-purpose flour, plus more for dusting or as needed 

  • ¾ cup water

  • 2 Tbsp sour cream or plain Greek yogurt

  • 1 large egg, beaten

  • 1 tsp kosher salt

For the filling and sauce:

  • 1½ lb (680 g) cherries or sour cherries

  • ½ cup sugar

  • 1 tsp cornstarch

  • juice of ½ a lemon

  • sour cream, as desired, for serving

Directions:

  1. Start by making your dough: In a large bowl, combine the 3 cups of flour, water, sour cream, egg and salt. Mix until a shaggy dough forms, then transfer to a clean surface and knead until very soft, smooth and elastic, about 8-10 minutes. If the dough is very sticky, add additional flour 1 Tbsp at a time until it’s easy to knead and doesn’t stick to your hands. 

  2. You can also make this dough in a stand mixer with the dough hook attachment by adding all of the ingredients to the bowl, and mixing on the lowest speed until a shaggy dough forms. Turn up the speed to medium-low, and mix until smooth and soft, about 4-5 minutes. 

  3. Transfer the dough to a bowl and cover it with a lid or plastic wrap. Allow the dough to rest at room temperature for 1 hour. 

  4. While the dough is resting, start on your filling. Wash, dry and pit all of your cherries. If using a cherry pitter, cut the cherry in half after removing the pit. Add the cherries to a bowl with ½ cup of sugar, and let them sit and start to release their juices for a minimum of 30 minutes, or as the dough rests.

  5. Once your dough has rested for an hour and your cherries have been sitting for at least 30 minutes, you can begin shaping your vareniki. 

  6. Line a baking sheet with parchment, and heavily dust it with flour.

  7. Divide the dough into 4 pieces. Liberally dust both your rolling pin and your surface with flour. Roll out each piece of dough very thin, almost as thin as pasta; if you lift it up the dough light should come through it. 

  8. Cut out 2-inch rounds of dough using a water glass or biscuit cutter, lightly flour the rim of the glass or cutter before making rounds. Gather up the scraps into a ball and reserve to re-roll the dough one time, after that discard any scraps. Fill each round of dough with about a teaspoon of cherry, about 1-1½ cherries. Seal the dumplings into half-moon shapes, if needed dab the edges with water to help it stick, but the dough should be sticky enough to press together on its own. Using the tines of a fork, press the edges of the dough to ensure they’re properly sealed. 

  9. Transfer the formed dumplings onto the lined baking sheet. Reserve any remaining cherries for sauce. Repeat the process until you have used up all of the dough, and then place the dumplings in the freezer for a minimum of 15 minutes before cooking. While your vareniki are in the freezer you can bring a large pot of water to a boil. 

  10. While the water is coming to a boil, add the remaining cherries to a small pot. Bring the cherry mixture up to a boil, lower the heat and simmer the cherries for 10-15 minutes or until they are very soft and broken down. In a small bowl, combine 1 tsp of cornstarch with the juice of half a lemon. At the end of cooking the cherries, add the starch slurry, and simmer for an additional minute or until just thickened. If the sauce thickens too much, you can always thin it with water.

  11. Add vareniki, in batches if needed, to the pot of water (be careful not to overfill).. Once the vareniki float to the top, simmer them for an additional 5 minutes. If using frozen vareniki, it may take a few minutes longer for them to float to the top. Remove the vareniki from the pot and serve immediately. 

  12. Top the vareniki with sour cream and cherry sauce. 

In Holiday, Old World Recipes, Ukrainian, Vegetarian, Dessert Tags Ukrainian food, Vareniki, Varenykiki, Dumplings, Cherry Vareniki, Cherry dumplings, Soviet food, Russian Dumplings, Soviet Dumplings, Ukrainian Dumplings, Jewish food, Cherry
Comment
kreplachcooked_veg.jpg

Kreplach Two Ways - Chicken and Vegetarian

August 16, 2021

I will be teaching how to make these kreplach on August 22nd at 4:30 PST, for The Nosher’s High Holiday Cooking Class Series. The class if free to all, register via the link!

Kreplach became a staple of Ashkenazi cooking in Germany and Eastern Europe by way of Italian Jews. Kreplach are stuffed dumplings, often made with a dough that is similar to Italian ravioli or tortellini. They are traditionally served in chicken soup for holidays and Shabbat meals.

 Fillings for kreplach vary from home to home, as do their shapes and sizes. Here you’ll find two filling options: classic chicken and onion, and vegetarian mushroom and cabbage. The chicken filling can be made with the same chicken you might use to make your chicken soup, or with any pre-cooked chicken. The chicken gets shredded chicken and then mixed with caramelized onions and fresh herbs, making the kreplach flavorful and light. The mushroom and cabbage version is meaty with a rich flavor, and they are a great alternative for vegetarians.

The same dough can be used with any filling you desire and in any shape. Triangular-shaped kreplach are common, especially during Purim when it is customary to eat foods in the shape of a triangle. Kreplach are also often served for the pre-fast meal at Yom Kippur. While kreplach take a little time and effort to make, there are few dishes that are as rewarding, comforting, and festive as dumplings.

Kreplach Two Ways

(Makes 28-30 dumplings)

Ingredients for the dough:

  • 2 cups (270 g) all-purpose flour

  • 3 lg eggs, at room temperature

  • 1 Tbsp oil

  • 1 tsp kosher salt

To make the dough by hand: Add the flour to a large mixing bowl. Make a well in the middle of the flour, then add the eggs, oil, and salt. Using a fork, beat the eggs in the center of the well, then slowly begin to incorporate the flour into the egg mixture. Once you can no longer mix the dough with the fork transfer it onto a clean surface. Begin to combine the dough with your hands until it forms a ball; if it is very sticky add a little more flour. Knead the dough until silky and smooth, about 5-6 minutes. Wrap in plastic and refrigerate for at least one hour or up to 8 hours.

To make the dough in a food processor: combine all of the ingredients in the food processor. Pulse 5-6 times, then press on and let the food processor run until the mixture forms a ball, about 30-60 seconds. Transfer the ball of dough onto a clean surface, knead for one minute, wrap in plastic and refrigerate for at least one hour or up to 8 hours.

To assemble the kreplach: Divide the dough in half. Keep one half wrapped or covered while you roll out the first batch of dough.

Lightly dust your surface with flour, then roll out the dough as thin as possible; you should be able to almost see through the dough. Once the dough is rolled out, cut it into equal-sized 3” squares. Fill each square with approximately 1 teaspoon of filling, be careful not to overfill your kreplach.

Fill a small dish with water, then begin to form your kreplach. Dab the edges of the dough with water, then fold into a triangle shape, seal the edges by firmly pressing the dough, or by using the tines of a fork. Place the formed kreplach on a parchment-lined baking sheet; dust lightly with flour if they are sticky on the outside. You can cook the kreplach immediately, or place them in the freezer in a single layer. Once frozen, transfer them into an airtight container; they will last in the freezer for up to 3 months.

To cook and serve: When ready to cook, fill a large pot of water to a boil. Simmer the kreplach for 15-20 minutes, or until very tender. If cooking the kreplach from frozen, simmer for 5-10 minutes longer. Once cooked and tender, add the cooked kreplach to your soup and serve.

FILLINGS

Ingredients for the chicken filling:

  • 1.5 cups shredded cooked chicken

  • ½ a medium yellow or white onion, diced fine

  • 2 Tbsps chopped parsley or dill

  • Salt and pepper, to taste

  • Oil, as needed

To make the chicken filling: Shred the chicken. You can use the chicken from making your chicken soup, or rotisserie chicken.

Add a drizzle of oil to a pan over medium heat, then add the diced onion to the pan and cook until golden brown, about 10 minutes. Season with salt.

 In a bowl, combine the shredded chicken, browned onion, chopped parsley, and season with salt and pepper. The filling can be made up to 1 day in advance.

Ingredients for the vegetarian filling:

  • ½ a medium yellow or white onion, diced fine

  • 8 oz crimini mushrooms, chopped fine

  • 2 cups finely shredded cabbage

  • 1-2 Tbsps soy sauce or Worcestershire sauce

  • Salt and pepper, to taste

  • Oil, as needed

To make the vegetarian filling: Add a drizzle of oil to a large pan over medium heat. Add the diced onion to the pan and sauté until golden brown, about 10 minutes. Add the chopped mushrooms to the pan, and sauté until they have released all of their liquid and are beginning to brown, about 10 minutes. Add the cabbage and soy sauce to the pan. Sauté until the cabbage is softened, about 3-4 minutes. Taste and season with more soy sauce, salt, or pepper. Transfer to a bowl and allow to fully cool before assembling your kreplach. The filling can be made up to 1 day in advance.

kreplach_2shapes.jpg
In Holiday, Dinner, Vegetarian Tags Kreplach, Chicken Kreplach, Vegetarian Kreplach, Dumplings, Jewish Food, Kosher Food, Ashkenazi food, Holiday food, High Holiday food, Shabbat Food
Comment

Latest

Featured
IMG_3606.jpeg
May 27, 2025
Sheet-pan Lemony Potatoes and Baby Artichokes
May 27, 2025
May 27, 2025
IMG_3784.jpeg
May 12, 2025
The Secret to Crispy Tofu Every Time + A Sweet & Spicy Gochujang Glaze
May 12, 2025
May 12, 2025
snackingcakeslices copy.jpg
Apr 11, 2025
One-bowl blueberry lemon snacking cake (gluten-free/grain-free)
Apr 11, 2025
Apr 11, 2025
IMG_5075.JPG
Feb 24, 2025
Manti (meat dumplings) in brothy tomato sauce
Feb 24, 2025
Feb 24, 2025
matzoballsontablecloth.jpg
Jan 20, 2025
Golden Chicken Soup with Matzo Balls
Jan 20, 2025
Jan 20, 2025
harissatofuandchickpeas.jpg
Dec 18, 2024
Sheet-Pan Crispy Harissa Tofu, Chickpeas, and Broccolini
Dec 18, 2024
Dec 18, 2024
caracaracake.jpg
Dec 4, 2024
Cara Cara Orange Olive Oil Cake
Dec 4, 2024
Dec 4, 2024
IMG_0640.JPG
Nov 6, 2024
Easy Roast Turkey for Thanksgiving
Nov 6, 2024
Nov 6, 2024
IMG_3282.JPG
Sep 19, 2024
Apple and Honey Dumplings
Sep 19, 2024
Sep 19, 2024
IMG_7173.jpeg
Jul 31, 2024
Galette with any kind of fruit
Jul 31, 2024
Jul 31, 2024
IMG_4004.jpeg
May 9, 2024
Cheddar Cheese Coin Crackers
May 9, 2024
May 9, 2024
DSC02602.JPG
May 2, 2024
Asparagus, Gruyere & Swiss Tart
May 2, 2024
May 2, 2024
whitebeansoupwithzhug.JPG
Mar 11, 2024
Yemenite White Bean Soup with Zhoug
Mar 11, 2024
Mar 11, 2024
DSC02301 (1).jpeg
Jan 24, 2024
Celery, kohlrabi, date salad with toasted almond and sesame
Jan 24, 2024
Jan 24, 2024
DSC02138.jpg
Dec 3, 2023
Sweet potato latkes with cranberry salsa
Dec 3, 2023
Dec 3, 2023
kompot_main photo.JPG
Jul 11, 2023
Ukrainian Summer Fruit Kompot
Jul 11, 2023
Jul 11, 2023
cherryvareniki mainphoto.jpg
Jun 15, 2023
Cherry Vareniki
Jun 15, 2023
Jun 15, 2023
tzimmescaketopdown.jpg
Apr 19, 2023
One-Bowl Tzimmes Cake
Apr 19, 2023
Apr 19, 2023

Sign up with your name and email address to join my mailing list.

I respect your privacy.

Thank you!

Privacy Policy can be found here

All photos copyright of Sonya Sanford unless otherwise indicated