• Welcome
  • Book
  • Classes
    • Recipes
    • Index
  • Writing
  • Press
  • Shop
  • Contact
Menu

Sonya Michelle Sanford

  • Welcome
  • Book
  • Classes
  • Recipes
    • Recipes
    • Index
  • Writing
  • Press
  • Shop
  • Contact

Perfect Salmon with Rosemary and Lemon

October 26, 2016

Whenever I make salmon for a client, I always get asked: "How did you make this?" When I tell them, they are then always surprised by how easy it is.

The most important factor for me is that the salmon has to be high quality - e.g. wild and fresh. Previously frozen and defrosted salmon will not have the same texture as fresh salmon. It will likely turn out dryer. It's hard to make frozen salmon as awesome as fresh salmon. For me, making fish is a treat. Wild fresh fish is more expensive than previously frozen fish, but I treat it as a seasonal special occasion treat.

The second most important factor when cooking salmon is to not assume that one cooking time is going to work each time you make the dish. It may sound annoying, but it really is done when it's done.  Each salmon fillet is of varying thickness and density, and therefor will cook at differing rates. Over time, it gets easier and easier to tell when the fish is done just by looking at it and smelling it... but here's the trick for checking doneness: stick the tip of a knife blade into the thickest part of the fish. Put the blade against your lips, if it's hot/warm, it's cooked through. If the blade is cold it needs more time. This allows you to pierce the fish with minimal destruction, no need to slice it in half and ruin the fillet.

Everything else is incredibly simple. You can add whatever favorite herbs or sauces you like to your salmon using this method.

Roast Salmon with Rosemary and Lemon

  • Salmon fillet, either whole or cut into individual fillets (I like one's that are 6-8 oz per person)
  • Lemon, thinly sliced
  • Sprigs of fresh rosemary
  • Salt and pepper, to taste
  • Olive oil, to drizzle

Preheat the oven to 425°F.

On a parchment or foil-lined baking sheet, place the salmon skin side down. 

Salt and pepper the fish. Top each fish with thin slices of lemon and sprigs of fresh rosemary (either left whole or chopped fine). Drizzle the top of the fish with olive oil.

Bake for 7 minutes, then turn the pan around (or rotate pans if making salmon on two sheet pans). Depending on the thickness of the salmon, check on its doneness after another 5-6 minutes. Most salmon cooks in about 14-15 minutes. Serve immediately with your favorite sides. Leftover salmon keeps for 2 days in the fridge. 

In Lunch, Dinner Tags Salmon, Fish, Pescatarian, Cooking, Recipe
Comment

Spring Chicken

April 28, 2016

Like so many good things, this dish was discovered as a result of throwing together whatever I had in the fridge into one pot and putting it into the oven. Since then, I've been cooking it on repeat.

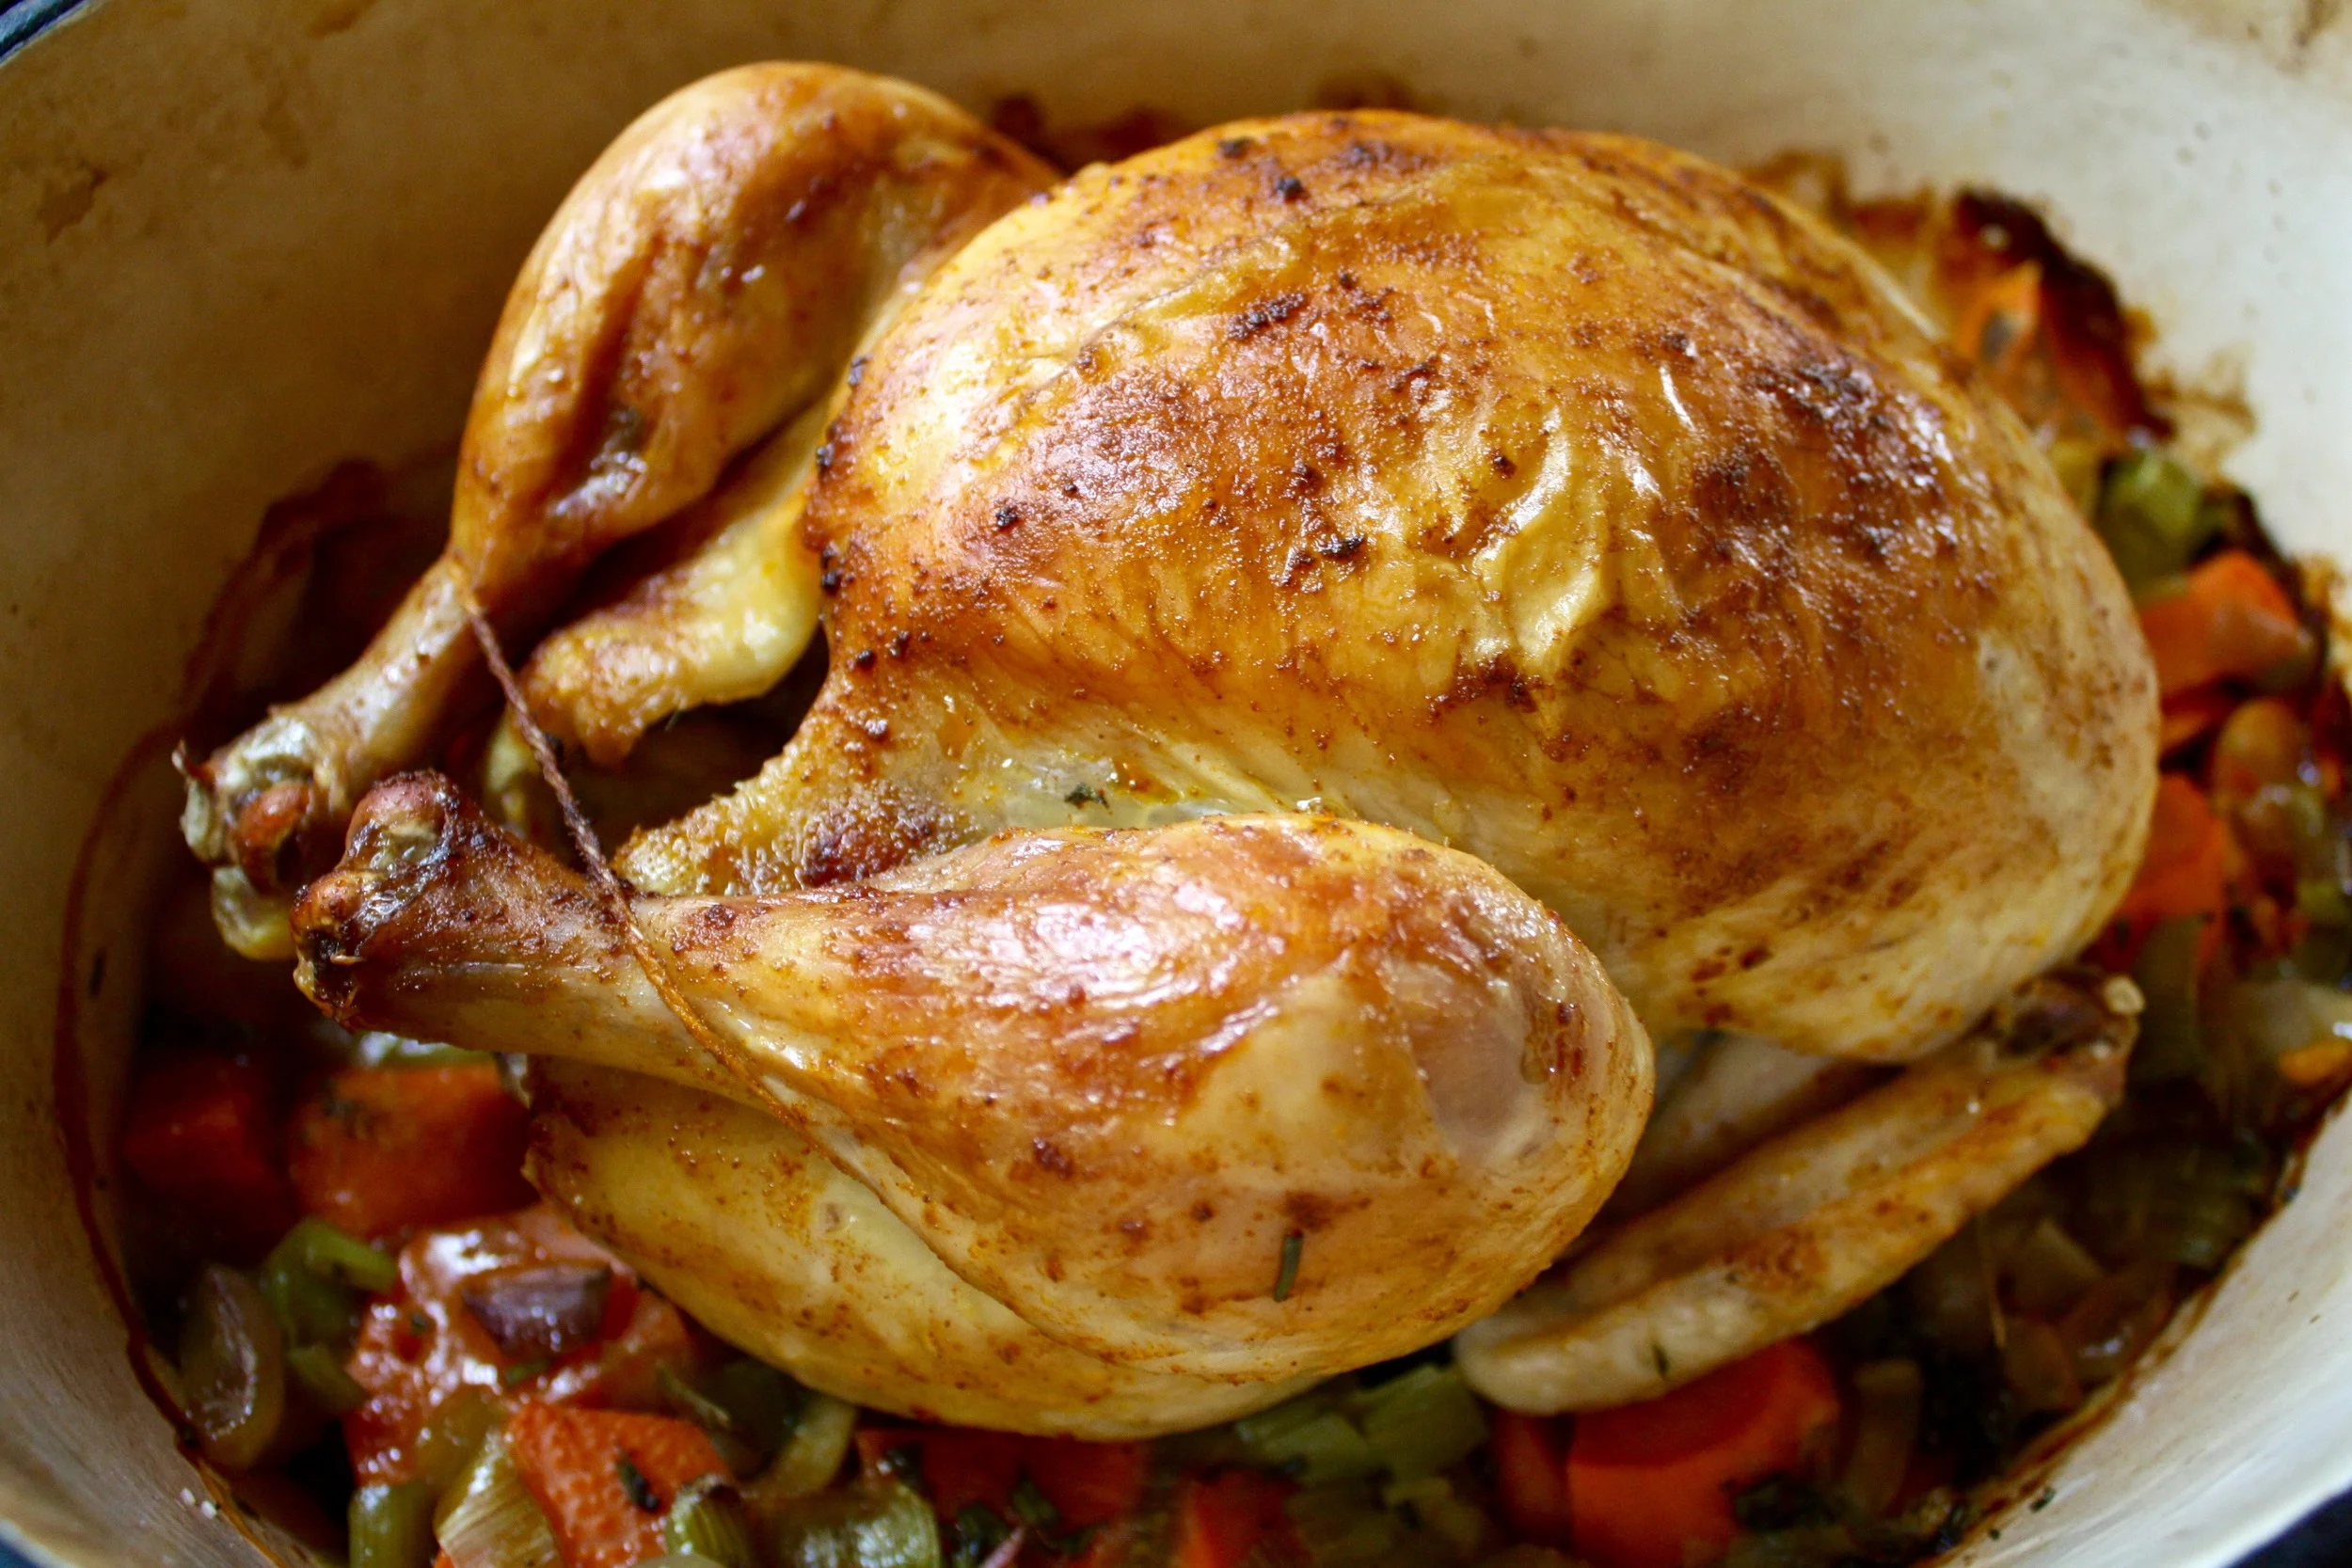
It was a Sunday, I had two large leeks leftover from another meal sitting hopefully in the fridge. I had a pile of good sweet potatoes (yams) sitting in a bowl on my counter. I had a whole chicken waiting to be roasted. When everything came together and ended up on the table, we ate the first few perfect bites in total happy silence.

I can and have cooked chicken dozens of ways, but among my favorite preparations is putting the entire bird into a Dutch oven. You can make this recipe in a deep casserole dish or even in a roasting pan, but I can't guarantee the same success. There's just something that ceramic cast iron does to the bird: the meat stays tender, the skin gets perfectly browned, the flavors are somehow more pronounced. Yes, these pots are generally expensive. I have been lucky enough to have been gifted a few that I otherwise would not have been able to afford, but I also have a pot that I got years ago for $50 dollars at World Market and it's the one that I made this chicken in, and I continue to use this cheaper less sexy Dutch oven for countless other dishes. The point is, any cast iron pot will do. Even a plain lodge cast iron pot would be great. If you don't have one, this one time investment will last forever and will be a welcome addition to your kitchen.

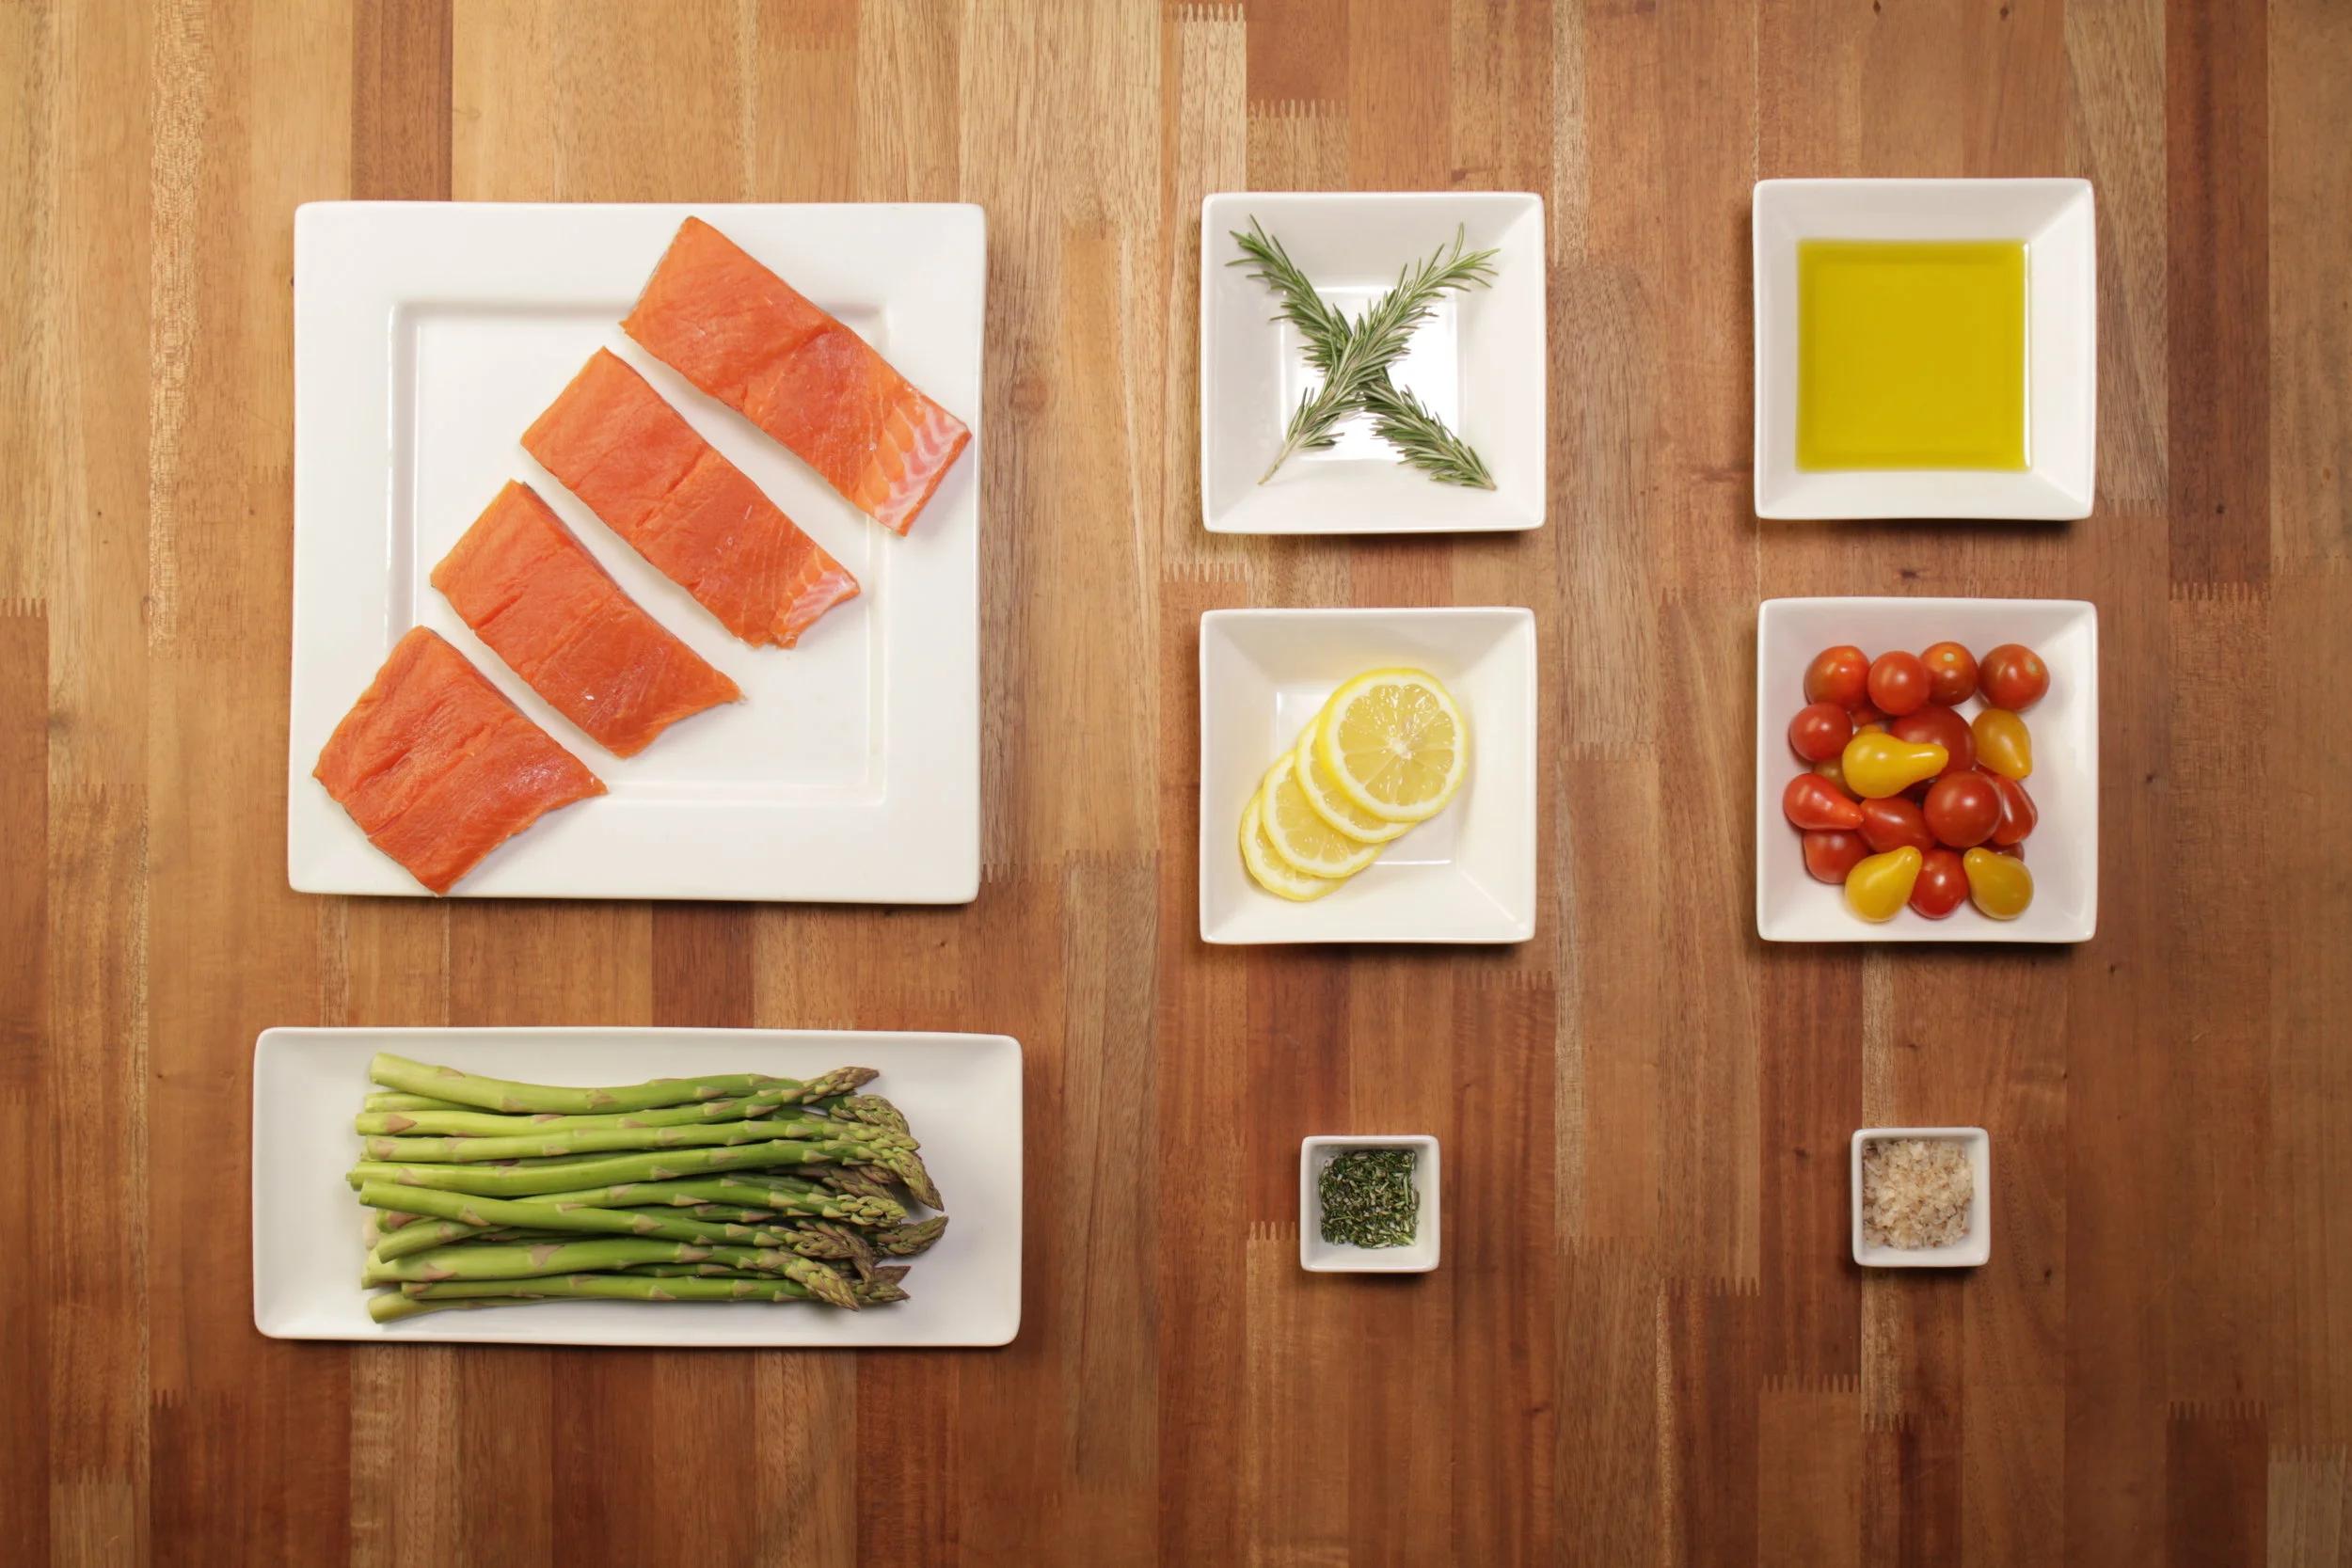
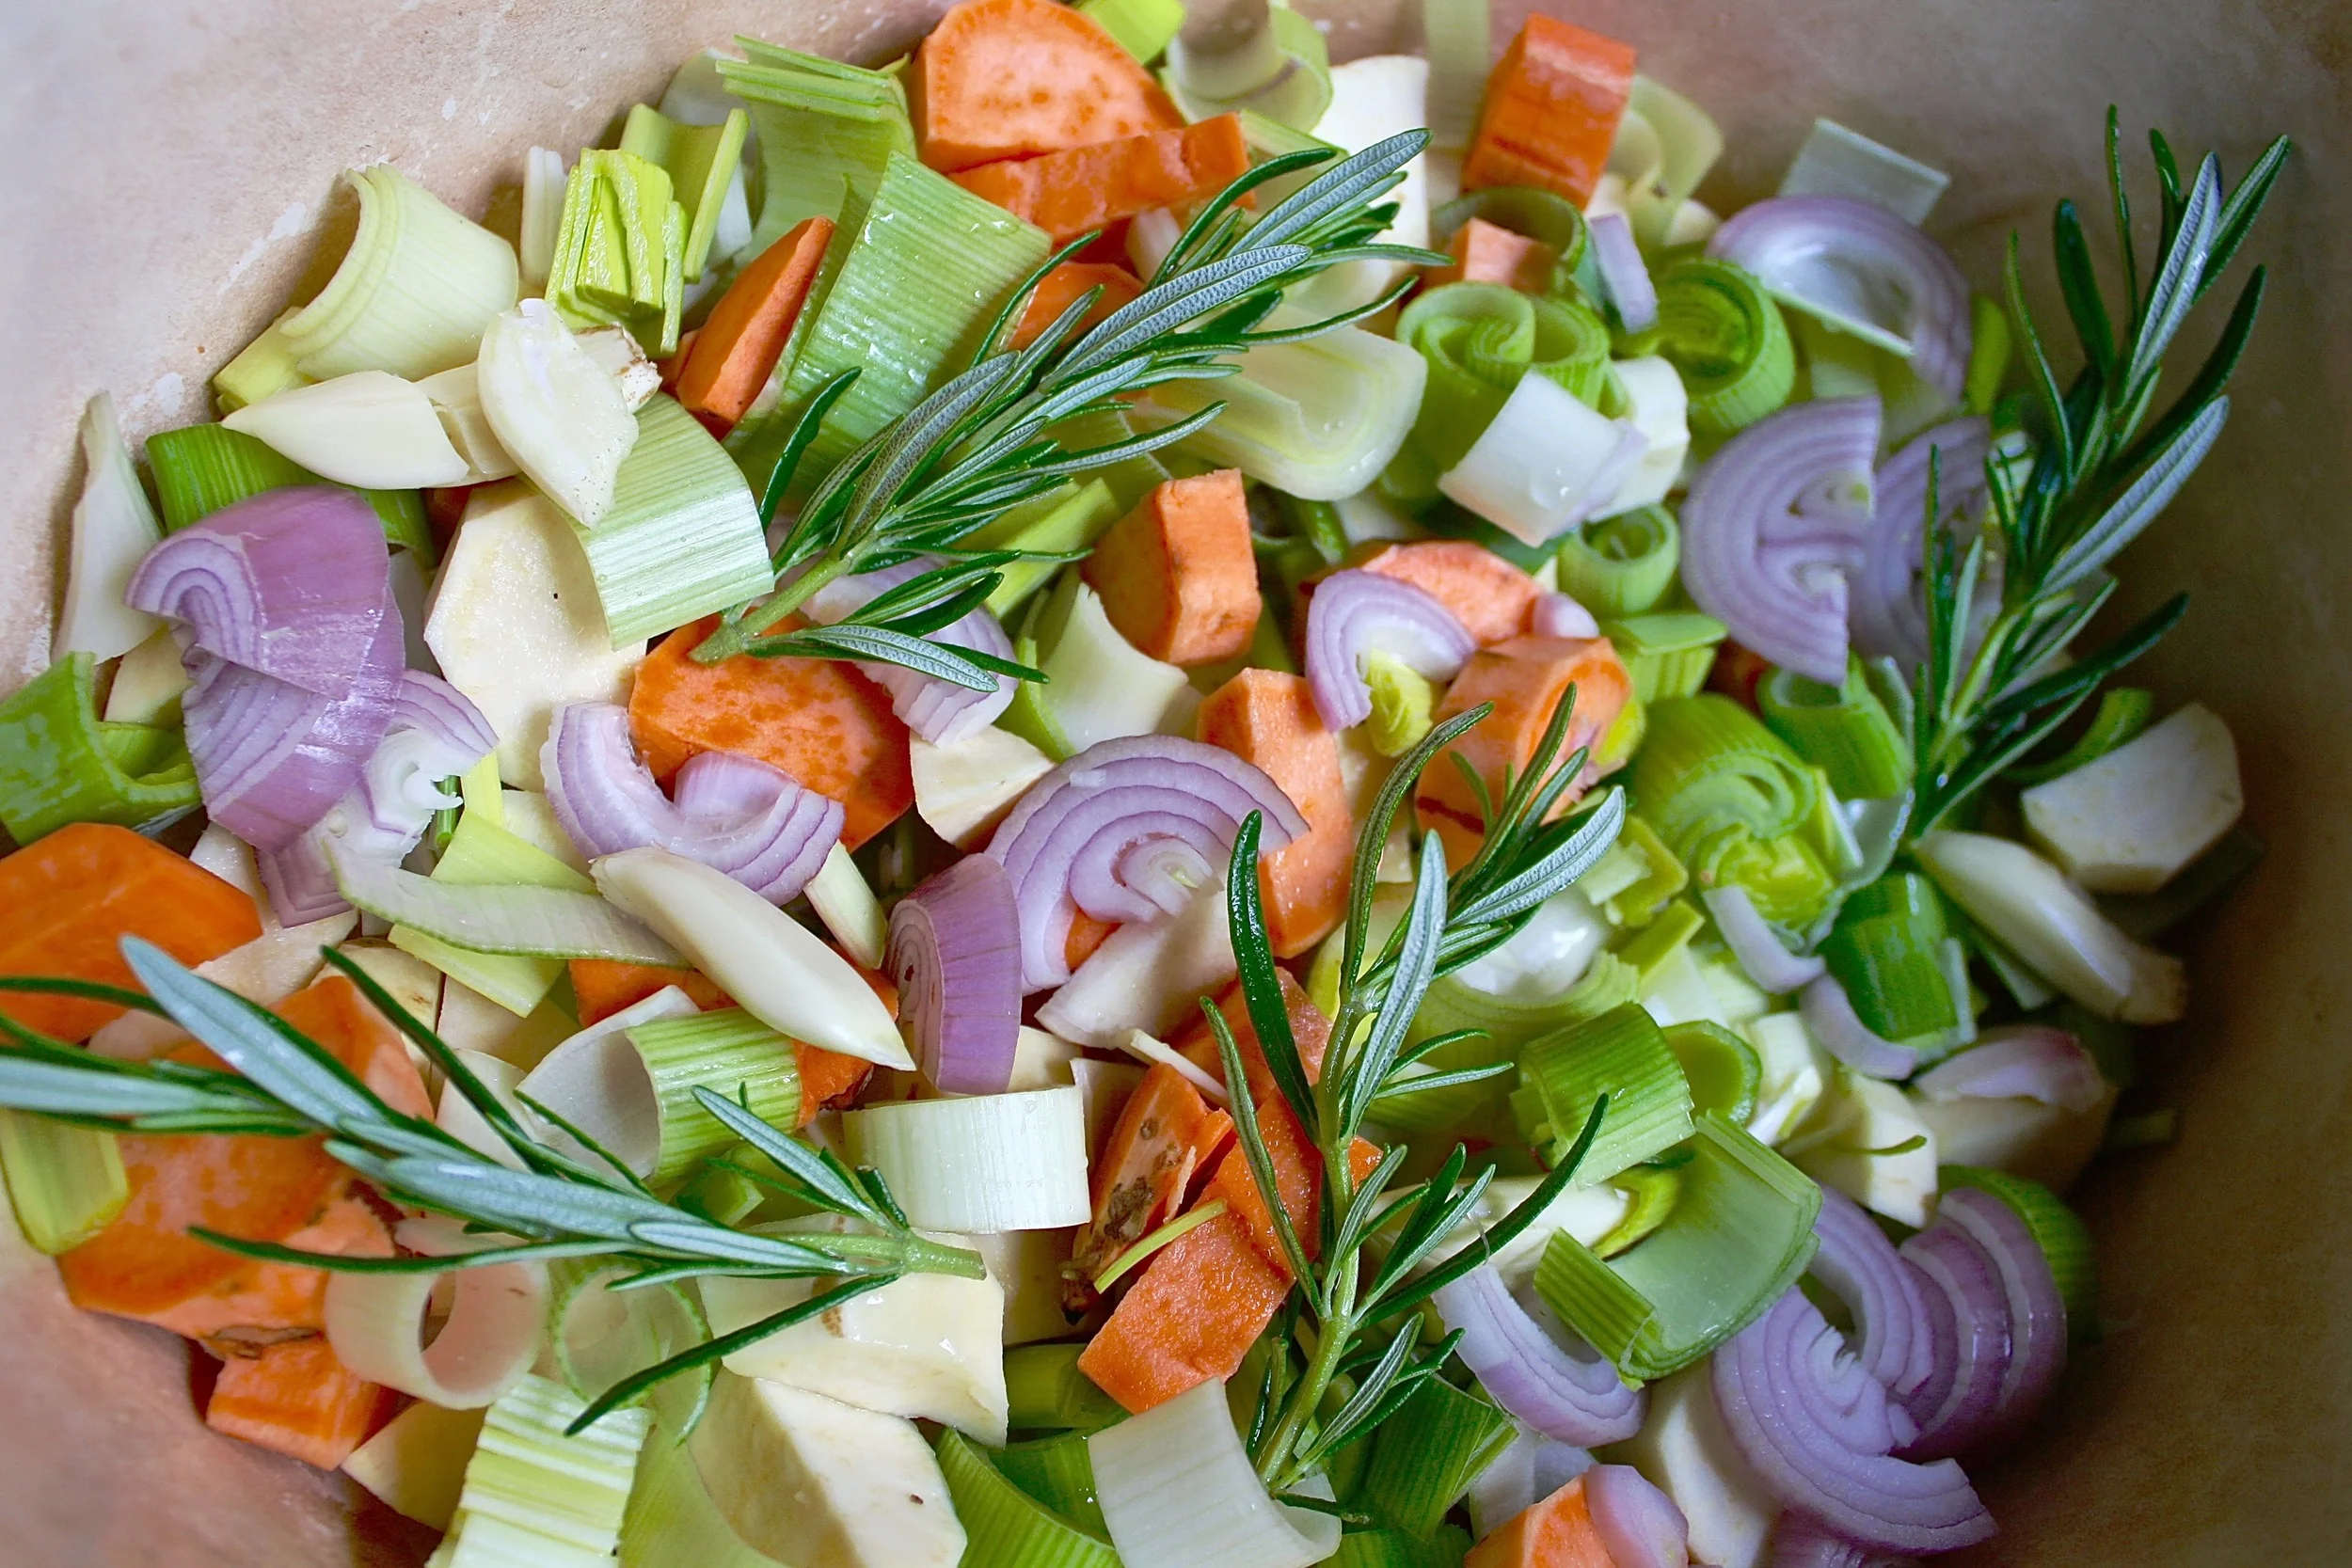
This recipe can be modified endlessly. I like to use Japanese sweet potato alongside the beautiful orange variety. I like to throw in a shallot or two for a contrasting onion note. I would happily swap out sweet potatoes for carrots and parsnips, or plain good quality potatoes if I didn't have yams on hand. I sometimes use fresh rosemary, and sometimes I use fresh thyme. Sometimes I use both. I could get away with neither. You get the picture...

But in its best form, this dish is about leeks and sweet potatoes, leeks and sweet potatoes, and leeks and sweet potatoes. Cooked down with the chicken, the aromatic sweetness of the leeks marries with the floral sweetness of the potatoes in rich chicken drippings. The vegetables get very soft, the leeks become unrecognizable, and it all goes so well with perfectly cooked, deeply savory, crisped roast chicken.

All this glory comes together quickly and easily. Everything is thrown into one pot, everything is cooked at the same time, no extra sides are necessary (unless desired). This is a very happy Sunday night meal.

One Pot Roast Chicken with Leek and Sweet Potato

Serves 4-5

  • 1 whole 5 lb. chicken, or you can use the same weight of just white or dark meat pieces (but you will want skin on bone in pieces)
  • 3-4 medium sweet potatoes (1 lb./450g) (any variety or mix of varieties)
  • 2 large whole weeks (1 lb./ 450g)
  • 1 large shallot (3-4 oz / 90g)
  • 4-5  large cloves of garlic, smashed and peeled
  • 3-4 sprigs fresh rosemary
  • kosher salt, to taste
  • freshly ground pepper, to taste
  • Hungarian parika, to taste (optional)
  • Olive oil, to drizzle
  • juice of 1/2 a lemon
  • 1/2 cup water (or white wine or chicken stock if you have it)

Preheat oven to 375°F.

Cut the sweet potatoes into chunks that are no more than 1" in thickness. If the chunks are too thick they might not cook through. Trim the green tops off of of the leek. Use the white/light green part of the leeks by cutting them in half lengthwise, and then washing them well to remove all of the grit. Roughly chop or slice the leeks into half moons, their thickness is totally up to you. Halve the shallot lengthwise and cut it into half moons.

To a pot add the chopped sweet potato, leeks, shallot, smashed garlic, and whole springs of fresh Rosemary (the leaves will come off the stems as everything cooks. Season lightly with salt and pepper.

Generously season the whole chicken with salt and pepper, inside and out. Top with paprika if using Drizzle the chicken generously with olive oil, and rub the oil all over the outside of the chicken.

Place the seasoned chicken into the pot on top of the sweet potato mixture.

Squeeze the juice of half a lemon over the chicken. Add 1/2 a cup of liquid to the pot, drizzled all over the veg. The liquid will help cook the vegetables and keep everything from getting too dry.

Put the lid on the pot (if using a deep casserole dish or roasting pan, cover the dish/pan tightly with foil). Cook with the lid on for 45 minutes. Cook with the lid off for the rest of the cooking time, about 30 minutes - depending on the size of your chicken. You know the chicken is done when it is golden brown, the juices run clear when pierced, or when the internal temperature reaches at least 165°F when tested with a meat thermometer.

Once the chicken is cooked, let it rest for at least 10 minutes before serving. Carve, and serve the chicken with the cooked sweet potatoes and leeks.

In Dinner, Lunch Tags chicken, roast chicken, one pot meal, one pot chicken, sweet potatoes, leeks, sweet potato and leeks, roasted vegetables, dinner, sunday night, lunch
Comment
Photo by Eric Slatkin

Photo by Eric Slatkin

Mexican Inspired Matzo Brei

April 19, 2016

Matzo Brei is easily one of my favorite types of Passover food tied only with matzo pizza (because pizza anything is the best). 

There are endless variations on matzo soaked in egg and cooked in fat (ideally butter). This is my favorite version: it's reminiscent of Huevos Rancheros or even a good Chilaquiles. The crispy buttery matzo combines perfectly with a little heat from the sauce, creamy avocado, and fresh cilantro. 

Ranchero sauce is made of chilis, peppers, and aromatics that are cooked and blended together, but you can also find many good pre-made Ranchero salsas at the market. It can also be substitutes with almost any another kind of chili based sauce that you prefer. 

Whether you make the matzo brei savory, sweet, or spicy, I've learned that one thing that is critical for good brei is a generous amount of butter or oil. Without a good amount of fat, the matzo can become dry and brittle. With fat the matzo is creamer and gets crisped and golden on its edges.

This recipe is featured in our Passover Assembly Line series! Video below.

Chag Sameach!

Mexican Matzo Brei

Serves 2-4

for the matzo brei-

  • 4 matzos
  • 4 large eggs
  • 2-3 tablespoons heavy cream
  • 1 tablespoon ranchero salsa (homemade or store bought)
  • ½ teaspoon salt
  • ½ teaspoon ground cumin
  • ½ teaspoon ground coriander
  • ¼ teaspoon chili powder
  • 4 tablespoons butter

for the toppings-

  • 1 avocado, cut into thin slices
  • 2 scallions, sliced thin
  • ½ cup cilantro leaves
  • sour cream, to taste
  • hot sauce, to taste

Start by breaking up your matzo into large chunks into a sieve or colander. It’s ok if the matzo pieces are uneven. Rinse the matzo under cold water until dampened and just softened, about 10-15 seconds.

In a large bowl, whisk the eggs, cream, ranchero salsa, spices, and salt together. Add the soaked matzo to the bowl, and stir until the matzo is coated in the egg mixture.

Heat a large nonstick or well-seasoned cast-iron skillet over medium heat. Add the butter to the pan. Once the butter has fully melted, add the matzo mixture to the pan in an even layer. Allow the matzo to cook and brown on one side for  2-3 minutes. Flip the matzo pieces over and cook them on the other side until they are nicely browned as well, another 2-3 minutes.

Transfer to a large serving platter or individual plates. Top with sliced avocado, fresh scallion, cilantro, and sour cream and hot sauce if desired. Serve immediately.

In Holiday, Breakfast, Lunch Tags Passover, pesach, matzo brei, matzah brei, matzo, mexican, mexican jewish, jewish food, vegetarian
Comment

Citrus, Pomegranate and Mint Salad

January 21, 2016

Tu B’Shevat Citrus, Pomegranate, and Mint Salad

Serves 4-6 (recipe can be doubled or tripled as needed)

for the salad-

  • 1 small head of lettuce, your favorite variety (Speckled, Romaine,Little Gem)
  • 2 small Cara Cara oranges (or any available orange)
  • 1 small blood orange (or any available orange)
  • 2 tangerines
  • ½ cup feta cheese, cubed small or crumbled
  • ⅓ cup pomegranate seeds
  • ¼ cup fresh mint leaves, chopped

for the dressing-

  • 1 tablespoon pomegranate molasses
  • 1 tablespoon fresh lemon juice
  • 1 teaspoon honey, or to taste
  • ½ teaspoon salt
  • ⅓ cup extra virgin olive oil

Start by removing the peel and outer membrane from all of the citrus. Slice off the very top and bottom of the fruit. Next, cut the peel and outer membrane away from the flesh by standing the fruit on its bottom and carefully run the knife alongside the fruit, cutting away the peel one section at a time. Once you have cut away the peel, slice the citrus into half inch rounds. Alternatively, you can also fully supreme the fruit.

Lay the lettuce leaves down into your serving platter or bowl. If using large leaves of lettuce, slice the lettuce into smaller pieces. Lay the fruit on top of the lettuce. Sprinkle with pomegranate seeds and fresh mint. Season with a pinch of salt.

In a small bowl, whisk together the pomegranate molasses, lemon juice, honey and salt. Slowly whisk in the olive oil. Taste and adjust according to your liking. Drizzle the dressing over the salad and serve.

In Lunch, Dinner, Vegetarian, Vegan Tags Salad, Tu B'Shevat, Citrus, Blood Orange, Cara Cara Orange, Feta, Mint, Holiday, Vegetarian
Comment

Photo by Eric Slatkin.  This recipe was developed for and first appeared on ASSEMBLY LINE

All Things Green Avocado Toast

January 5, 2016

Like many, I crave green fresh things at the start of the year. Even in LA it's dreary and cold, and fresh vegetables and leafy greens are very welcome after all of the rich food eaten over the holidays.

There are some food trends that are classics. I don't think I'll ever get tired of avocado toast. We're lucky to have so many good avocados in California year round. While I'm often homesick for the Pacific Northwest, avocados and other incredible produce are the things I love most about living here. Simple avocado on toast is perfect, but this is a gussied up version that takes little extra effort. Sometimes I like to start the day with a little extra time put into breakfast.

You don't really need a recipe, but here's one just in case. The idea is to add some fresh herbs, some protein in the form of pistachios, some spice with a little bit of thinly sliced jalapeno (optional), and a not of acid with lime zest and juice to this classic toast. There are endless variations and possibilities but I love the combo of creamy avocado paired with herbs, citrus, and nuts. Happy new year!

All Things Green Avocado Toast

Serves 1-2

  • 2 large slices seeded multigrain or sprouted grain bread
  • 1 avocado, sliced thin
  • ¼ jalapeno, very thinly sliced
  • 4 large basil leaves
  • 4 chives
  • 1 tablespoon fresh parsley leaves
  • 1 tablespoon fresh cilantro leaves
  • 2 tablespoons shelled roasted unsalted pistachio nuts, chopped
  • 1 teaspoon lime zest, or to taste
  • fresh lime juice, to taste
  • extra virgin olive oil, drizzle to taste
  • salt and freshly ground pepper to taste

Start by toasting your bread slices. While the bread is toasting, prepare the other ingredients. Halve your avocado, and slice the avocado halves thin. Slice half a jalapeno pepper very thin. 

On a cutting board, pile the basil, chives, parsley and cilantro together. Roughly chop all of the herbs. Roughly chop the pistachios. 

Once your bread is toasted, top each slice with half of the avocado. Top the avocado with a few slices of jalapeno, if using. Top the jalapeno with your herb mixture. Top the herbs with chopped pistachios. Grate some fresh lime zest over each slice of toast. Squeeze lime juice over the toast.

Drizzle the olive oil over each slice. Finally, garnish the toast with salt and pepper, to taste.

In Vegan, Vegetarian, Lunch, Breakfast Tags avocado, avocado toast, toast, vegan, vegetarian, delicious, snack, breakfast
Comment

Daikon and Potato Latke with Ponzu Dipping Sauce

December 8, 2015

My love of Japanese food led me to reconsider the traditional Hanukkah potato latke served with applesauce and sour cream. Don’t get me wrong, classic latkes are delicious, but sometimes I love a little variety on my holiday table. Traditional Japanese tempura is often served with citrusy Ponzu sauce and finely grated Daikon radish. The salty tangy Ponzu, accompanied with the fresh cool Daikon are as welcome to latkes as they are to lightly fried vegetables and fish. Adding Daikon to the batter as well makes these latkes a touch sweeter and lighter than their all-potato counterparts. Flavorful sharp scallion garnish the latkes and bring a touch of brightness to the final dish. 

The recipe can be halved, but you may want to even double it. These latkes will go fast!

Daikon and Potato Latkes with Ponzu Dipping Sauce

Makes 24-27 Latkes, Serves 8-10 (recipe can be easily halved or doubled)

for the latkes-

  • 1½ lbs. (680 grams)  Russet potatoes, about 3-4 medium sized
  • 1½  lbs. Daikon radish (680 grams)
  • 1 large yellow or white onion
  • 3 medium scallions, sliced fine
  • 2 large eggs, beaten
  • ¼ cup all purpose flour (can be substituted with all purpose gluten free flour)
  • 1½ teaspoons kosher salt
  • peanut or vegetable oil, as needed

for the Ponzu sauce-

  • ½ cup light soy sauce
  • juice of 1 large orange, about ½ a cup
  • juice of 1 lemon, about ¼ cup
  • 3 tablespoons mirin
  • ¼ teaspoon red pepper flake, or to taste

for garnish-

  • ½ lb. (230 grams) Daikon radish, peeled and finely grated
  • sliced scallion, to taste

for the Ponzu sauce-

Start by making the Ponzu sauce. Add the soy sauce into a medium sized bowl. Juice the lemon and orange through a strainer over the bowl of soy sauce. Add the mirin and pepper flake, whisk until combined. Set aside and reserve.

Ponzu sauce can be made ahead and will keep up to 1 week in the fridge.

for the latkes-

Preheat the oven to 325°F/165°C.

Peel and grate the potatoes, Daikon, and onion into a large bowl. Using a clean dish towel, squeeze the moisture out of the combined potatoes, Daikon and onion. This step ensures a crispy latke!

To a large bowl, add the potatoes, Daikon and onion. Add the sliced scallion, beaten eggs, flour and salt to the bowl. Mix until just combined.

Line a sheet pan with paper towels.

Add about ⅛-¼ inch of oil to a large heavy-bottomed skillet, cast iron is ideal. Over medium high heat, allow the oil to get hot. Test the oil with a small piece of potato. If it immediately starts to sizzle and bubble the oil is ready. Form the latkes into small thin patties. I make mine to fit the palm of my hand, but these can be as wide or small as you prefer.

Carefully add the latkes to the hot oil. Brown on one side for 2-3 minutes, flip and brown for another 2-3 minutes. Occasionally, rotate the pan or adjust the heat to ensure even browning and cooking. Like pancakes, the first batch is usually the worst, so don’t get discouraged. When browned and crispy on each side transfer the cooked latkes to the lined sheet pan and allow to rest.

Fry the latkes in batches, be careful not to crowd the pan. Add more oil as necessary to maintain a constant level. Adding more oil will drop the temperature, so adjust the heat as necessary.

Keep the latkes warm in the oven until ready to serve (remove paper towels from sheet pan). Serve warm and fresh!

for the garnish-

Using a microplane or the small size on a box grater, grate the Daikon radish. Thinly slice the scallion.

to serve-

Top each latke with the grated Daikon radish and sliced scallion. Serve alongside the Ponzu dipping sauce.

In Vegetarian, Dinner, Lunch, Appetizer Tags Latke, Jewish food, Japanese, Ponzu, Dipping Sauce, Vegetarian, Hanukkah, Chanukkah, Holiday fodo
Comment

Mushroom and Goat Cheese Tart

November 23, 2015

Whether you're looking to make a substantial vegetarian dish for your Thanksgiving table, or whether you just love making savory tarts any time of year, this recipe is super easy, delicious, and endlessly modifiable.

Yes, it uses store bought puff pastry. In terms of pre-made things, puff pastry and phyllo dough are two of things I prefer to buy already made. They're complicated and time consuming pastry to make at home, and there are excellent versions of both at the market.

In the picture above I made the tart without egg and creme fraiche/sour cream. The egg and cream will bind the mushrooms a little better, but frankly, I didn't mind it with the mushrooms coming apart a bit. It tasted more mushroomy. If you do use the egg binder, then make sure you're mixture isn't too wet or your tart will get soggy.

If you're not a mushroom fan, you can take the same principles for making this tart, and make it with a combination of any other kind of filling: roasted squash and fennel, sautéed zucchini pepper and feta, potato leek... you get the idea. Basically, you want the filling to be mostly or partially cooked, so that you're really just putting the tart in the oven for the pastry's sake.

You can check out a video of this recipe on our Thanksgiving Pies series over at The Assembly Line . You can also follow us on Instagram or Facebook for weekly recipes and videos.

Mushroom Goat Cheese Tart

Makes one tart, serves 6-8

  • 2 tablespoons butter
  • 2 tablespoons olive oil
  • 2 shallots, sliced thin
  • 1 lb. mushrooms, sliced thin (crimini, oyster, hen of the woods, chanterelles or
  • whatever is available)
  • 3 cloves garlic, minced fine
  • splash of sherry vinegar
  • 1 teaspoon kosher salt
  • freshly ground pepper
  • ¼ cup sour cream (or creme fraiche)
  • 1 medium egg
  • ⅓ cup goat cheese, crumbled (or to taste)
  • 2 sprigs thyme, leaves removed from stem
  • 1 sheet puff pastry, thawed and cold
  • chopped chives, for garnish

Preheat oven to 400°F.

In a large skillet, add the butter and olive oil. Add the sliced shallots to the butter and oil. Stir and let the shallots heat up for 2 minutes, until just fragrant and slightly softened. Add the mushrooms to the shallots, and cook until the mushrooms are softened and the moisture has evaporated, about 5-6 minutes. Add the garlic and sherry vinegar to the pan and sauté for an additional 1-2 minutes. Season generously with salt and pepper. Transfer the mixture to a bowl, and allow the mushrooms to fully cool.

In a small bowl combine the sour cream and egg until the egg is fully incorporated. Add the sour cream mixture to the cooled mushroom mixture in the bowl, stir until fully combined.

Roll out your puff pastry so that it is larger in size than a large dinner plate. Using the dinner plate upside down as a stencil, cut a circle out of the puff pastry. Using a smaller salad plate, gently score an inner circle inside of the larger puff pastry circle. Using a fork, gently poke the inner circle of the puff pastry.

To assemble the tart- Add the mushroom mixture to the inner circle of pastry. Use a slotted spoon to transfer the mushrooms, any extra liquid can remain in the bowl. Top with goat cheese and thyme. Brush the outer edges of the pastry with egg wash.

Bake for 20-25 minutes, or until the pastry is browned and fully cooked.  Once fully cooked, top with fresh chives. Serve warm or at room temperature.

In Dinner, Lunch, Vegetatian, Appetizer Tags Mushroom, vegetarian, vegetables, tart, pastry, savory, goatcheese, dinner, thanksgiving, side
Comment
← Newer Posts

Latest

Featured
IMG_3606.jpeg
May 27, 2025
Sheet-pan Lemony Potatoes and Baby Artichokes
May 27, 2025
May 27, 2025
IMG_3784.jpeg
May 12, 2025
The Secret to Crispy Tofu Every Time + A Sweet & Spicy Gochujang Glaze
May 12, 2025
May 12, 2025
snackingcakeslices copy.jpg
Apr 11, 2025
One-bowl blueberry lemon snacking cake (gluten-free/grain-free)
Apr 11, 2025
Apr 11, 2025
IMG_5075.JPG
Feb 24, 2025
Manti (meat dumplings) in brothy tomato sauce
Feb 24, 2025
Feb 24, 2025
matzoballsontablecloth.jpg
Jan 20, 2025
Golden Chicken Soup with Matzo Balls
Jan 20, 2025
Jan 20, 2025
harissatofuandchickpeas.jpg
Dec 18, 2024
Sheet-Pan Crispy Harissa Tofu, Chickpeas, and Broccolini
Dec 18, 2024
Dec 18, 2024
caracaracake.jpg
Dec 4, 2024
Cara Cara Orange Olive Oil Cake
Dec 4, 2024
Dec 4, 2024
IMG_0640.JPG
Nov 6, 2024
Easy Roast Turkey for Thanksgiving
Nov 6, 2024
Nov 6, 2024
IMG_3282.JPG
Sep 19, 2024
Apple and Honey Dumplings
Sep 19, 2024
Sep 19, 2024
IMG_7173.jpeg
Jul 31, 2024
Galette with any kind of fruit
Jul 31, 2024
Jul 31, 2024
IMG_4004.jpeg
May 9, 2024
Cheddar Cheese Coin Crackers
May 9, 2024
May 9, 2024
DSC02602.JPG
May 2, 2024
Asparagus, Gruyere & Swiss Tart
May 2, 2024
May 2, 2024
whitebeansoupwithzhug.JPG
Mar 11, 2024
Yemenite White Bean Soup with Zhoug
Mar 11, 2024
Mar 11, 2024
DSC02301 (1).jpeg
Jan 24, 2024
Celery, kohlrabi, date salad with toasted almond and sesame
Jan 24, 2024
Jan 24, 2024
DSC02138.jpg
Dec 3, 2023
Sweet potato latkes with cranberry salsa
Dec 3, 2023
Dec 3, 2023
kompot_main photo.JPG
Jul 11, 2023
Ukrainian Summer Fruit Kompot
Jul 11, 2023
Jul 11, 2023
cherryvareniki mainphoto.jpg
Jun 15, 2023
Cherry Vareniki
Jun 15, 2023
Jun 15, 2023
tzimmescaketopdown.jpg
Apr 19, 2023
One-Bowl Tzimmes Cake
Apr 19, 2023
Apr 19, 2023

Sign up with your name and email address to join my mailing list.

I respect your privacy.

Thank you!

Privacy Policy can be found here

All photos copyright of Sonya Sanford unless otherwise indicated