• Welcome
  • Book
  • Classes
    • Recipes
    • Index
  • Writing
  • Press
  • Shop
  • Contact
Menu

Sonya Michelle Sanford

  • Welcome
  • Book
  • Classes
  • Recipes
    • Recipes
    • Index
  • Writing
  • Press
  • Shop
  • Contact

Ukrainian Summer Fruit Kompot

July 11, 2023

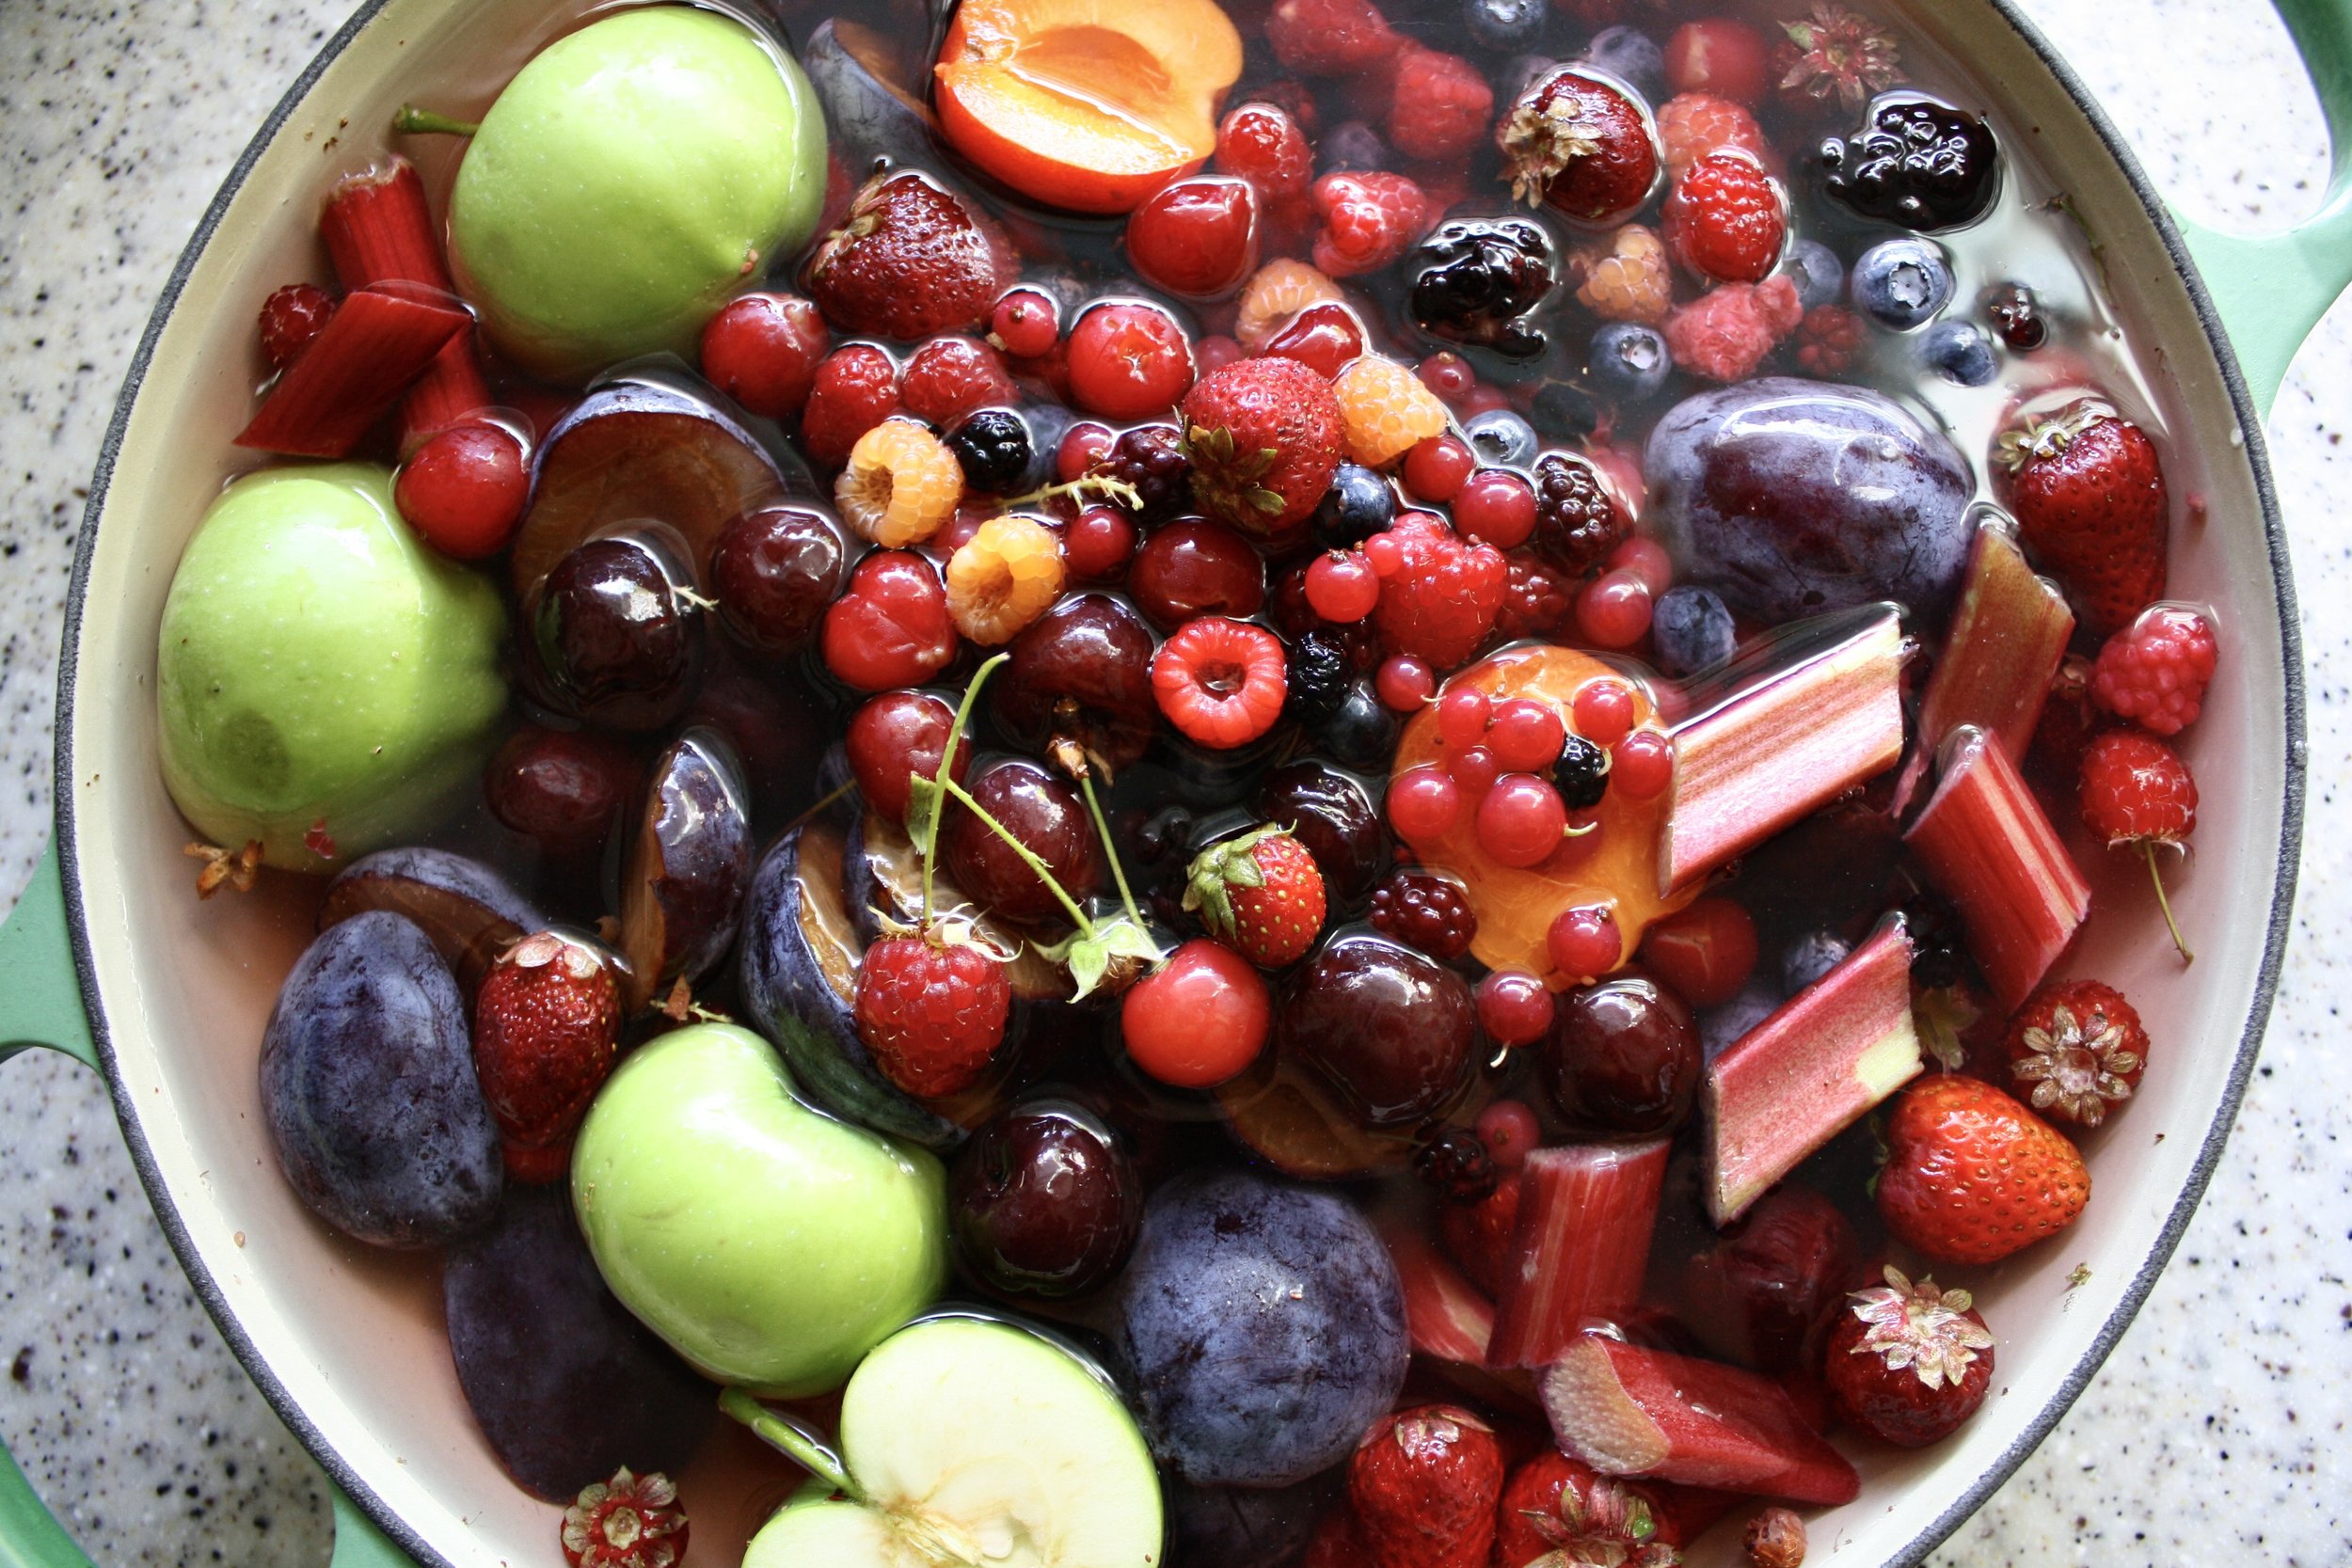
My grandmother would always make a vibrant, fragrant, ice-cold kompot (compote) in the dog days of summer, often with fruit my family had foraged or harvested in the Pacific Northwest. Kompot is essentially stewed fruit that can be strained and enjoyed as a beverage, or it can be ladled into deep mugs and served like a fruit soup. Rich with berries and stone fruit, the deep purple liquid would cool us down as the temperature climbed.

Kompot is very popular in Ukraine, where my family comes from, and across the former Soviet Union and Eastern Europe. Each home has its own recipe, and it can be made with fresh or even dried fruit. Keeping with tradition, I often squirrel away foraged fruit in the freezer; preserving berries and stone fruit from throughout the season waiting for the right time to make this family recipe. Inevitably, an August heat wave will arrive, and that’s when I take out my grandmother’s big enamel pot and fill it with all that saved fruit. The house will slowly fill with the smell of simmering fruit, and I’ll eagerly wait for the satisfaction of sipping on chilled kompot.

This recipe is very simple and endlessly modifiable and can be made year-round from fresh or frozen fruit.

Ukrainian Summer Fruit Kompot (Compote)
Serves 6-8

  • Ingredients
    1½ lbs, mixed berries, fresh or frozen (raspberries, blackberries, currants, strawberries, etc.)

  • 1 lb mixed stone fruit, fresh or frozen (cherries, plums, peaches)

  • 2-3 small apples, cored and halved

  • 1 cup sugar or honey, or to taste

  • 8 cups of water 

  • Juice of 1 lemon, optional 

Directions:
Clean off the fruit and remove any stems.

Add the fruit, sugar, and water to a large pot.

Bring the liquid up to a boil, then lower the heat and gently simmer for 10 minutes; you want the fruit to release its juices but still hold its shape.

Taste and add more sugar or honey if you like it sweeter. If adding extra sweetener, let it simmer for another 2-3 minutes to let the sugar dissolve. Add lemon juice if desired for a more tart flavor.

Allow the kompot to cool then transfer it to the fridge to fully chill before serving. 

If you prefer a strained kompot, use a mesh strainer, and transfer the kompot into a pitcher to serve cold. If you prefer the kompot with the fruit still in it, serve it ladled into deep cups or bowls with a spoon.
In Dessert, Old World Recipes, Ukrainian, Vegan Tags Kompot, Compote, Ukrainian food, Jewish food, Foraged fruit, Pacific Northwest, Pacific Northwest food, Summer Compote, Summer Kompot, Vegan, Vegetarian, Summer fruit
Comment

Cherry Vareniki

June 15, 2023

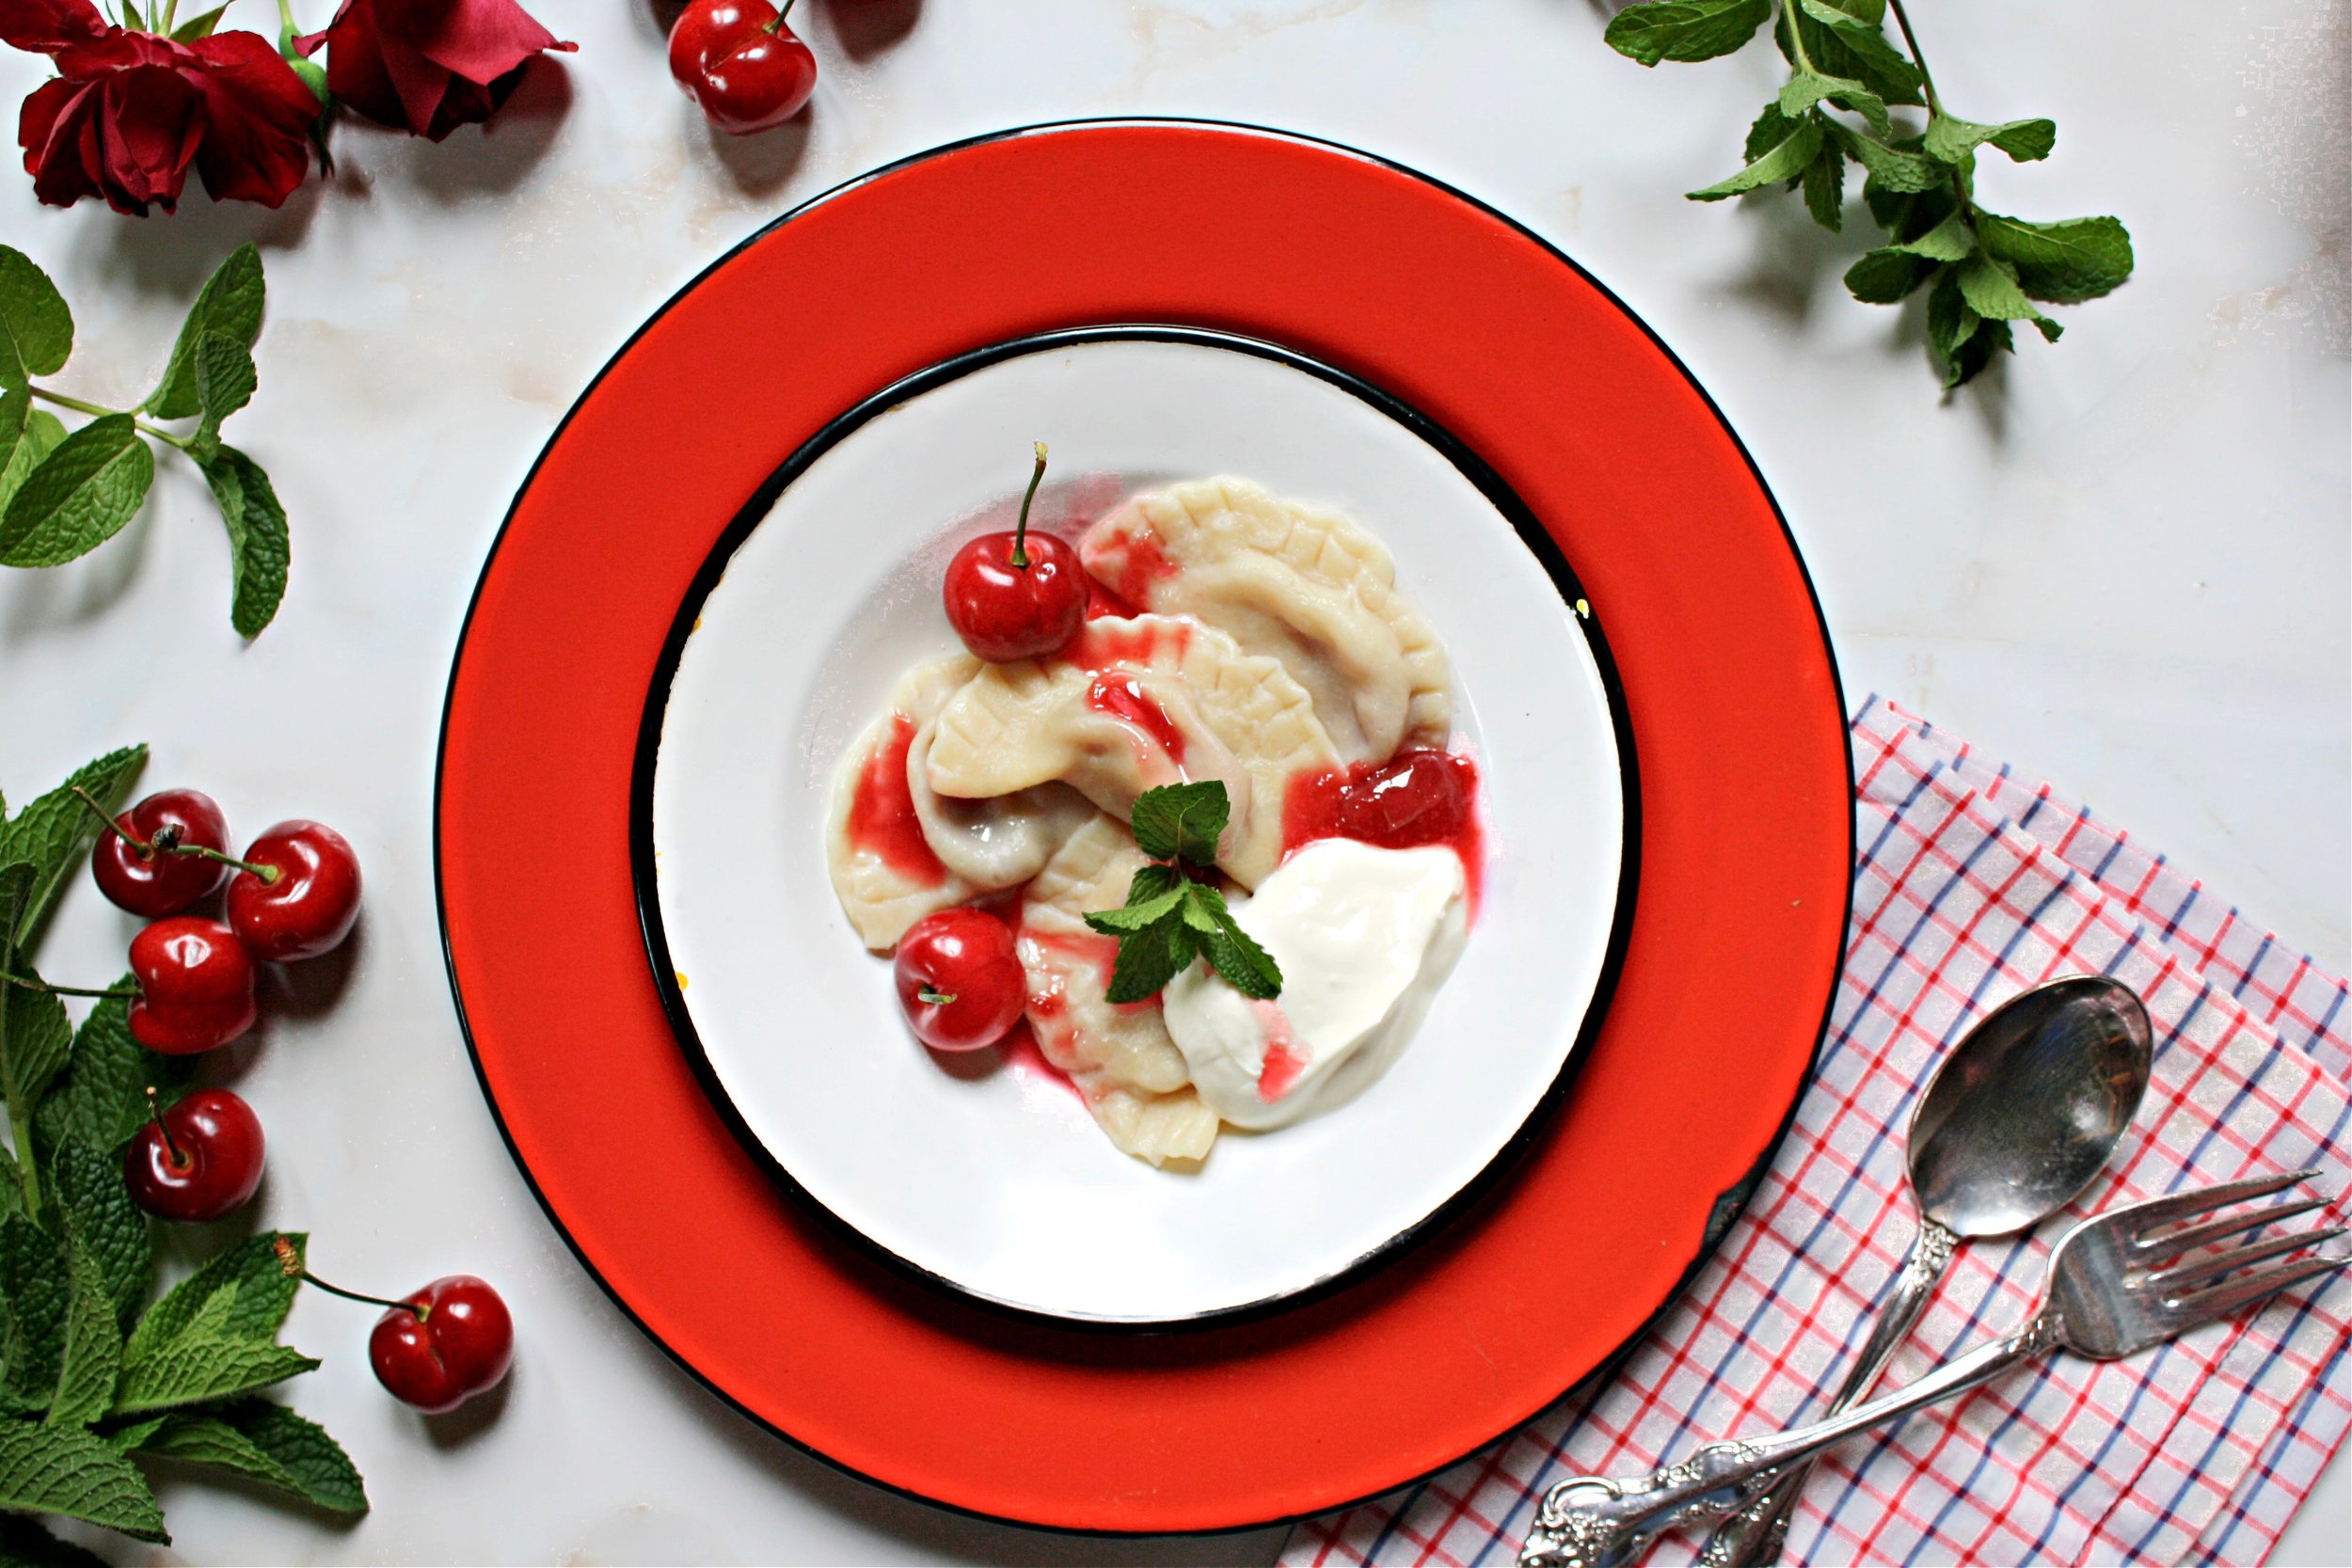
Cherry vareniki (half-moon-shaped dumplings) in Ukraine are typically made with sour cherries, known as vishnya. They are nostalgic for many from the region — including my family — and were famously novelist Nikolai Gogol’s favorite food. My family immigrated from Soviet Ukraine to Seattle, and after almost a decade of building a new life in America, my parents were able to buy their first home. It had an enormous garden, with an established cherry tree. Soon after moving, when I was a very small child, my grandparents came to visit us from out of town. That summer, the cherry tree was loaded with fruit. I vividly remember picking glossy, red cherries off the tree with my grandmother and brother by my side. There was more fruit than could be eaten fresh, and my grandmother decided to use some of the harvest to make a large batch of cherry vareniki. We sat outside and ate bowls of the dumplings – pillowy and bursting with tart, sweet fruit. 

Vareniki are similar to pierogi or pelmeni; the dough is tender and soft, and the filling is only lightly sweetened so that the flavor of the fruit shines. This dish straddles the line between sweet and savory; topped with smetana (sour cream), one can eat cherry vareniki either as a main course or as a dessert. When using sour cherries, I eat my vareniki as a savory dish; you can get sour cherries fresh for a few weeks each year, otherwise, I pick them up frozen or preserved from Eastern European or Russian markets. When I fill the vareniki with Bing or Rainier cherries, I enjoy these dumplings as a sweet treat.

I love to serve cherry vareniki with a simple cherry sauce made from the extra filling, topped with big dollops of sour cream to balance out the sweetness. Like any kind of homemade dumpling or ravioli, vareniki take some effort to make, but are unquestionably worth the work. They’re ideal to make with a group of friends, and you can double or even triple the recipe as needed. 

Notes:

  • Vareniki freeze extraordinarily well, offering a way to preserve the best of fleeting cherry season for future bowls of sweet dumplings. Freeze uncooked in a single layer, then transfer them to a bag or airtight container for three months. 

Cherry Vareniki (Dumplings)
Serves: 4-6, makes about 50 vareniki
Prep time: 1 hour
Cook time: 10 minutes


Ingredients:
For the dough:

  • 3 cups + 2 Tbsp (400 g) all-purpose flour, plus more for dusting or as needed 

  • ¾ cup water

  • 2 Tbsp sour cream or plain Greek yogurt

  • 1 large egg, beaten

  • 1 tsp kosher salt

For the filling and sauce:

  • 1½ lb (680 g) cherries or sour cherries

  • ½ cup sugar

  • 1 tsp cornstarch

  • juice of ½ a lemon

  • sour cream, as desired, for serving

Directions:

  1. Start by making your dough: In a large bowl, combine the 3 cups of flour, water, sour cream, egg and salt. Mix until a shaggy dough forms, then transfer to a clean surface and knead until very soft, smooth and elastic, about 8-10 minutes. If the dough is very sticky, add additional flour 1 Tbsp at a time until it’s easy to knead and doesn’t stick to your hands. 

  2. You can also make this dough in a stand mixer with the dough hook attachment by adding all of the ingredients to the bowl, and mixing on the lowest speed until a shaggy dough forms. Turn up the speed to medium-low, and mix until smooth and soft, about 4-5 minutes. 

  3. Transfer the dough to a bowl and cover it with a lid or plastic wrap. Allow the dough to rest at room temperature for 1 hour. 

  4. While the dough is resting, start on your filling. Wash, dry and pit all of your cherries. If using a cherry pitter, cut the cherry in half after removing the pit. Add the cherries to a bowl with ½ cup of sugar, and let them sit and start to release their juices for a minimum of 30 minutes, or as the dough rests.

  5. Once your dough has rested for an hour and your cherries have been sitting for at least 30 minutes, you can begin shaping your vareniki. 

  6. Line a baking sheet with parchment, and heavily dust it with flour.

  7. Divide the dough into 4 pieces. Liberally dust both your rolling pin and your surface with flour. Roll out each piece of dough very thin, almost as thin as pasta; if you lift it up the dough light should come through it. 

  8. Cut out 2-inch rounds of dough using a water glass or biscuit cutter, lightly flour the rim of the glass or cutter before making rounds. Gather up the scraps into a ball and reserve to re-roll the dough one time, after that discard any scraps. Fill each round of dough with about a teaspoon of cherry, about 1-1½ cherries. Seal the dumplings into half-moon shapes, if needed dab the edges with water to help it stick, but the dough should be sticky enough to press together on its own. Using the tines of a fork, press the edges of the dough to ensure they’re properly sealed. 

  9. Transfer the formed dumplings onto the lined baking sheet. Reserve any remaining cherries for sauce. Repeat the process until you have used up all of the dough, and then place the dumplings in the freezer for a minimum of 15 minutes before cooking. While your vareniki are in the freezer you can bring a large pot of water to a boil. 

  10. While the water is coming to a boil, add the remaining cherries to a small pot. Bring the cherry mixture up to a boil, lower the heat and simmer the cherries for 10-15 minutes or until they are very soft and broken down. In a small bowl, combine 1 tsp of cornstarch with the juice of half a lemon. At the end of cooking the cherries, add the starch slurry, and simmer for an additional minute or until just thickened. If the sauce thickens too much, you can always thin it with water.

  11. Add vareniki, in batches if needed, to the pot of water (be careful not to overfill).. Once the vareniki float to the top, simmer them for an additional 5 minutes. If using frozen vareniki, it may take a few minutes longer for them to float to the top. Remove the vareniki from the pot and serve immediately. 

  12. Top the vareniki with sour cream and cherry sauce. 

In Holiday, Old World Recipes, Ukrainian, Vegetarian, Dessert Tags Ukrainian food, Vareniki, Varenykiki, Dumplings, Cherry Vareniki, Cherry dumplings, Soviet food, Russian Dumplings, Soviet Dumplings, Ukrainian Dumplings, Jewish food, Cherry
Comment
Apple Oladi Ukrainian and Soviet Pancakes

Apple Oladi - Ukrainian Pancakes

December 14, 2022

Oladi are pancakes that are popular in Ukraine and across the former Soviet Union. They come in a variety of styles but their batter is most often made with plain kefir (or buttermilk) and a leavening agent, such as baking powder or yeast. When fruit or cheese are added to oladi, they become fritter-like. They are typically cooked in a generous amount of sunflower oil, allowing them to puff up and become fluffy in the center with golden, crisp edges. 

The recipe for oladi first appeared in “Domostroy,” a famous 16th-century Russian book on household matters, but the term oladi comes from the East Slavic word oldaya, which refers to a flat cake of unleavened wheat, that dates back to 1470. Oldaya is derived from the Greek word for oil and is also associated with a Middle Greek oil cake called eladion. While these Russian pancakes may seem distant from the potato pancakes we eat at Hanukkah, the Yiddish word latkes comes from oladka, the Russian diminutive of oladi. 

In fact, early latkes were not made from potato at all, but were instead prepared with curd cheese fried in butter or oil, and likely originated in Italy, not Eastern Europe. Potatoes were not cultivated in Europe until the late 16th century; they became a staple crop in Russia and Poland in the 19th century. Once potatoes were ubiquitous in Ashkenazi communities, latkes for Hanukkah were made with potatoes fried in schmaltz. 

Oladi can be made plainly with flour, but they are also made with potato, carrot, beans, rice or even squash. Sweet oladi are made with apples or raspberries, especially in Ukraine. Like potato latkes, they are traditionally served with sour cream. You can make these apple oladi even sweeter by topping them with fruit preserves, a generous dusting of powdered sugar, or a drizzle of sweet, golden honey.

Apple Oladi
Serves 4

Ingredients:

  • 1 medium-size apple 

  • 1 large egg

  • 1 cup plain kefir or buttermilk

  • ¼ cup water

  • 3 Tbsp sugar

  • 1½ tsp baking powder

  • ½ tsp baking soda

  • big pinch of salt 

  • 2 cups (250 g) all-purpose flour

  • oil, as needed (sunflower, avocado or any neutral-tasting oil)

Directions:

  1. Peel your apple. Dice it very fine by hand or in a food processor.

  2. In a bowl, whisk together the egg, kefir/buttermilk, water, sugar, baking powder, baking soda, and salt until thoroughly combined. 

  3. Add the flour to the bowl, and mix until just combined, be careful not to overmix.

  4. Add the apple and fold it into the batter until just combined. Do not let the batter sit for too long before cooking the oladi, as the apples will begin to release their juices.

  5. In a large skillet over medium-high heat, add a generous amount of oil (about ¼” deep in the pan). Once the oil is hot, lower the heat to medium and add ¼ cup of batter for each pancake. Cook for 2-3 minutes per side, or until the oladi are golden brown on each side and have puffed up. Work in batches, and make sure not to crowd the pan. 

  6. Serve immediately dusted with powdered sugar, and with sides of sour cream and fruit preserves.

Apple oladi
In Breakfast, Holiday, Ukrainian Tags oladi, apple oladi, Ukrainian food, Soviet food, russian food, Russian pancakes, Ukrainian pancakes, apple pancakes
2 Comments
Bubliki Ukrainian Bagels

Bubliki - Ukrainian Bagels

June 14, 2022

Bublik looks a lot like a bagel, sounds a little like a bagel, but is not quite a bagel. Bublik (pronounced boob-leek) or bubliki (pl), is the Ukrainian version of a yeasted, boiled, round bread that dates back to 18th century Odessa. Just like New York or Montreal-style bagels, bubliki came to the Ukraine by way of Ashkenazi Jewish immigrants from Poland and Eastern Europe, and later became popular throughout the former Soviet Union. While bread shaped into rings dates back to at least the 13th century, written records of the beygl (Yiddish for bagel), date back to 1610 in Krakow, Poland, where bagels were mentioned in Jewish community ordinances. The word bublik comes from the proto-Slavic word boubl, which means swelling or bubble. These delicious rings of bread are also affectionately called bublichki, and there is even a famous Yiddish-Ukrainain song from the 1920’s with this diminutive name.

Popular across the former Soviet Union, bubliki are not typically eaten as a breakfast food, and are instead traditionally served with tea, topped with butter, jam, or even smetana (sour cream). Compared to bagels, bubliki have a tender crust, are a little sweeter, and sometimes have a larger hole in their center. The chewiness of the bublik varies by baker, but they’re most often lighter than their New York counterparts. While bagels are made with a simple dough of yeasted flour and water, bubliki are typically made with an enriched yeasted dough that includes butter, egg, and milk. Both bagels and bubliki are boiled in water before being baked, which gives them their unmistakable glossy crust, but bagels are traditionally boiled in water with barley malt syrup added to it, whereas bubliki are boiled in plain water. In some ways, the flavor of bubliki is closer to a Montreal-style bagel, which is sweetened and boiled with honey.

In all its forms, bubliki and bagels have made their way into kitchens and bakeries around the world. While bubliki take time to make from scratch, you will be rewarded with the incomparable  joy of eating a fresh, warm bublik, and your home will be filled with the smell of one of the most comforting Jewish breads.

Bublik (Ukrainian Bagels)

Makes 10 bubliki

Ingredients:

  • 1½ cups (350 ml) milk (or non-dairy unsweetened milk)

  • 2¼ tsps (7 g/ 1 packet) active dry yeast

  • 2 Tbsps sugar

  • 4 cups (525 g) bread flour, or all-purpose flour

  • 4 Tbsps (65 g) unsalted butter or vegan butter, melted

  • 1 large egg

  • 2 Tbsps honey

  • 2 tsps kosher salt, or 1½ tsps sea salt

  • Poppy seeds or sesame seeds, optional

Directions:

1.     Heat the milk until it is just warm to a touch, between 80-100°F. Add the active dry yeast and sugar to the milk and stir. Let the yeast proof for 5-10 minutes, or until it is foamy on top.

2.     In a large bowl, or in the bowl of a stand mixer with the dough hook attachment, add the flour, melted butter, egg, honey, and salt. Add the milk and yeast mixture to the bowl. Combine the dough together by hand, or turn the mixer on to low. Mix until it forms a craggy ball. If kneading by hand, transfer the dough onto a clean surface and knead until the dough is smooth, elastic and firm, about 10-15 minutes. If using a stand mixer, increase the speed to medium, and knead for 8-10 minutes. Check to see if enough gluten has formed by doing the window pain test: rip off a small piece of dough, and gently stretch it until it is thin enough that you can see light coming through it. If it starts to tear before you can stretch it thin, then continue to knead the dough for a few more minutes, and test it again.

3.     Transfer the dough to a large lightly oiled bowl and cover it tightly with plastic wrap or a lid. Refrigerate the dough overnight, or for at last 8 hours. It is ideal to let this dough slowly proof in the fridge, but alternatively, you can cover the bowl with a damp towel and allow the dough to rise at room temperature for 1.5-2 hours, or until doubled in size.

4.     Remove the proved dough from the fridge and let it sit at room temperature for 30 minutes. Transfer the dough onto a clean surface, and press it down to fully deflate any bubbles in the dough. For even-sized bubliki, weigh the dough, and divide the toal amount by 10. Each bublik should weigh  1/10th of the total weight of dough (or roughly 90g per bublik). If you do not have a scale, divide the dough into 10 approximately equal-sized pieces.

5.     Line a baking sheet with a Silpat or parchment paper, and lightly sprinkle the surface with flour. Make 10 balls of dough, by taking each piece of dough, and pinching the edges of the dough towards the center to form a ball. Roll the dough into a ball. Place the balls of dough a few inches apart from each other on the lined baking sheet. Loosely cover the balls of dough with plastic wrap, and allow them to rise for 15 minutes.

6.     After 15 minutes, shape each ball of dough into a bublik by sticking your thumb down into the center of the dough, forming a hole, and then using both hands to stretch it into a ring about 5-6 inches in diameter (it will quickly shrink back a bit when you place it back onto the lined parchment paper). Cover all of the formed bubliki with the loose plastic wrap and allow them to rise for another 20 minutes.

7.     While the bubliki are rising, preheat the oven to 500°F and arrange the baking racks on the upper and lower thirds of the oven. Line two more baking sheets with parchment paper.

8.     Once the water is boiling and the bubliki have risen, add 2-3 at a time to the boiling water (be careful not to crowd the pot). Let the bubliki boil for 30 seconds on one side, then flip them and let them boil for 30 seconds on the opposite side. Transfer the bubliki to the parchment-lined baking sheets, leaving several inches of room between each bublik, about 4-6 bubliki per baking sheet. If topping with seeds, immediately sprinkle poppy or sesame seeds over each bublik.

9.     Place one baking sheet on the top third of the oven, and one baking sheet on the lower third. Immediately lower the oven temperature to 450°F. Bake for 5-6 minutes, then rotate the baking sheets and bake for an additional 5-7 minutes or until deep golden brown on the top and the bottom of each bublik.

10.  Allow the bubliki to cool on a baking rack. Serve warm or at room temperature. Bubliki are best eaten the same day they are made, but they also freeze well, and can be reheated in an oven or toaster.

In Bread, Ukrainian Tags Bublik, Bubliki, Ukrainian food, Ukrainian bagels, Bagels, Bread
Comment

Latest

Featured
IMG_3606.jpeg
May 27, 2025
Sheet-pan Lemony Potatoes and Baby Artichokes
May 27, 2025
May 27, 2025
IMG_3784.jpeg
May 12, 2025
The Secret to Crispy Tofu Every Time + A Sweet & Spicy Gochujang Glaze
May 12, 2025
May 12, 2025
snackingcakeslices copy.jpg
Apr 11, 2025
One-bowl blueberry lemon snacking cake (gluten-free/grain-free)
Apr 11, 2025
Apr 11, 2025
IMG_5075.JPG
Feb 24, 2025
Manti (meat dumplings) in brothy tomato sauce
Feb 24, 2025
Feb 24, 2025
matzoballsontablecloth.jpg
Jan 20, 2025
Golden Chicken Soup with Matzo Balls
Jan 20, 2025
Jan 20, 2025
harissatofuandchickpeas.jpg
Dec 18, 2024
Sheet-Pan Crispy Harissa Tofu, Chickpeas, and Broccolini
Dec 18, 2024
Dec 18, 2024
caracaracake.jpg
Dec 4, 2024
Cara Cara Orange Olive Oil Cake
Dec 4, 2024
Dec 4, 2024
IMG_0640.JPG
Nov 6, 2024
Easy Roast Turkey for Thanksgiving
Nov 6, 2024
Nov 6, 2024
IMG_3282.JPG
Sep 19, 2024
Apple and Honey Dumplings
Sep 19, 2024
Sep 19, 2024
IMG_7173.jpeg
Jul 31, 2024
Galette with any kind of fruit
Jul 31, 2024
Jul 31, 2024
IMG_4004.jpeg
May 9, 2024
Cheddar Cheese Coin Crackers
May 9, 2024
May 9, 2024
DSC02602.JPG
May 2, 2024
Asparagus, Gruyere & Swiss Tart
May 2, 2024
May 2, 2024
whitebeansoupwithzhug.JPG
Mar 11, 2024
Yemenite White Bean Soup with Zhoug
Mar 11, 2024
Mar 11, 2024
DSC02301 (1).jpeg
Jan 24, 2024
Celery, kohlrabi, date salad with toasted almond and sesame
Jan 24, 2024
Jan 24, 2024
DSC02138.jpg
Dec 3, 2023
Sweet potato latkes with cranberry salsa
Dec 3, 2023
Dec 3, 2023
kompot_main photo.JPG
Jul 11, 2023
Ukrainian Summer Fruit Kompot
Jul 11, 2023
Jul 11, 2023
cherryvareniki mainphoto.jpg
Jun 15, 2023
Cherry Vareniki
Jun 15, 2023
Jun 15, 2023
tzimmescaketopdown.jpg
Apr 19, 2023
One-Bowl Tzimmes Cake
Apr 19, 2023
Apr 19, 2023

Sign up with your name and email address to join my mailing list.

I respect your privacy.

Thank you!

Privacy Policy can be found here

All photos copyright of Sonya Sanford unless otherwise indicated