The nicest thing about soup is that it's just as good to make for one as it is for a hundred. As a single person, it's nice to make food that tastes better as it sits in your fridge for days. It's nice to come home from work and know that a nutritious meal is waiting for you, and will only take moments to reheat and enjoy. When cooking for a group, it's ideal to prepare something uncomplicated and satisfying that can be made in a single large pot, and can be reheated easily if your guests happen to arrive late or want to sip on wine and chat before they do any eating. In addition to its ease and long lifespan, soup is comforting; one large bowl can easily constitute an entire meal, and soup can be super healthy. So there. You're all set for life if you just know how to make soup.
I highly recommend reading
Tamar Adler's An Everlasting Meal: Cooking with Economy and Grace. You'll learn a lot about soup, and how easy and varied soups can be. You'll also be wowed by exceptional prose, and a deep understanding of food. The book's insights and tips about cooking may be intuitively known among avid home cooks, but have rarely been put into such eloquent writing.
So soup. Soup can be made with most vegetables, most beans, most broths, most proteins (including eggs, tofu and dairy), and well, most any edible thing you can stick in a pot. Things that can make soups especially wonderful are: acid (lemon or vinegar), tomatoes and tomato paste (also acidic), and fresh herbs.
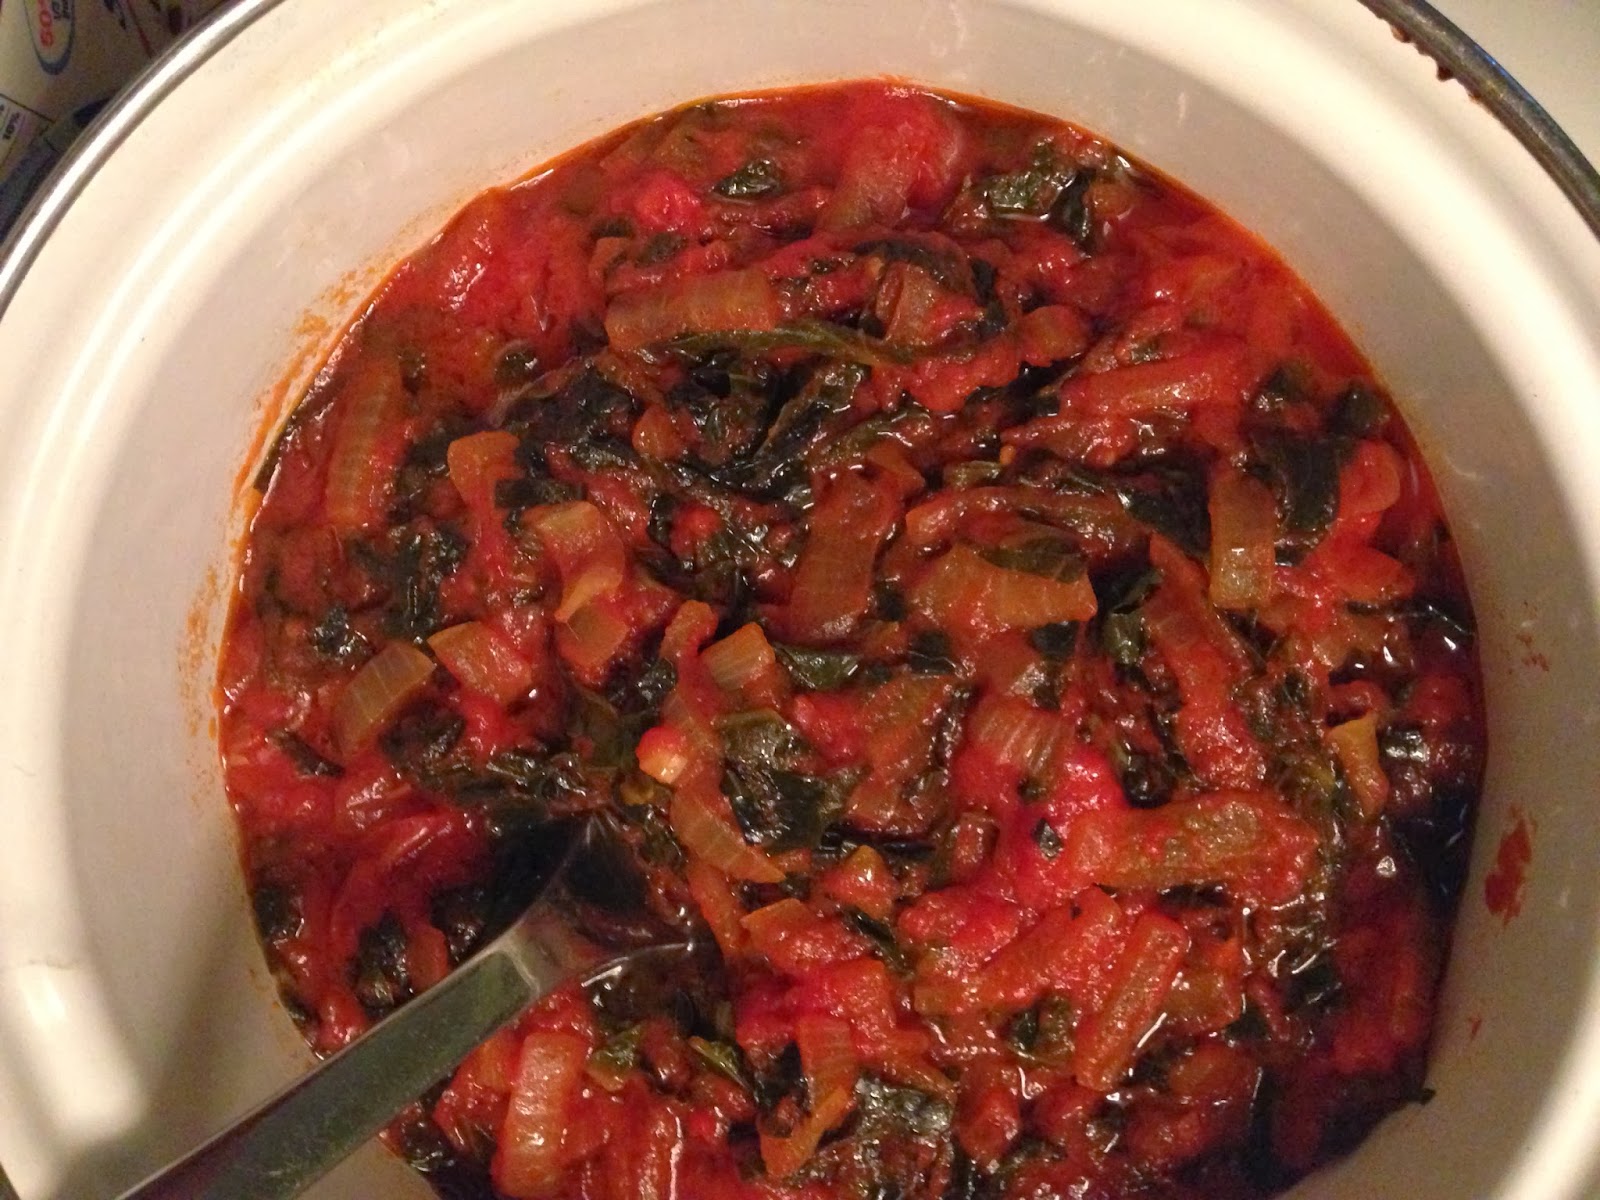
The other night I was craving soup and didn't feel like running to the grocery store. I had a few carrots, some celery, a large half of shallot, some scallions, garlic, some leftover kale and spinach, a can of tomatoes, and some dry
beluga lentils lying around. I decided all these things could easily become soup, and they did. And it was delicious. And it ended up being a sort of not-so-attractive brown color (from the lentils), but it didn't matter because it tasted good, and I served it with toast and shredded parmesan on top, and it was filling, and I shared it with my neighbors and we all had a nice time on a quiet warm Sunday evening.
So here's a recipe that means little, because any ingredient can be added, omitted, or modified in quantity. What you will need: a pot, water or broth, some vegetables, salt and oil, something from the onion family, and the desire to make a soup.
Vegetable Soup with Beluga Lentils
Serves 1-8
good olive oil
1 large carrot, or 1 medium and 1 small carrot, diced
2-3 stalks celery, diced
1 shallot, diced fine
5 scallions, chopped
2 cloves garlic, minced
2 cups kale, chopped
1 cup spinach, chopped
1 cup dry beluga (black) lentils, or french, or green lentils (could sub with a can of white beans)
2 tablespoons tomato paste
1 can tomatoes
1 bay leaf
3 sprigs thyme (or used dried thyme)
1 tablespoon dried oregano
water
salt and pepper
1 tablespoon red wine vinegar (or lemon juice)
In a large pot on medium high heat, sauté your shallot, green onion, (you can use regular onion in place of both), celery and carrot with salt and pepper, for about 8-10 minutes or until the veg has softened. Add the garlic for a minute, then add the spinach and kale and let them wilt. Once wilted, add the lentils (rinsed first). Add the tomato paste, and stir everything about until it's all coated with the paste. Add the canned tomatoes and their liquid. Add a bay leaf, some thyme, oregano and more salt and pepper. Fill the pot with water (about 6-8 cups... you can use broth of some kind if you have it on hand). Let everything come up to a boil, and immediately lower the heat to a simmer. Partially cover the pot with a lid and let the soup simmer for about 45 minutes. Try the lentils. Are they done? Does the soup taste pretty good? Add more salt and pepper as needed. If the lentils still taste uncooked, let the soup simmer until they're fully cooked. Turn the heat off, remove the bay leaf, and add the red wine vinegar. Taste the soup again, and add any salt, pepper, or acid that you think it needs.
Ladle into bowls. Shred some parmesan cheese on top. Serve with hearty bread.
...
And on the topic of using what you've got to make something delicious, I'll leave you with the wonderful words of Elizabeth David:
So long as I have a supply of elementary fresh things like eggs, onions, parsley, lemons, oranges and bread and tomatoes--and I keep canned tomatoes too--I find that my pantry will always provide the main part of an improvised meal. If this has to be made quickly it may just be a salad of anchovy fillets and black olives, hard-boiled eggs and olive oil, with bread and a bottle of wine. If it a question of not being able to leave the house to go shopping, or of being too otherwise occupied to stand over the cooking pots, then there are white beans or brown lentils for slow cooking... with onions and oil and possibly tomato... Or if I am given, say, forty-five minutes to get an unplanned meal ready--well I have Italian and Patna rice and Parmesan, spices, herbs, currants, almonds, walnuts, to make a risotto or a pilaf. And perhaps tuna, with eggs to make mayonnaise, for an easy first dish. The countless number of permutations to be devised is part of the entertainment.