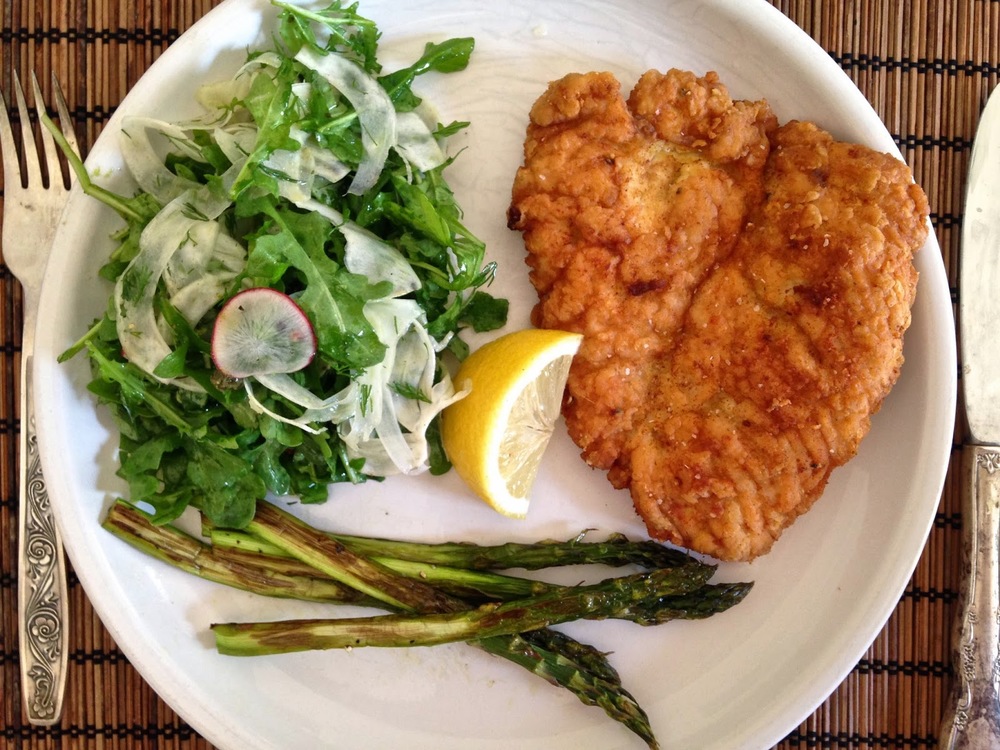
Avocado Mango Spinach Salad


It was an unusually hot spring day here in Los Angeles and we were going to have a BBQ birthday celebration outside for my lovely sister in law. I wanted to bring a light and flavorful dish to go with all the grilled heavy things, and I went off to the market with only the idea to get ingredients for some kind of salad.

At the farmers' market I picked up beautiful California avocados and a big bunch of cilantro (thank you California for all of your avocados!) I stopped at a grocery store for a few extra things and I saw some really perfectly ripe mangoes. Mangoes and avocados always go so nicely together and they are two of my favorite fruits forever and always. That's when I knew what salad I wanted to make. I decided to pick up some spinach. I wanted a green that would hold up a little to the warm day and the substantial mango and avocado. Butter lettuce or even thinly sliced Napa cabbage would go well in this salad too.

I made a gingery Asian-inspired dressing. These ingredients can hold up to a lot of flavor and the mango, avocado and cilantro go really well with ginger, lime, rice wine vinegar and sesame oil flavors. You don't need all of the ingredients listed, but I do think this type of dressing works better than a more classic French or Mediterranean vinaigrette.

Like all salads this one is infinitely interchangeable depending on your preferences. The stars of this show are creamy avocado and tangy sweet mango... the rest is up to you.

Avocado Mango Spinach Salad
Serves 4-6

for the salad-
5-6 full cups baby spinach
1 large ripe mango, cubed (or 2 if you want even more mango)
1 large ripe avocado, cubed (or 2 if you want even more avocado)
3-4 scallions, sliced thin (red onion or shallot would be good too)
1/4 cup sunflower seeds (or sub with roughly chopped cashews)
handful of cilantro, roughly chopped

for the dressing-
2 tablespoons rice wine vinegar
2 tablespoons Mirin* (optional)
2 teaspoons freshly grated ginger with its juice
1 teaspoon liquid aminos or soy sauce
1 teaspoon agave or honey
juice of 1/2 a lime
1 teaspoon sesame oil
1/4 cup oil (you want something pretty neutral like grape seed or safflower oil. Avocado oil would work well too)

Add the spinach to a serving dish. Pile the other salad ingredients on top of the spinach.

To make the dressing, combine the vinegar, Mirin, freshly grated ginger (you can do this with a Microplane... or you could even chop super fine if you need to... add more or less depending on how much ginger you love), liquid aminos, agave, and lime juice. Whisk in the sesame oil and grape seed oil (or shake everything up in a jar). Taste the dressing. This step is crucial. If its too tangy add some more oil. If you like it sweeter add more agave or honey. If you don't eat sugar leave the agave and honey out. If you want it saltier add more liquid aminos/soy sauce/salt. And so on and so forth...

Gently toss the salad with the dressing, be careful not to break up the avocado too much. Add as much dressing as you need to lightly coat all of the vegetables. You may have excess salad dressing depending on how heavily or lightly you like your salad dressed.

*Mirin is a sweet rice wine with very low alcohol content that is often used in Japanese cooking. You can usually find it in grocery stores next to the rice vinegar and soy sauce. I like having it on hand because it adds a really nice bright sweetness. It's totally optional here and shouldn't require a special trip to the store.

Chicken Schnitzel


When I was 10 years old I lived in Jerusalem for a year with my family. While we lived there we ate a LOT of chicken schnitzel (schnitzel is also made from veal, and can be made from any boneless meat that is thinly pounded out). It may not be common knowledge, but schnitzel is one of the most popular dishes in Israel and it is widely served in restaurants, cooked fresh at home, or sold frozen in grocery stores. I really haven't eaten often since then.

But we had been talking about making all winter... The we in this party lived in Berlin for a significant amount of time. During part of that time he lived above a restaurant that specialized in schnitzel, and for that and other reasons has a strong affinity for the dish. Somehow schnitzel-making kept getting postponed... either we didn't feel like something fried, or we didn't feel like meat, or we just didn't feel like schnitzel.

One recent spring day schnitzel finally seemed like the perfect thing to eat for lunch. I had picked up some beautiful asparagus, a really nice fennel bulb, and some arugula. I roasted the asparagus simply: with olive oil salt and pepper at 400°F until tender and just browned. I sliced the fennel super thin on a mandolin; I did the same to the radish and I added them to a pile of wild arugula all tossed together with a lemon vinaigrette.

In Israel I always ate schnitzel plain or with ketchup, but in Germany it is apparently often served with cranberry sauce. This was an exciting discovery for me as I love any excuse to make and eat cranberry sauce, and I always keep a bag of frozen cranberries in my freezer for just this reason. I made a batch and served it along with everything else.

Even though the schnitzel is essentially fried chicken it isn't all that heavy. The thinness of the meat allows for a kind of light crispyness that is satisfying without being a gut bomb. It goes perfectly with a side that is fresh, green and slightly acidic.

I was in Berlin once. It was June and the weather was perfectly sunny and warm. The daylight lasted forever and everywhere Berliners were out and about enjoying the early summer days and nights. One perfect afternoon, I went out to lunch with my dear friend. We drank cool rosé, and he ordered the schnitzel with white asparagus. I ordered something less memorable and gratefully accepted his offer to share his plate of food. Maybe schnitzel is always linked with asparagus for me for that reason... maybe its more linked to that day in Berlin than that year in Israel. Regardless, this plate of food makes me think of spring or early summer when everything is vibrant and new beginnings are on the horizon.

Classic Chicken Schnitzel
Serves 4-6

4 4-5 oz. chicken breasts, pounded to 1/8-1/4-inch thickness
2 eggs, beaten
1 cup all purpose flour (or GF flour, or matzo meal, or almond flour...  any type of flour will work although regular flour is the most traditional)
salt and pepper, to taste
canola, safflower or peanut oil, as needed (to fill the pan about 1/2 of an inch continuously while cooking)
lemon wedges
cranberry sauce, optional (see recipe below)

Using a meat mallet, rolling pin, or the bottom of a cast iron skillet, pound the chicken breasts until they are about 1/8-1/4-inch in thickness. Make sure each piece of chicken is pounded out to the same thickness. Also make sure to pound out the chicken as evenly as possible (so that parts of it aren't thicker than others, otherwise one end could get dry/burnt while the other is undercooked).

Beat the eggs in a deep shallow bowl. Season with salt and pepper.

Add the flour to another deep shallow bowl. Season it with a generous pinch of salt and freshly ground pepper.

In a large cast iron skillet or heavy-bottomed pan, add a 1/2-inch layer of oil. Heat the oil over medium-high heat until it is hot (make sure that it is bubbly and really hot, not luke warm or semi-hot).

Dip the chicken breast one at a time into the eggs first. Shake off any excess egg. Next, dip the chicken into the flour. Shake off any excess flour. Place the coated chicken breast into the hot oil. Repeat with a second chicken breast. Depending on the size of the pan, cook 2 chicken breasts at a time. Be careful not to overcrowd the pan. Cook for 4-5 minutes per side, or until the chicken is golden brown and fully cooked. Make sure the oil stays hot but not super hot. You may have to raise and lower the heat on the stovetop periodically as the schnitzel cooks. Once evenly browned on both sides and cooked through, transfer the schnitzel to a rack and continue the process until all of the chicken is cooked.

Serve immediately with lemon wedges and cranberry sauce if desired.

For the cranberry sauce:
2 cups fresh or frozen cranberries
1/4 cup sugar
1 cinnamon stick
1 star anise (optional)
1/2 teaspoon vanilla extract
1 cup water
Squeeze of orange or tangerine juice (optional)

Place all of the ingredients into a saucepan or pot. Bring to a boil. Simmer for 10 minutes. Remove from stove, allow to cool, transfer to a bowl and refrigerate. The sauce will thicken as it cools. 

Big Colorful Summer Salad


My dad is visiting from Jerusalem, and inspired by the salads that he loves to eat on a daily basis, I whipped this up as a main component for a light summer dinner. Along with the salad, I served smoked salmon and turmeric spiced basmati rice. The cool bright vegetables were a perfect compliment to the smoky salmon and aromatic rice.

I don't want to be misleading. This isn't an Israeli salad. For one, most Israeli salads are made up of a combination of tomatoes, cucumbers, onions, and olive oil. Traditionally, these salads don't have lettuce, but in this case, I had a beautiful head of red leaf lettuce, and I wanted to include it to make the salad a more substantial dinnertime dish. Also, dressing for Israeli salads are super simple, and this salad includes a Dijon based vinaigrette. This salad is inspired-by, not in-the-tradition-of.

Those bright magenta things are thin slices of watermelon radish. Watermelon radish tastes similar to regular radish, but has a subtle sweetness to it. They are delicious and gorgeous and I love when they are in season. I found these at my local supermarket, but usually I spot them at the Hollywood Farmers' Market. 

The point is, for this salad you can throw in all kinds of chopped veggies on top of crisp lettuce. Think: big, colorful, and well-dressed.

Big Colorful Summer Salad
Serves 4-6

for the salad-
1 medium head red leaf lettuce, chopped
2 medium tomatoes, diced
2 small persian cucumbers, diced
1 small red bell pepper, diced
3-4 red radishes, sliced thin
1 watermelon radish, peeled and sliced thin
2-3 scallions, sliced thin
1 generous bunch of dill, roughly chopped

for the dressing-
2 heaping teaspoons good quality Dijon
juice of 1/2 a large lemon (or a whole lemon depending on its size)
1 small garlic clove, finely minced (or you can use a press)
1/3 cup olive oil
1/2 teaspoon oregano
Drop of honey
pinch of salt and pepper

Wash and dice all of your veggies and herbs. Add them to a large salad bowl.

Whisk together all of the dressing ingredients (or put them in a mason jar with a tight lid and shake it up). Taste the dressing. Add more lemon, dijon, honey, oil or salt. Dressings are all about finding the balance YOU like. Ingredients differ in terms of flavor, and proportions may have to be adjusted. Dip a piece of lettuce into the dressing if you need a better idea of how it will taste on the salad. 

Right before serving, sprinkle salt over the salad and toss. Then add the dressing to the salad. Toss until all the components are evenly coated. 

You can add crumbled feta or grilled chicken to make a meal out of the salad itself. 

Super Good Classic Fried Chicken


Homemade fried chicken can take time, patience, and a little finesse. The work pays off, and this comfort food is always a crowd-pleaser. Even a reluctant meat-eater, such as myself, has a hard time turning down something this crunchy, delicious and tender.

You can do this in a skillet, or a dutch oven, or a deep fryer. You can serve this hot or room temp. Room temp is easier to serve, and might even be better. It's a good idea to serve the chicken with a side of honey. They go crazy good together. Summer and fried chicken are synonymous, and even though hot weather doesn't exactly scream standing over a hot stove frying something, it's still a satisfying dish to serve at a late evening picnic, at a daytime BBQ, or as a special treat to take to the beach.

Because I needed to make this fried chicken kosher, I did not give the chicken a traditional buttermilk marinade before frying it. Instead, I did a flavorful spice rub. Buttermilk marinades are definitely something to consider if you are inclined, but instead of using dairy, a simple brined chicken is just as good (and may even be better?). I chose kosher chicken, which meant the poultry had already been salted, and therefor effectively brined. I love cooking with kosher chickens for this reason: they turn out a lot more tender and flavorful, but you don't have to do the work of brining yourself.

This recipe is pretty forgiving. Methodology is way more important here then the specific amounts... you can change the spices for the dredging mixture, you could use gluten free flour, and you could marinade the chicken or not. If you don't have a deep fryer, I suggest investing in a candy/deep fry thermometer. You will need to constantly adjust the temperature on your stove top to make sure the chicken fries at the right temp to ensure even browning and cooking. A thermometer becomes a fry-saver.

Get ready for some addictive, soul-warming, crisp and juicy fried chicken.

Classic Fried Chicken
Serves 8-10

ingredients-
1 tablespoon kosher salt
1 1/2 tablespoons ground pepper
1 tablespoon smoked paprika
2 tablespoons garlic powder
2 teaspoons chipotle chile powder
2 teaspoons ground coriander
1 teaspoon cumin
1 teaspoon turmeric

2 4-5 lb. kosher chickens, cut into 10 pieces (remove backbone, or have a butcher cut it up for you)
3 eggs, beaten with a splash of water
4 cups all-purpose flour
1 teaspoon kosher salt
2 tablespoons corn starch
oil for frying (peanut or safflower)

equipment-
- Candy/fry thermometer
- Tongs or a spider
- Dutch oven or cast-iron skillet

In a small bowl, combine the salt, pepper, smoked paprika, garlic powder, chipotle powder, ground coriander, cumin and turmeric. Mix together well.

Make sure to pat down each piece of chicken with a paper towel to ensure dryness. Add the cut dry chicken parts to a large bowl. Sprinkle the spice mixture evenly over the chicken. Using your hands, toss the chicken pieces in the spice mixture and make sure each piece is evenly coated. Refrigerate for 3-5 hours.

Take the chicken out of the fridge, and let it come to room temp for about half an hour. Once the chicken is at room temp, fill a dutch oven or skillet with oil and place it on the stove on medium high heat. You want to make sure that the chicken is at last halfway submerged in oil as it fries on each side. You can fill a dutch oven a little more heavily with oil than a skillet. Allow the oil to reach 325°F.

While your oil is coming to temp, create the dreding mixtures for your chicken. I like to use baking dishes or deep bowls. In one dish, add the flour, corn starch and salt. Mix together with a fork. In another dish, whisk together the eggs with a splash of water. Lay out a rack with paper towels underneath it for the chicken to rest on once they are cooked. The excess oil will drip onto the paper towels and will help prevent the chicken from getting soggy in extra oil.

When your oil is heated to 325°F, start to dredge the chicken. You will need to fry your chicken in batches. You do not want to overcrowd the pot/skillet or your chicken will not fry as well. I usually fry 3-5 pieces at a time depending on the size of each piece of chicken (the fact that you have to fry in batches is part of the reason you need patience for this recipe... you could also use several pots at once to fry the chicken in a shorter amount of time... or just reach a zen cooking place and enjoy the time it takes to masterfully cook the meat). Take the chicken and dip it in the egg mixture first, followed by the flour mixture. Dust off any excess flour and gently place the chicken in the hot oil.  You want to keep the temperature of your oil consistent. Once you add the chicken pieces, the temp of the oil will drop, and you will need to raise the flame/temp on your stove. Adjust the heat while the chicken cooks so that the heat never goes above 325° or below 310°F.

Fry the chicken on each side for 6-8 minutes, or until both sides are golden brown, and the thickest part of the chicken is 165°F when tested with a meat thermometer (another handy and very cheap kitchen tool).

Using tongs, or a spider, remove the chicken once it is cooked and place it on a rack so that any excess oil can drip off.

Serve hot or room temp. Serve with your favorite condiments or side salads. I like to serve mine with a side of honey to dip the chicken in. Sounds crazy, but it's delicious. I also like to serve the chicken with a bright fresh salad (with lots of lemon or vinegar in the dressing), to cut the fat of the fried chicken.

Bon appetit!


Indian Spiced Tomato Soup


I've been thinking about the tomato soup from Kerala Indian Restaurant  in Kyoto, Japan since the day I tried it. As I mentioned in my original post about the restaurant, the owner spent years developing the recipe for this soup. He is Japanese born to an Indian father and Japanese mother. He also spent a significant time in England, working at both a French and Italian high-end restaurant. He ended up returning to his home town, and took over his father's successful Indian restaurant. In a way, you can taste the story of his life in this soup.

It's a soup that has Indian, French, and Italian flavors. It's a soup that cannot be improved upon. It's a soup that was developed by someone with passion, curiosity, and an incredible palate. Like many things in Japan, it's a soup made with precision, care, pride, and love.

After tasting it, I knew I would try to recreate it back in the States. I also knew that I wouldn't come close. That didn't matter; if I could make something remotely similar to what I had, it would still be worth eating.

So I made the soup... and no, it's not the same. It's still damn good. It's curiously spiced and satisfying. There's nothing wrong with classic creamy tomato soup, but if you're looking for a soup with more depth of flavor and unusual spices, this recipe is worth a go.

If you don't have all of the spices in your pantry you can skip some of them. But don't skip the cinnamon stick... that's the secret ingredient!

And if you find yourself in Kyoto... got to Kerala Indian Restaurant and order the large portion of the soup.

Indian Spiced Roasted Tomato Soup
Serves 10

14 medium-small very ripe tomatoes, or about 2.5 lbs. worth fresh tomatoes
2 tablespoons olive oil
1 onion, diced
3 cloves of garlic, minced
1 tablespoon ground coriander
1 tablespoon ground cumin
2 teaspoons ground cardamom
1 teaspoon ground turmeric
2 tablespoons tomato paste
1 quart vegetable stock (homemade if possible)
1 cinnamon stick
1 star anise
1 bay leaf
1 12-oz can tomatoes (Mutti brand)
1 tablespoon salt (or to taste)
2 teaspoons ground pepper
3-4 tablespoons brown sugar or honey (or to taste)
1/2 cup half & half

Preheat the oven to 400°F.

Slice your tomatoes in half. Lay them cut side down on a lined sheet tray. Place them in the preheated oven for 15-20 minutes, or until roasted and soft.


While your tomatoes are roasting, you can start on the base of your soup. In a large soup pot on medium heat, add 2 tablespoons of olive oil and one diced onion. Sauté your onion until softened, about 6-8 minutes. Once softened, to the onion add the minced garlic, ground coriander, cumin, cardamom and turmeric. Sauté until fragrant, about a minute. Then, add 2 tablespoons tomato paste until the bits of onion are well coated, about 30 seconds. Next, add 1 quart vegetable stock (I prefer homemade, but get low-sodium if it's store bought). Add the cinnamon stick, star anise, and bay leaf to the liquid. Finally, add salt, pepper, and 3 tablespoons of sugar or honey. Depending on the tomatoes, you might need more sugar to balance out the acidity of the tomato. Start in small amounts, and add more later if needed. You can always add the sweetener later, but it's hard to take it away once you've put it in the pot.

Once the tomatoes are roasted, add them, their juices, and the canned tomatoes to the pot. Bring the mixture to a boil, and then turn the heat down to low and allow the soup to simmer for 30 minutes until all the flavors meld together. Using an immersion blender, or a regular blender, puree the soup until smooth.

Finally, add the half & half to the pot. Taste the soup and add more salt, pepper, or even half & half depending on your preference.

If you want to make the soup non-dairy, I think it would taste very good with coconut milk, or a non-dairy creamer. Taste and adjust the amounts according to your liking. Alternatively, you could just add more vegetable stock.

Serve hot, ideally with some fresh garlic naan bread, or a melty grilled cheese.

Goat Cheese Tartine with Cherries and Mint


I can subsist solely on bread and cheese. Good bread and cheese would be ideal, but frankly, I'll accept any form of either. When a great loaf of bread ends up in my kitchen I get inspired to top it with other good things.

A tartine is just the French word for "open-faced sandwich." This tartine came as a result of having an incredible bag of cherries (it's peak cherry season in Bakersfield, CA), a bundle of fresh mint, and some crazy good goat cheese (Artisan Farmstead Goat Cheese from Drake Family Farms - available at the Hollywood farmers' market). 

It's hard to go wrong with good things paired with other complementary good things on top of toasted bread. If it's not cherry season where you are, strawberries or apricots would also work well with goat cheese and mint. If the bread was sliced into small pieces and toasted in the oven, this would make a great appetizer at a dinner party. It's also perfectly wonderful as a lunch for one.

Goat Cheese Tartine with Cherries and Mint

sliced cherries
soft goat cheese
fresh mint, chopped
good bread, sliced 
salt

Toast the bread. Slather with goat cheese. Sprinkle with mint. Top with sliced cherries. Sprinkle with course salt. You could even drizzle this with good olive oil or Balsamic if the mood strikes. Serve immediately.

Baked Eggs with Spring Onion and Spinach


Spring is here and with it comes all the new and tasty, green, yellow, orange and pink things popping up at the market and in my CSA (Farm Fresh To You). I'm still trying to figure out if the CSA system works for me as a single person that loves going to the farmer's market to pick out her own produce. The truth is, some weekends I'm too busy to go the farmer's market. The nice thing about the CSA is that I don't have to think about how I'm going to get quality organic produce into my kitchen. Also, I love getting surprised by seasonal items that I might not have thought to pick out on my own.

For example: spring onions. As much as I like onions, it's never really never occurred to me to seek out spring onions. Usually, I reach for the leeks instead. This bundle was delivered yesterday and I immediately felt inspired by these sweet and delicate onions. 

Baked eggs are such a foodie trick. They couldn't be easier, and they look so pretty baked in their own little white dishes (doesn't anything seem fancier when baked in its own dish?). Most importantly, baked eggs are delicious.

I ate this for lunch with a small salad, and I left the table full and satisfied. This recipe works for breakfast, lunch, or dinner. You can add some cheese or sausage to the baking dish if you want something heartier. A splash of cream could add a nice richness to the dish, if you're so inclined. Tarragon or basil would be nice additions, too.  However you choose to compose your little egg dishes, you'll have a meal on your table in 20 minutes or less.

Baked Eggs with Spring Onion and Spinach
Serves 2 (Can easily be halved, doubled, tripled, or quadrupled)

2 small spring onions, tops and bottoms trimmed, thinly sliced 
1/2 cup spinach, roughly chopped
3 tablespoons flat-leaf parsley, roughly chopped
1 teaspoon butter
1 teaspoon olive oil
4 eggs
cooking spray
salt and pepper

Preheat the oven to 375°F. Spray two 6-oz. baking dishes with cooking spray. You can use a ramekin or whatever small baking dish you have (oval, round, square); smaller dishes will simply hold less of the filling, but they'll work perfectly well. Frankly, you can use large muffin tins if you don't have any baking dishes (use one egg instead of 2 per each cup). For the spray, I used coconut oil cooking spray, which adds a mild coconut flavor to the dish.  

Thinly slice your spring onions and roughly chop the spinach and flat leaf parsley.  Set aside and reserve. 


In a pan on medium high heat, melt a teaspoon of butter with a teaspoon of olive oil. You could use just butter or just olive oil; I like the flavor of butter mixed with the lighter quality of oil. Add the spring onions to the pan, and sauté them until they soften and a lovely onion aroma wafts out of the pan, about 2-3 minutes. Add the spinach to the softened onions, and cook it until it just wilts, about 1 minute. Season with salt and pepper. Turn off the heat.  

Divide the onion and spinach mixture evenly between the baking dishes.

Add two eggs to each dish. Top the eggs with chopped flat-leaf parsley.

Sprinkle a little more salt over the eggs.

Place the baking dishes on a baking sheet, and put the baking sheet in the oven for 15-18 minutes, or until the eggs have fully set, and the yolks are just slightly soft. Check your eggs after 10 minutes to gage their level of doneness.


Serve with crusty bread, a side salad, and hot sauce. 
Enjoy each flavorful, fresh, buttery, onion-flavored bite!