• Welcome
  • Book
  • Classes
    • Recipes
    • Index
  • Writing
  • Press
  • Shop
  • Contact
Menu

Sonya Michelle Sanford

  • Welcome
  • Book
  • Classes
  • Recipes
    • Recipes
    • Index
  • Writing
  • Press
  • Shop
  • Contact
healthsalad_mainphoto.jpg

"Health Salad

July 8, 2021

Health salads — sweet and tangy slaw-like, cabbage-based salads that often include carrots, bell pepper and cucumber — are a fixture of New York Jewish delis. They’re  sold by the pound in the deli case or sometimes generously arrive alongside your complimentary plate of pickles. While the dressing is typically sweetened with sugar, the purported “health” is derived from the volume of raw vegetables and the notable absence of mayonnaise. 

If you’re from New Jersey you may also know this dish as a Claremont Salad. In the 1950s, the Bauman brothers operated the beloved Claremont Diner in Verona, New Jersey. The diner was famous for its cheesecake, but it was also known for its “courtesy” cabbage salad that came with every meal. Morris and Leo Bauman never claimed to have invented the salad, but it became so popular that local supermarkets started offering Claremont Salad  in their own deli cases. 

East Coast Jewish delis aren’t the only places you can get this addictive salad. Across Eastern Europe and the former Soviet Union you’ll find salat vitiminniy(vitamin salad). Like health salads, the base is typically made of cabbage and carrot, and may also include cucumber, pepper, tomato, onion and other seasonal summer vegetables. Again, this style of salad gets its healthy-sounding name because of its contrast to the many richer salads that make up Soviet cuisine, which tend to be made with lots of mayonnaise or sour cream. Vitamin salad dressings are also acidic but tend to include less sugar than health salads. Instead, they may include raisins or apples for sweetness. 

While the exact origin of health and vitamin salads is unknown, they have been popular among Ashkenazi Jews for decades. In the “Vilna Vegetarian Cookbook” by Fania Lewando — the first woman to publish a Yiddish vegetarian cookbook in Europe who tragically died in the Holocaust in an attempt to flee the Vilna ghetto — published in 1938, there are four separate vitamin salad recipes. Each features a different combination of seasonal raw vegetables, shredded or chopped, and dressed with oil and lemon juice. 

Whatever you call this salad, and however you make it, the idea is the same: combine lots of hearty, raw vegetables in a salty, acidic, sweetened dressing. The salad will taste great right away and, like everything in the pickle family, it will taste even better as it continues to marinate in the fridge. This salad is refreshing, light, and particularly satisfying when it is served ice-cold on a hot summer day. 

Health Salad

Serves 6-8

Ingredients:

  • 1 lb cabbage (about ½ a medium cabbage)

  • 2 medium carrots

  • 1 red or green bell pepper

  • 1 medium Persian or Kirby cucumber

  • 4-6 small radishes

  • 2 tsps Diamond brand kosher salt, or more to taste

  • 3 Tbsps oil (avocado, sunflower, or canola)

  • 2 Tbsps water

  • 2 Tbsp apple cider vinegar

  • 1 Tbsp white distilled vinegar 

  • 2 Tbsps sugar, or to taste

Directions:

Prepare the vegetables by shredding the cabbage with a knife, mandoline or by using a food processor.  Peel and shred the carrots. Core and thinly slice the bell pepper. Halve or quarter the cucumber, remove the seeds, and slice. Thinly slice the radish into rounds or half-moons. Combine all of the shredded and sliced vegetables together in a large bowl. Season with salt, and toss until everything is coated. 

For the dressing, whisk together the water, apple cider vinegar, white vinegar and sugar. Let the sugar dissolve for a few minutes, then whisk the oil into the vinegar mixture. Pour the dressing over the vegetables and toss the salad. Refrigerate for at least 30 minutes before serving. Taste prior to serving, season with more salt if necessary. The salad keeps for up to a week in the fridge but will soften more each day. 

healthsaladingredientsbigbowl.jpg
In Vegetarian, Vegan, Lunch, Salad Tags Health salad, Claremont Salad, Claremont diner salad, Vitamin Salad, Cabbage salad, Summer salad, Salaad, Mayo free, Mayo free slaw
Comment
strawbrettylabnehslice.jpg

Labneh Cheesecake with Strawberry Sauce

May 10, 2021

Cheesecake is a staple of Shavuot, a holiday that celebrates receiving the Torah, and that also celebrates the Spring harvest and the abundance of dairy that come from pastured animals during this time of year. While cream cheese is typically used in cheesecake, swapping it for labneh transforms traditional cheesecake into something lighter, tangier, and silkier. Labneh is easy to make at home, as it's simply yogurt that has been strained in cheesecloth. You can also find it pre-made at Middle Eastern and Kosher markets.  

This cheesecake can be eaten as is, but it levels up with a fruit topping. I’ve included a recipe for strawberry sauce, but any other berry or stone fruit can be swapped for the strawberries. In lieu of a cooked sauce, you could also top this tart with fresh berries and whipped cream. 

This recipe requires no special equipment, and if you don’t have a springform or tart pan, you can use any standard 9” pie dish. A pre-made graham cracker crust is another convenient time-saver; the extra filling can be baked separately in a small ramekin or baking dish. While the pie comes together quickly, it does need to spend time in the fridge to fully set; it’s best to make this the day before you intend to serve it. 

Labneh Cheesecake with Strawberry Sauce

Ingredients

For the crust:

  • 1 sleeve (150 g) graham crackers (9-10 crackers depending on the brand)

  • 2 Tbsps sugar

  • ¼ teaspoon salt

  • 5 Tbsps unsalted butter, melted

For the labneh filling:

  • 2 cups (16 oz) labneh*

  • ½ cup (4 oz) sour cream

  • ½ cup sugar

  • 3 large eggs, at room temperature

  • 2 tsps vanilla extract

  • ¼ tsp salt

For the strawberry sauce:

  • 3 cups strawberries, fresh or frozen

  • ½ cup sugar

  • ¼ cup water

  • Juice of ½ a lemon

  • ¼ tsp salt 

  • 2 tsps cornstarch + 2 tsps water, whisked together

*To make labneh: line a mesh sieve with cheesecloth, and place it over a large bowl. Add a 32 oz container of plain full-fat yogurt to the lined sieve. Cover and refrigerate for at least 8 hours or overnight. Transfer to an airtight container and discard the liquid. 

Directions

Remove your labneh, sour cream, and eggs so they can come up to room temperature while you make the crust. 

For the crust: Preheat the oven to 350°F. Grease a 9” springform pan, 9” pie pan, or 9½” tart pan.

Crush the graham crackers in their unopened sleeve, or if they are open, place them in a bag. This recipe will work with 9 or 10 graham crackers, as different brands carry different amounts of crackers in their sleeves. Crush until the crackers are fine crumbles. Transfer to a small bowl, and crush any pieces that are larger than a pea in size. Combine with sugar and salt.

Add the warm melted butter, and using your hands mix the butter into the crumb mixture until it resembles wet sand. Transfer the mixture into the greased pan. Press the crumbs towards the sides of the pan, making a thin even layer on the bottom. The bottom can be much thinner than you think it needs to be; the crumbs on the sides should be thicker, and should go up about ½-1”-high depending on the pan you are using. Using the bottom of a measuring cup, press the crumbs into the bottom and sides of the pan. It will seem fragile but will hold up well once baked and filled.

Bake the crust for 10 minutes, or until darker in color and firmer. Allow it to cool for 10 minutes. 

For the filling: In a large bowl, whisk together the labneh, sour cream, sugar, and salt until smooth.

Whisk in one egg at a time, making sure each egg is fully incorporated before adding the next.

Whisk in the vanilla extract.

Pour the mixture into the slightly cooled crust. Bake at 350°F for 20-24 minutes, or until the edges are just starting to set but the center is still very jiggly when you move the pan. If using a tart pan, the cooking time may be quicker, check after 15 minutes. Be careful not to over-bake the tart.

Allow the tart to fully cool at room temperature for 1 hour. Once it’s fully cooled, transfer it to the refrigerator and let it set for a minimum of 6 hours or overnight. Once set, serve the tart as is, or topped with fruit, whipped cream, or strawberry sauce. The tart will keep for up to 5 days in the fridge. 

For the strawberry sauce:

In a medium pot, combine the strawberries, sugar, water, lemon juice, and salt. Bring the mixture to a simmer, and simmer for 3-4 minutes, or until sugar is fully dissolved and strawberries are beginning to soften but still hold their shape. Add in the slurry of cornstarch and water, and simmer for 1 minute more. The cornstarch will immediately thicken the sauce, which should easily coat a spoon.

Allow the sauce to fully cool, then transfer it to the refrigerator. Sauce can be made up to 2 days in advance and will keep for up to one week in the fridge. 

labnestawberryhorizontal.jpg
In Dessert, Holiday, Vegetarian Tags Dessert, Labneh, Labneh cheesecake, cheesecake, labneh strawberry cheesecake, holiday food, Shavuot, Shavuot dessert
1 Comment
blueberrydanish1.jpg

Blueberry Cheesecake Danish

May 6, 2021

The danish came into being as a result of a kitchen mishap and a workers’ strike. In the early 1600s, a French baker forgot to add butter to his flour at the “right” time, and in an attempt to salvage his pastry he folded chunks of butter into his flour mixture. He inadvertently created a delicious flaky puff pastry dough. From there, danish-like pastries were made in France, then Italy, and Austria. A few hundred years later during a labor strike in Denmark in 1850, business owners hired bakers from abroad to replace local workers. Several such Austrian bakers began making danish-like pastries, and when the strike was over, Danish bakeries continued to bake and improve upon these newly beloved pastries. In 1915, a Danish immigrant chef baked danishes for Woodrow Wilson’s wedding to great success and acclaim. Soon after, the same baker encouraged a New York Jewish restauranteur to start selling the pastries at his establishments. Danishes have been a staple in bakeries and delis across the country ever since. 

Danishes are typically made with puff pastry, which is a buttery laminated dough. If you love baking projects you can make this recipe with homemade puff pastry. For a quicker and easier danish, pre-made puff pastry is ideal. Any store-bought frozen version will work, but using an all-butter puff pastry will yield better quality and flavor. These pastries are crispy on the edges with a buttery flaky dough, and soft in the middle with a fruity cheesecake-like filling. Always a crowd-pleaser, they’re perfect for any holiday brunch or lunch spread.

Blueberry Cheesecake Danishes 

Makes 12 danishes

For the pastry:

  • 1 (17.25 oz or 1 lb) package all-butter puff pastry, defrosted

  • 1 egg, beaten

  • Turbinado sugar (or any course sugar), for sprinkling


For the cream cheese filling:

  • 1 (8 oz) block cream cheese

  • 3 Tbsps sugar

  • 2 tsps vanilla extract

For the blueberry sauce:

  • 2 cups blueberries (fresh or frozen)

  • ½ cup water

  • ¼ cup sugar

  • Juice of ½ a lemon, or to taste

  • 1 Tbsp cornstarch + 1 Tbsp water, whisked together 

  • 1 teaspoon vanilla extract

For the blueberry sauce:

In a medium pot combine the blueberries, sugar, water, and lemon juice. In a small dish, whisk together the cornstarch and water and reserve. On medium-high heat, bring the mixture up to a simmer. When the blueberry mixture starts to bubble, add in your slurry of cornstarch and water. The sauce will immediately begin to thicken. Stir and let the blueberries simmer for 2 more minutes until the sauce is thick, easily coats a spoon, but the blueberries still hold their shape. Turn off the heat and add in the vanilla.

Remove from the heat, and allow the sauce to fully cool. Transfer to the fridge or freezer to cool the sauce quickly.

For the cream cheese filling:

Using a handheld mixer or stand mixer fitted with a paddle attachment, beat the cream cheese, sugar, and vanilla on medium speed until light and fluffy, about 2-3 minutes. To make this without a mixer, allow the cream cheese to come to room temperature, combine it with sugar and vanilla, and beat vigorously together with a wooden spoon.

Assemble the danishes:

Preheat the oven to 350°F.

Roll your puff pastry sheets into a 12” x 8” rectangle (if it is already roughly this size, there is no need to roll it out). Divide the pastry into even-sized 3” x 4” rectangles. For square danishes, roll your pastry into a 12” x 12” square, and cut them into  4” x 4” squares. 

Using a small paring knife, gently score each rectangle with a ½” border, so that there is an outline of a smaller rectangle inside each pastry. Transfer the squares to two parchment-lined baking sheets, and place them at least 1” apart.

Add a heaping tablespoon of the cream cheese mixture to the center of the rectangle. Using an offset spatula or the back of a spoon, spread the mixture into an even layer, so it roughly fills only the interior rectangle of the pastry. Top the cream cheese with a tablespoon of the blueberry sauce. 

Before baking, brush the border edges of the pastry with the beaten egg, and sprinkle Turbinado sugar on top of the egg wash. Bake for 22-25 minutes, or until the pastry has puffed up and is deep golden brown in color. Allow the pastry to cool for 15 minutes prior to serving. Danishes are best eaten the same day they are made and can be stored at room temperature. If you have leftovers, they can be reheated in an oven or toaster oven the next day. 

assembling_danishes.jpg

To make ahead:

Form the danishes up to the point of topping them with blueberry sauce. Freeze the cream cheese filling-topped danishes in a single layer, then transfer them to an airtight container or bag. If making more than a week in advance, freeze the sauce, and then defrost before assembly. 

When ready to bake, top the danishes with the blueberry sauce as instructed above. Add the egg wash and sugar to the edges of the frozen pastry. Bake as directed until golden brown. Frozen pastry may take 3-5 minutes longer to bake.

In Holiday, Dessert, Vegetarian Tags Danish, Blueberry Danish, Blueberry cheesecake danish, easy danish, dessert, easy baking
Comment
matbucha.jpg

Matbucha - Tomato and Pepper Dip

April 28, 2021

Matbucha is a Maghrebi dish made of tomatoes and peppers and means “cooked salad” in Arabic. Jewish immigrants from Morocco, Tunisia, Algeria, and Libya brought matbucha with them to Israel, where it has become a staple of Israeli cuisine. Matbucha is nearly as popular as hummus, and the two are usually located right by each other at the grocery store. 

Matbucha is technically a salad, but it does take serious cooking time. While store-bought versions are convenient, nothing compares to making this recipe at home. First, you roast tomatoes and peppers until they are charred with a smoky flavor, and then you simmer the matbucha for over an hour until it becomes thick and luxurious. The slow simmering process can’t be rushed, as all the flavor comes from the slow-cooked tomatoes. Matbucha varies from kitchen to kitchen, some cooks add onions and/or garlic, and some prefer making it with lots of hot peppers. Adding some fresh chili pepper is traditional; in this recipe, it adds a very mild and subtle heat.

Matbucha has the consistency of a dip or spread, and it is commonly served with first-course salads (salatim) at the start of Middle Eastern and North African meals. Matbucha also makes a delicious topping for grilled meat or fish, as a sandwich spread, and it can even be used as the base for shakshuka. 

Matbucha

Serves 4/ Makes 2-3 cups

Ingredients:

  • 6 large Roma tomatoes

  • 3 medium red bell peppers

  • 1 jalapeno or serrano pepper, seeded and diced fine

  • ½  a medium yellow onion, diced small

  • 2-3 cloves garlic, minced

  • 1 tsp salt, or to taste

  • ¼ cup olive oil

  • 1-2 tsps sugar (optional, or to taste)

 Directions:

Line a baking sheet with foil. Set the oven to broil (alternatively, you can char the peppers over a gas flame or grill).

 Place the tomatoes on one half of the baking sheet, and the peppers on the other half of the same baking sheet. Place the baking sheet on the top rack of the oven, and broil the tomatoes and peppers for 10 minutes, or until blackened on top. Using tongs or a fork, remove the tomatoes. Turn the peppers onto their opposite side and continue to broil them until blackened on both sides, another 8-10 minutes. (Watch your tomatoes and peppers carefully, as some ovens will broil them more quickly than others.)

Once the peppers are blackened on both sides, place them in a bowl and cover it tightly with foil or plastic wrap to let the peppers steam. Prep the other ingredients while the tomatoes and peppers cool. Once cool enough to the touch, peel the peppers and remove their seeds, and peel the tomatoes. Dice the peppers and tomatoes and reserve.

To a medium pot on medium heat, add the olive oil, diced jalapeno, diced onion, and minced garlic. Allow the mixture to cook and soften for 4-5 minutes, until the onion and garlic are aromatic, but before they start turning brown. Add the peeled diced peppers and tomatoes to the mixture, and bring it up to a simmer. Lower the heat, and let the matbucha simmer for 90 minutes, or until most of the liquid has evaporated and the mixture significantly thickens. Stir every 10-15 minutes throughout the cooking time. Matbucha can take more or less time depending on the size of the pot you use, or the amount of liquid in the tomatoes. If the mixture still has a lot of liquid, continue to cook it for up to two hours.

Once cooked, allow the matbucha to fully cool and then refrigerate it. Matbucha can be eaten right after it cools, but it tastes even better the next day. It will last up to one week in the fridge.

matbucha1.jpg
In Appetizer, Dinner, Vegan, Vegetarian Tags matbucha, dips, North African
Comment
Pampuskhy1.jpg

Pampushky - Ukrainian Garlic Bread Rolls

February 28, 2021

Pampushky are fluffy, soft, Ukrainian garlic rolls. Ukraine was known as the “breadbasket” of the Soviet Union, and both garlic and bread are staples of the cuisine. These rolls are traditionally served alongside borscht; the garlic’s sharpness compliments the sweetness of borscht’s beets. Garlic + bread is such a common side to borscht, that my own grandparents would often simply eat slices of brown bread and whole raw cloves of garlic with their soup. 

I was first inspired to make pampushky years ago when I came across a recipe in Mamushka, Olia Hercules’ exceptional Ukrainian cookbook. This recipe differs slightly, but the idea is the same for all pampushky: make pillowy soft buns, and top them with a mixture of oil and copious amounts of freshly minced or grated raw garlic. I prefer sunflower oil for this recipe, which is traditionally used in Ukrainian cooking. The moment the rolls come out of the oven, generously slather them with the garlic and oil mixture. The heat of the bread cooks the garlic just enough to slightly mellow its flavor. Fresh parsley and dill are also added to the garlic oil, which offers a bright herbaceousness to the spicy heat of the garlic. Make no mistake, these rolls are adamantly for garlic lovers. 

Pampushky are best served warm, either soon after coming out of the oven, or reheated just before serving. As you set the rolls on the table, make sure to announce that you are serving  “pampushky.” Saying the word out loud is part of the joy of making these rolls. 

Ingredients-

  • For the dough:

  • 1 cup (250 ml) milk 

  • 2¼ tsps (1 packet) active dry yeast

  • 2 Tbsps sugar

  • 2 Tbsps oil (sunflower, avocado, or olive) 

  • 3 cups (380 g) all-purpose flour

  • 2 tsps salt

  • 1 egg, beaten

For the garlic oil:

  • 3 Tbsps oil (sunflower, avocado, or olive) 

  • 3-4 garlic cloves

  • 1 Tbsp chopped fresh dill

  • 1 Tbsp chopped fresh Italian parsley 

  • Flake salt (optional)

Directions-

Warm the milk until it is between 80-100°F, and just warm to the touch. Add the milk to the bowl of a stand mixer fitted with a dough hook attachment, or add the milk to a large bowl if kneading by hand. Add the sugar to the milk, then sprinkle the yeast on top. Whisk the mixture and allow it to activate and become foamy for about 5-10 minutes. Once the yeast is activated, add the oil to the milk mixture, then add the flour and salt. If using a stand mixer, start mixing the dough on the lowest setting. Once the dough starts to form a ball, increase the speed to medium and knead for 6-8 minutes. Alternatively, knead for 10-12 minutes by hand. The dough is done when it is elastic, glossy, soft, and easily comes away from the sides of the bowl/surface. Add the dough to a lightly oiled bowl, and cover with a clean damp kitchen towel. Let the dough rise for 1-1½ hours, or until doubled in size. 

Once the dough has risen and doubled in size, punch it down to remove the air, and transfer it to a clean surface. Form the dough into a rectangle, and then divide it into 8 equal-sized pieces; weigh each one to be exact. Form each piece into a ball by pinching the edges inward, and then on a flat surface, roll the dough into a ball shape.

Preheat the oven to 350°F. Lightly grease a 9” round or square baking dish, preferably metal as opposed to glass or ceramic. Beat the egg for the egg wash. Place each ball of dough in the baking dish, with an equal distance between each ball. Allow the dough to rise a second time for 30 minutes, or until the rolls have puffed up and filled the pan. Brush the tops of the dough with the egg wash and bake for 25-30 minutes, or until deep golden brown.

While the rolls bake, make the garlic oil mixture. Finely mince the garlic using a garlic press or a Microplane. Combine the oil, garlic, chopped dill, and chopped parsley together. Brush the garlic-herb mixture over the rolls immediately after they come out of the oven. Allow the rolls to cool for 15 minutes before serving. Pampushky can also be served at room temperature or reheated.

oneplated_pampushky.jpg
In Vegetarian, Dinner, Holiday, Lunch, Snack Tags Pampushky, Pampushki, Garlic rolls, Garlic Bread Rolls, Ukrainian Bread Rolls, Ukrainian food, Bread rolls, bread, home baking
2 Comments
nuts.jpg

Sweet and Spiced Roasted Nuts with Turmeric, Ras el Hanout, and Rosemary

February 24, 2021

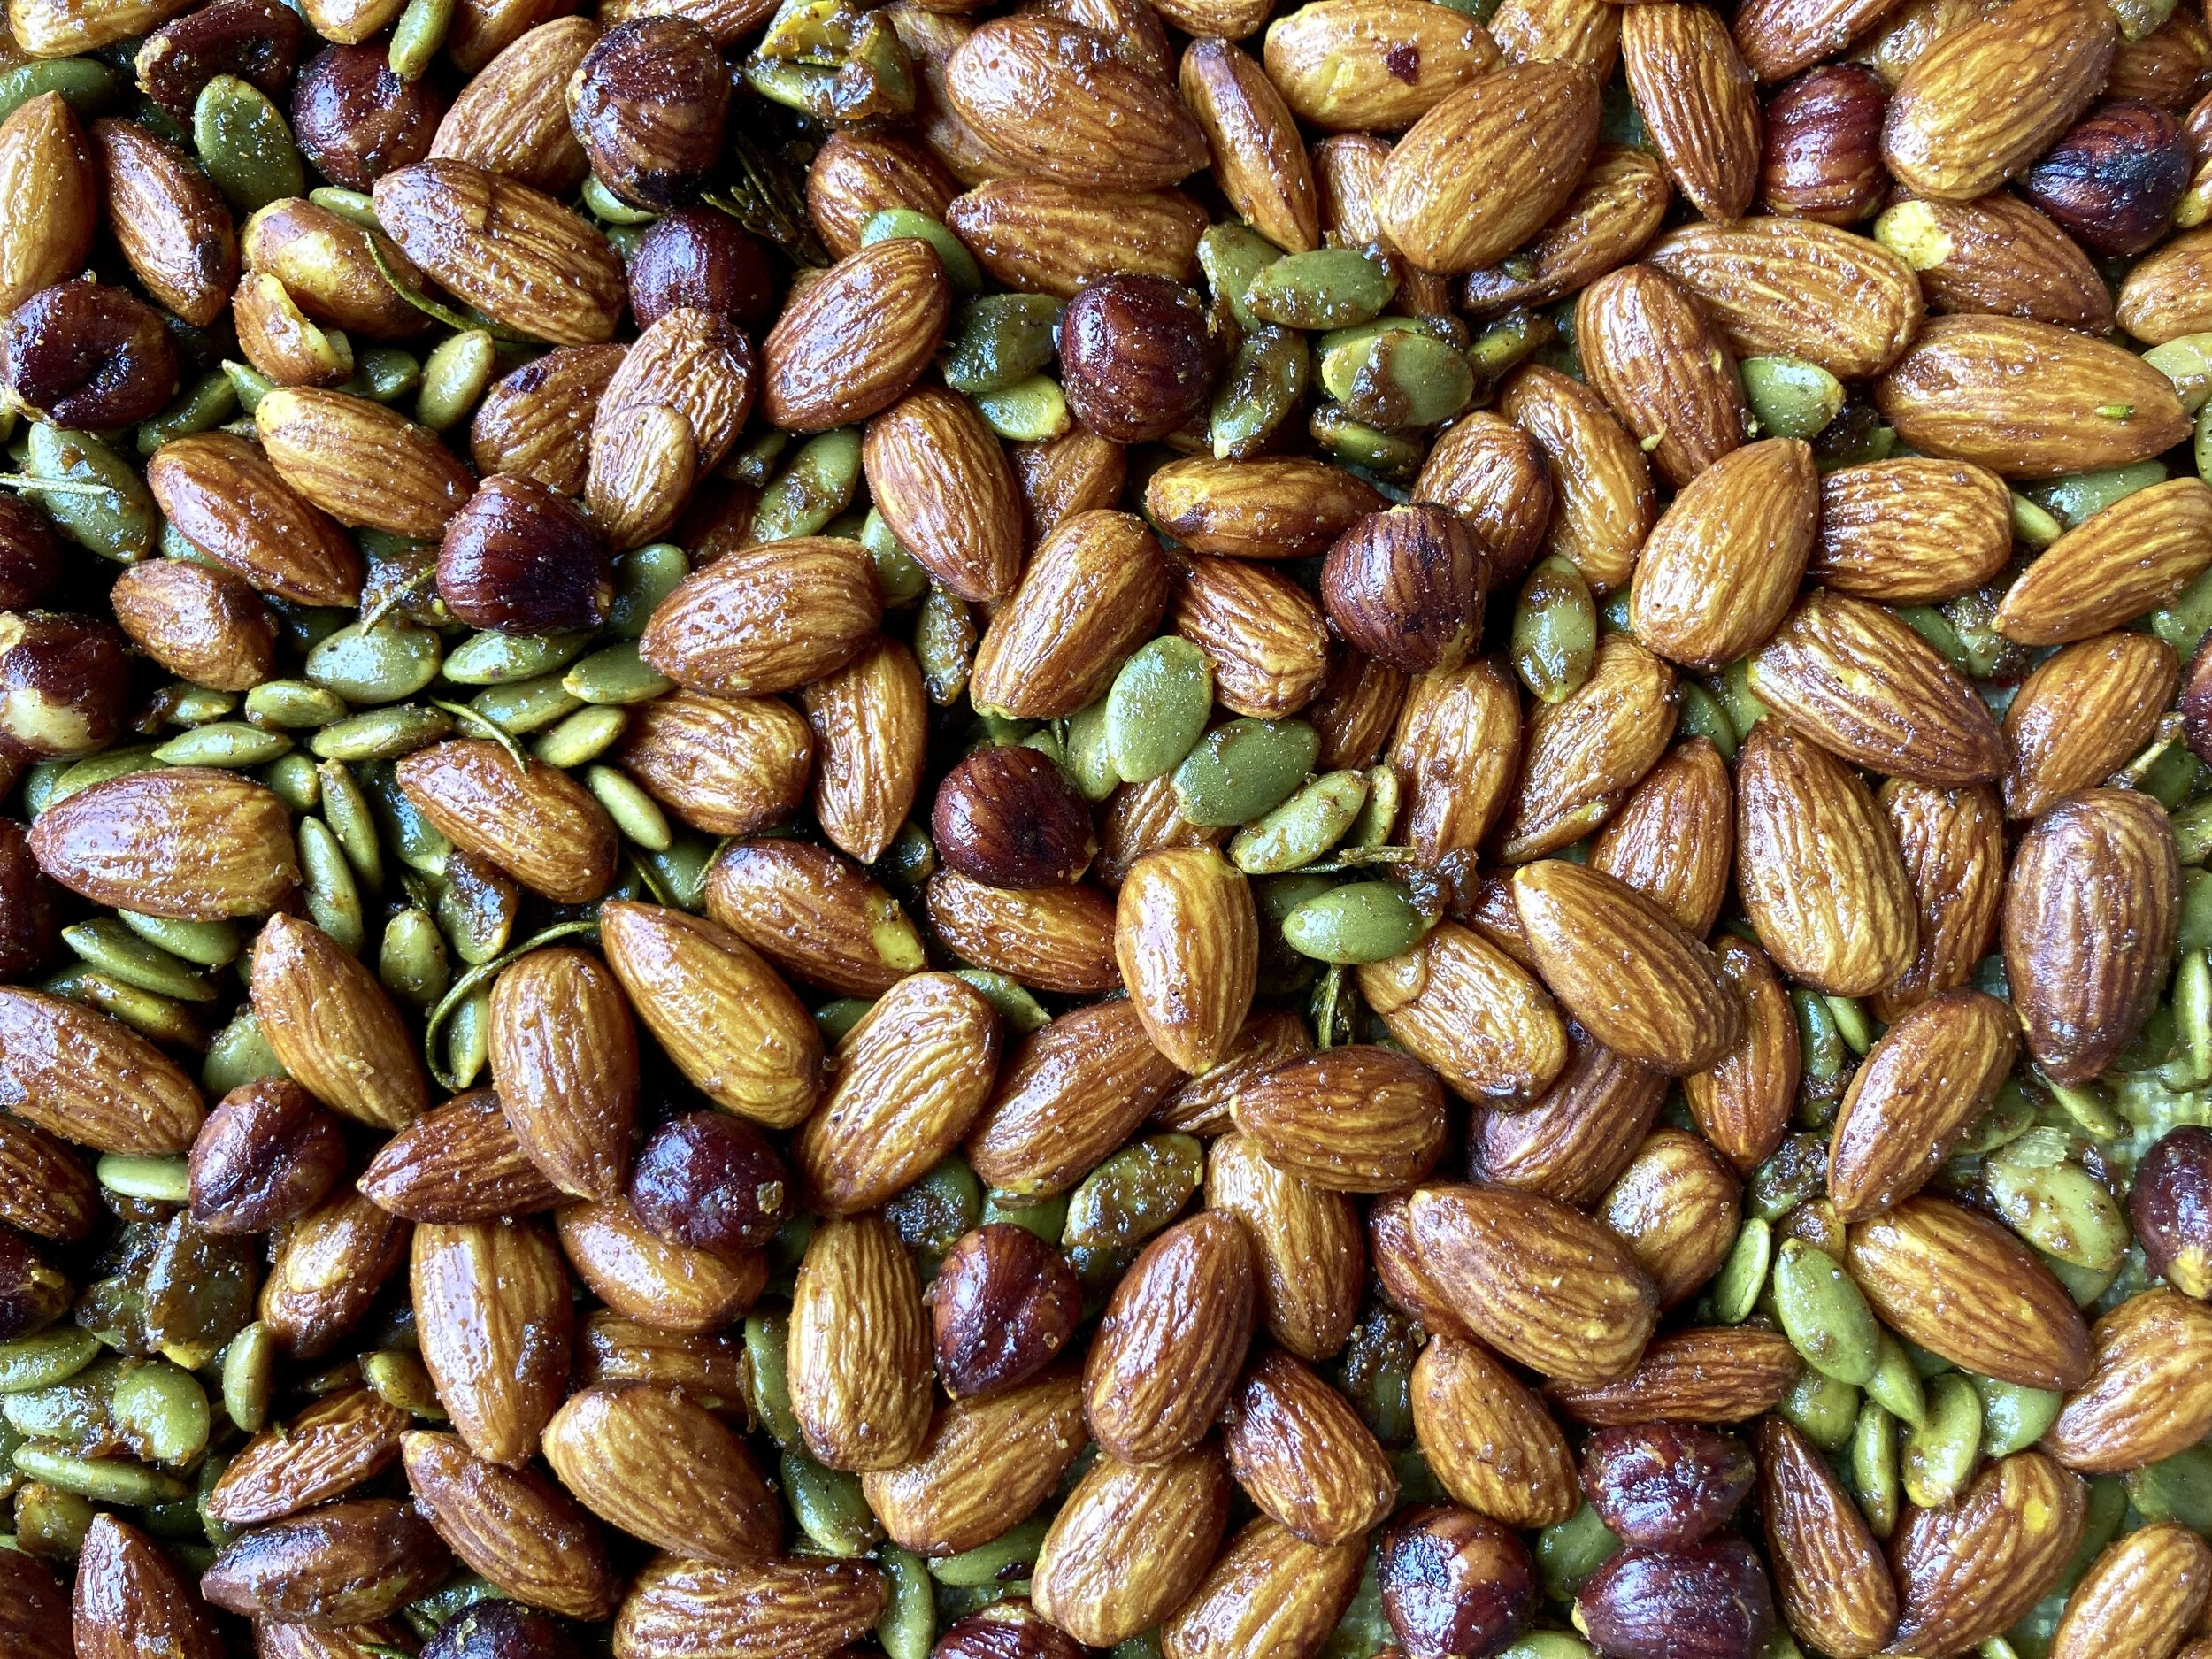
This simple roasted nut recipe combines earthy turmeric, aromatic gingery Ras el Hanout, piney rosemary, and sweet maple syrup. The mix of spices and aromatics pair perfectly with the rich nuttiness of the almonds and hazelnuts. That said, you can easily customize the nuts or flavors to your liking. If you like it sweeter add more maple, if you like it simpler omit any of the ingredients you don’t enjoy.

This addictive snack mix lasts 7-10 days in an airtight container and makes a great gift.

Sweet and Spice Roasted Nuts with Turmeric, Ras el Hanout and Rosemary

Ingredients:

  • 3 cups raw almonds (or sub cashews, pecans or walnuts)

  • 1 cup raw hazelnuts

  • 1 cup raw pepitas

  • 3 sprigs rosemary, removed from stems

  • 1/3 cup oil (e.g. avocado or sunflower)

  • 1 Tablespoon turmeric

  • 2 teaspoons kosher salt

  • 1 teaspoon Ras el Hanout spice mix

  • 2-3 Tablespoons maple syrup

Directions:

Preheat the oven to 325°F. Line a baking sheet with a silicone mat or parchment paper.

In a large bowl, combine the almonds, hazelnuts, pepitas, and rosemary. Add the oil and toss everything together.

Add the turmeric, salt, and Ras el Hanout to the coated nut mixture. Toss until everything is combined. Transfer to your lined baking sheet in an even layer. Roast for 10 minutes, remove and drizzle with maple syrup. Mix everything so that the maple syrup evenly coats the nuts.

Roast the nut mixture for another 10 minutes. Allow to fully cool on the sheet pan, then transfer to an airtight container.

fullsizeoutput_4853.jpeg
In Appetizer, Vegan, Vegetarian Tags Turmeric, Spiced nuts, Turmeric almonds, Roasted nut mixture, Snacks, Vegan
Comment
IMG_1523.jpg

Queen Esther's Cookies / Mohn Kichlah

February 17, 2021

Poppy seeds are the key ingredient in these Eastern European cookies. Mohn Kichlach , or Queen Esther’s Cookies, are made and eaten year-round, but they have special significance at Purim. The poppy seeds are meant to remind us of how Queen Esther was able to secretly keep kosher in Ahasuerus’ palace by only eating seeds, legumes, vegetables, and fruits. In fact, at Purim it’s traditional to eat all kinds of dishes with beans, seeds, or that are vegetarian.

These are simple sugar cookies, that are often flavored with almond extract, but here I’ve added lemon zest and lemon juice for their bright and citrusy flavors. You can make and eat these plain, but they are also delicious drizzled with a simple icing or with melted white chocolate. 

This dough can also be used to make hamantaschen; instructions are included at the bottom of the recipe.

Mohn Kichlah - Queen Esther’s Cookies

Ingredients:

  • 2 cups (275 g) all-purpose flour

  • 2 Tablespoons poppy seeds

  • ½ teaspoon baking powder

  • ½ teaspoon salt

  • ¾ cup (1½ sticks/170 g) unsalted butter

  • ⅔ cup granulated sugar

  • 1 large egg

  • 1 teaspoon vanilla extract

  • zest of one lemon

  • 1 Tablespoon lemon juice

For the icing:

  • 1 cup powdered sugar

  • 1-2 Tablespoons lemon juice

Directions:

Line two baking sheets with parchment paper or a Silpat. 

In a medium bowl, whisk together the flour, poppy seeds, baking powder, and salt. Reserve.

In a large bowl using a handheld mixer, or in a stand mixer fitted with a paddle attachment, beat the butter and sugar together until lightened in color and fluffy, about 3 minutes. Add the egg, and beat until fully incorporated. Beat in the vanilla, lemon zest, and lemon juice. 

Add the dry ingredients to the butter and sugar mixture, beat until everything just comes together, be careful not to overmix. 

Form the dough into a disc, and wrap it with plastic or beeswax wrap. Refrigerate for at least 2 hours, and up to 2 days. 

When ready to make the cookies, preheat the oven to 325°F.

Roll out the dough about ¼”-thick. Cut the dough into desired shapes such as triangles, hearts, or circles. Gather the scraps of dough, and roll them out again until you use up all of the dough. Place the cut out shapes onto the lined baking sheets, leaving 1”-2” of space between each cookie. Bake for 15 minutes, or until just becoming golden at the edges and starting to firm up. Allow the cookies to fully cool on a rack before serving, icing, or drizzling with melted white chocolate. 

For the icing:

Whisk together the sugar with 1 tablespoon of lemon juice. If it is too thick, add a little more juice or water until you have a loose consistency. Drizzle over the cookies with a spoon or fork. 

For Hamantaschen:

You can also use this dough for hamantaschen. Preheat the oven to 350°F. Cut the dough into rounds using a biscuit cutter or water glass. Fill each circle of dough with a small spoonful of jam or your favorite filling. Pinch the sides upward to form a triangle shape, pinch each side closed. Place the dough on a parchment-lined baking sheet and freeze or chill for a minimum of 15 minutes. Bake for 15-17 minutes or until firm to the touch and just golden at the edges.

In Holiday, Dessert, Vegetarian Tags Mohn Kichlah, Purim, Poppy Cookies, Cookies, Poppy Lemon Cookies, Purim cookies, Hamantaschen
Comment

Okonomiyaki for Hanukkah

December 5, 2017

As written for THE NOSHER

The Japanese word Okonomiyaki is derived from two words: okonomi “how you like it” and yaki “grill.” Okonomiyaki is a customizable Japanese savory vegetable pancake. Like a latke, it gets cooked in oil in a fritter formation. Unlike a latke, it’s usually made into a large plate-sized pancake comprised mainly of cabbage. Food historians have linked the rise in popularity of okonomiyaki in Japan to World War II, when rice was more scarce and this recipe offered a filling meal or snack with a wheat-based starch. Throughout Japan there are regional differences and countless variations of okonomiyaki, but the most common form of the dish involves a batter made of flour, a variety of mountain yam, eggs, shredded cabbage, green onion, dashi, and often the addition of pork belly. It gets topped with its own tangy sweet sauce, Japanese mayonnaise, and bonito flakes (katsuobushi).

I first fell in love with okonomiyaki on a trip to Japan. You can find it there in restaurants that specialize in the dish, but it’s also something that is prepared in home kitchens. The cabbage gets slightly crisp, tender and sweet when seared in oil on a flattop or skillet, and then it gets generously slathered with an umami rich sauce, along with a welcome drizzle of creamy mayo. The richness, sweetness, and tanginess of these components all work perfectly together. A few months after I got back from Japan, I ended up eating at Brooklyn’s Japanese Jewish restaurant, Shalom Japan. I didn’t hesitate to order their Jewish-influenced spin on okonomiyaki. They’re known to top it with pastrami, or even corned lamb tongue and sauerkraut. It became clear there that okonomiyaki is a perfect fit on a Jewish table with its base of humble cabbage and onion. The fried pancake part of it all called out “Hanukkah.”

I am a fan of all pancakes and fritters, and I set out to modify the classic Japanese version for a recipe that didn’t require access to a specialty food store, and that could be made with kosher ingredients. Full disclosure: my version lacks authenticity. If you’re going for the real deal you’ll need a batter made with an okonomiyaki flour mix, or nagaimo yam; this special kind of yam is added in powdered form to the flour mix, or gets grated fresh into the batter. The toppings should include bonito flakes, and the batter should be made with dashi. These ingredients can be found at most Japanese markets. Instead of nagaimo yam, my version uses a batter of flour and potato starch, and instead of dashi I use water. I’ve also included a recipe for homemade traditional okonomiyaki sauce that can be made simply with easy to find ingredients, but you can also buy premade bottled sauce. You can make these pancakes large-sized and cut into wedges like the Japanese do, or slightly smaller à la a large latke. I wouldn’t go too small with this, as the vegetables tend to hold together better en masse. This recipe doesn’t need to be too exact and it works as a blank canvas for additional vegetables like kale, mushrooms, and/or daikon. In the spirit of Hanukkah, these okonomiyaki get cooked in oil, but they’re not heavily fried. The oil used to fry the Okonomiyaki gives a loving nod to the miracle of the oil glowing for eight days instead of one in the Temple, but the heap of vegetables and addictive sauce make this a nutritious and satisfying addition to any Hanukkah meal.

ingredientshotokonomiyaki.jpg

Okonomiyaki for Hanukkah

Serves 4

Ingredients:

For the pancakes-

  • ¾ cup all purpose flour or gluten free all purpose mix
  • ¼ cup potato starch or cornstarch
  • 1 teaspoon baking powder
  • 1 teaspoon kosher salt
  • 2 large eggs
  • ½-¾ cup water
  • ½ green cabbage, about 4½ packed cups
  • 3 green onions, sliced thin plus more for garnish if desired
  • 1 carrot, peeled and shredded
  • 4-5 inches daikon, peeled and shredded (optional)
  • Oil as needed (i.e. sunflower, canola, or peanut)
  • Sesame seeds, for topping (optional)
  • Mayonnaise, for topping (optional)

For the okonomiyaki sauce-

  • ½ cup ketchup
  • ¼ cup Worcestershire sauce
  • 2 Tablespoons soy sauce
  • 2 Tablespoons honey or agave syrup, or to taste
cutvegetables.jpg

Directions:

  1. Start by making the batter. Whisk together the flour, starch, baking powder and salt in a large bowl.
  2. In a separate bowl beat the eggs. Add the eggs and ½ a cup of water to the flour mixture. Whisk until smooth. You want a fairly thin, crepe batter-like consistency. If you find it too thick, add another ¼ cup of water. Try not to overmix, you do not want to overdevelop the gluten. Allow the batter to rest in the fridge for 30 minutes to an hour.
  3. While the batter is resting, prepare the vegetables. Take out the thick core from the cabbage half, then cut the halved cabbage in two. Thinly slice or shred the cabbage. Thinly slice the green onions. Grate the carrot and daikon if using.
  4. Make the okonomiyaki sauce: combine the ketchup, Worcestershire, soy sauce, and honey/agave in a bowl. Taste and adjust to your liking. The sauce should be tangy, savory, and a little sweet.
  5. Combine the batter with the vegetable mixture.
  6. Heat a cast iron skillet or a nonstick-skillet with about 3 tablespoons of oil over high heat. Once the oil is glistening and hot lower the heat to medium low, and, add some of the cabbage mixture to the pan, gently nudge it into a circle shape. I like to make each pancake with about 2 cups of the mixture. For me, that makes an ideal sized pancake that isn’t too hard to flip, and one that will hold together. Cover the skillet with a lid for 3-4 minutes. Carefully flip over the pancake, and cover it with a lid for an additional 3-4 minutes, or until browned on both sides and cooked through. Make sure not to cook on too high of a heat or the pancake might burn while remaining raw in the center.
  7. Serve hot topped with a generous spread of the okonomiyaki sauce, mayo if desired, sliced green onions and sesame seeds.
  8. Slice and serve!
2closeupokonomiyaki_secondaryphoto.jpg
In Dinner, Lunch, Vegetarian Tags Hanukkah, Okonomiyaki, Kosher food, kosher, jewish food, japanese food
Comment

Preserved Lemons

April 27, 2017

Citrus season in California always seems never ending to me. In a good way. But there is a season, and that season peaks in winter, and spills into spring. The Meyer lemons are still around, but they're definitely on their way out. Before they go, I like to preserve a few jars.

Preserved lemons are some of the easiest of preserved foods to make. They involve little other than lemons, salt, and sanitized mason jars (just boil the jars totally submerged in water, lids off, for 10-12 minutes). You can flavor them with whatever spices you like - although I'm partial to the combination of black pepper, bay, and cinnamon. A friend gifted me a jar of lemons she preserved with fennel seed and pink pepper corn, which was lovely.

And then what do you do with them?

They're pungent, and borderline astringent. They're salty, acidic, and flavor-packed. A little goes a long way. But that little bitt adds notes of complexity. It makes you go: "what's in this?" It both highlights the essence of a lemon, and takes lemons to another otherworldly flavor.

I like to use them in homemade hummus (a la Joan Nathan's recipe in her new cookbook). They're beautiful in chicken dishes, and in tagine (they are a common North African ingredient). I also like to make a simple dip with thick plain yogurt, chopped fresh mint, and super finely chopped preserved lemon. 

This recipe works for any lemon, but lemons that are thin-skinned, like Meyer's, seem to work best. 

Preserved Lemons

Makes 1 pint jar

  • 5-6 lemons, depending on their size
  • Kosher salt, as needed
  • 3-4 fresh bay leaves
  • 1 cinnamon stick
  • 1 tablespoon black or pink peppercorns
  • Lemon juice, as needed
  • 1 pint mason jar, sterilized

Quarter each lemon by slicing the top down within half an inch of the bottom, leaving them connected. Pack salt into the lemon then press it back into its original shape.

Fill the bottom of the mason jar with a layer of salt. Layer the salted lemons into the bottom of the jar. Top each layer with more salt, and squeeze lemon juice over each layer as well. Top each layer with bay leaf and peppercorn, and stick the cinnamon stick into the jar as you layer. Pack all of the lemons in tight and make sure everything is covered with a layer of salt and lemon juice.

Place the jar on your kitchen counter or in a pantry and shake the jar once a day for 30 days. After 30 days, the lemons are ready for use. Once opened, I prefer to keep my lemons in the fridge. They’ll keep for up to 1 year.

Before using the lemons, rinse each piece as needed to remove the excess salt.


In Lunch, Dinner, Appetizer, Vegan, Vegetarian Tags preserved lemons, lemons, meyer lemons, preservation, snack, dinner, lunch, citrus, california
Comment

Citrus, Pomegranate and Mint Salad

January 21, 2016

Tu B’Shevat Citrus, Pomegranate, and Mint Salad

Serves 4-6 (recipe can be doubled or tripled as needed)

for the salad-

  • 1 small head of lettuce, your favorite variety (Speckled, Romaine,Little Gem)
  • 2 small Cara Cara oranges (or any available orange)
  • 1 small blood orange (or any available orange)
  • 2 tangerines
  • ½ cup feta cheese, cubed small or crumbled
  • ⅓ cup pomegranate seeds
  • ¼ cup fresh mint leaves, chopped

for the dressing-

  • 1 tablespoon pomegranate molasses
  • 1 tablespoon fresh lemon juice
  • 1 teaspoon honey, or to taste
  • ½ teaspoon salt
  • ⅓ cup extra virgin olive oil

Start by removing the peel and outer membrane from all of the citrus. Slice off the very top and bottom of the fruit. Next, cut the peel and outer membrane away from the flesh by standing the fruit on its bottom and carefully run the knife alongside the fruit, cutting away the peel one section at a time. Once you have cut away the peel, slice the citrus into half inch rounds. Alternatively, you can also fully supreme the fruit.

Lay the lettuce leaves down into your serving platter or bowl. If using large leaves of lettuce, slice the lettuce into smaller pieces. Lay the fruit on top of the lettuce. Sprinkle with pomegranate seeds and fresh mint. Season with a pinch of salt.

In a small bowl, whisk together the pomegranate molasses, lemon juice, honey and salt. Slowly whisk in the olive oil. Taste and adjust according to your liking. Drizzle the dressing over the salad and serve.

In Lunch, Dinner, Vegetarian, Vegan Tags Salad, Tu B'Shevat, Citrus, Blood Orange, Cara Cara Orange, Feta, Mint, Holiday, Vegetarian
Comment

Chocolate Covered Cara Cara Oranges

January 12, 2016

This recipe is one of the easiest in my arsenal. It takes a modest investment of time and only 2 ingredients. You don't have to worry about exact measurements, and it's seasonally versatile.

Yes, these are simply oranges dipped in chocolate. That's it. However, when cut attractively, and when using the best possible fruit at the best possible time in that fruit's season with very very good chocolate, it's a stunning and delicious dessert. Also, it's always a crowd pleaser. Citrus is a great way to end a meal - especially in winter.

Cara cara oranges are at their peak right now. They're distinctively grapefruit-like in color on the inside, but with no bitterness and incredibly sweet and floral in flavor. I picked these up from Ken's Top Notch Produce stand at the Hollywood Farmers' market, but I've even seen Cara Cara's sold at Trader Joe's. Alternatively, you can use any citrus you like: tangerines, grapefruit (for that I omit the peel entirely when dipping in chocolate), pomelo, etc. You can also dip anything else in chocolate: strawberries, coconut, blackberries, pears, persimmons, and more.

The key is to be gentle with the chocolate when you heat it up - once it's melted take it off the heat and act fast. The second trick is to make sure the fruit isn't too damp or the chocolate won't stick. The third key is to lay the dipped chocolate flat on a lined baking sheet, and immediately chill the fruit in the refrigerator for at least an hour before you're ready to serve it.

Chocolate Covered Cara Cara Oranges

Serves 6

  • 1-2 cups good quality dark or milk chocolate*

  • 2 oranges, sliced into 1/4-1/2 inch thick circles and then into half moons

  • flake salt, to taste**

Start by slicing your fruit. If you do not want to have your guests deal with the peel, you can also just peel and segment the orange, but I prefer the look of the slices. Lay the orange slices over a clean kitchen towel or paper towels to absorb any excess moisture.

Line a baking sheet with parchment paper or foil.

Add the chocolate to a double boiler (or a metal bowl place on top of a pot of simmering water). Occasionally stir until chocolate is just melted. Turn off the heat, and carefully dip the orange slices so that they are halfway covered by the melted chocolate. Lay the dipped orange onto the lined baking sheet. Immediately sprinkle with a tiny pinch of salt, if desired. Repeat until all of the oranges are dipped in chocolate.

* If using 2 cups of chocolate it will be easier to dip, but you might have extra chocolate at the end (sometimes I drizzle this over some cookies or other fruit). Also, for a glossier finish, you can add a tablespoon of coconut oil to the chocolate once it has just melted.
** I used Jacobsen Pinot Noir Flake Salt in this recipe. Alternatively you could sprinkle a little cayenne for heat, cinnamon for spice, or Turbinado sugar for extra sweetness

In Vegan, Vegetarian, Dessert Tags Cara Cara Oranges, Oranges, Citrus, Chocolate, Chocolate Dipped Oranges, Dessert, Paleo, Vegan, Vegetarian, Dairy Free
Comment

Photo by Eric Slatkin.  This recipe was developed for and first appeared on ASSEMBLY LINE

All Things Green Avocado Toast

January 5, 2016

Like many, I crave green fresh things at the start of the year. Even in LA it's dreary and cold, and fresh vegetables and leafy greens are very welcome after all of the rich food eaten over the holidays.

There are some food trends that are classics. I don't think I'll ever get tired of avocado toast. We're lucky to have so many good avocados in California year round. While I'm often homesick for the Pacific Northwest, avocados and other incredible produce are the things I love most about living here. Simple avocado on toast is perfect, but this is a gussied up version that takes little extra effort. Sometimes I like to start the day with a little extra time put into breakfast.

You don't really need a recipe, but here's one just in case. The idea is to add some fresh herbs, some protein in the form of pistachios, some spice with a little bit of thinly sliced jalapeno (optional), and a not of acid with lime zest and juice to this classic toast. There are endless variations and possibilities but I love the combo of creamy avocado paired with herbs, citrus, and nuts. Happy new year!

All Things Green Avocado Toast

Serves 1-2

  • 2 large slices seeded multigrain or sprouted grain bread
  • 1 avocado, sliced thin
  • ¼ jalapeno, very thinly sliced
  • 4 large basil leaves
  • 4 chives
  • 1 tablespoon fresh parsley leaves
  • 1 tablespoon fresh cilantro leaves
  • 2 tablespoons shelled roasted unsalted pistachio nuts, chopped
  • 1 teaspoon lime zest, or to taste
  • fresh lime juice, to taste
  • extra virgin olive oil, drizzle to taste
  • salt and freshly ground pepper to taste

Start by toasting your bread slices. While the bread is toasting, prepare the other ingredients. Halve your avocado, and slice the avocado halves thin. Slice half a jalapeno pepper very thin. 

On a cutting board, pile the basil, chives, parsley and cilantro together. Roughly chop all of the herbs. Roughly chop the pistachios. 

Once your bread is toasted, top each slice with half of the avocado. Top the avocado with a few slices of jalapeno, if using. Top the jalapeno with your herb mixture. Top the herbs with chopped pistachios. Grate some fresh lime zest over each slice of toast. Squeeze lime juice over the toast.

Drizzle the olive oil over each slice. Finally, garnish the toast with salt and pepper, to taste.

In Vegan, Vegetarian, Lunch, Breakfast Tags avocado, avocado toast, toast, vegan, vegetarian, delicious, snack, breakfast
Comment

Daikon and Potato Latke with Ponzu Dipping Sauce

December 8, 2015

My love of Japanese food led me to reconsider the traditional Hanukkah potato latke served with applesauce and sour cream. Don’t get me wrong, classic latkes are delicious, but sometimes I love a little variety on my holiday table. Traditional Japanese tempura is often served with citrusy Ponzu sauce and finely grated Daikon radish. The salty tangy Ponzu, accompanied with the fresh cool Daikon are as welcome to latkes as they are to lightly fried vegetables and fish. Adding Daikon to the batter as well makes these latkes a touch sweeter and lighter than their all-potato counterparts. Flavorful sharp scallion garnish the latkes and bring a touch of brightness to the final dish. 

The recipe can be halved, but you may want to even double it. These latkes will go fast!

Daikon and Potato Latkes with Ponzu Dipping Sauce

Makes 24-27 Latkes, Serves 8-10 (recipe can be easily halved or doubled)

for the latkes-

  • 1½ lbs. (680 grams)  Russet potatoes, about 3-4 medium sized
  • 1½  lbs. Daikon radish (680 grams)
  • 1 large yellow or white onion
  • 3 medium scallions, sliced fine
  • 2 large eggs, beaten
  • ¼ cup all purpose flour (can be substituted with all purpose gluten free flour)
  • 1½ teaspoons kosher salt
  • peanut or vegetable oil, as needed

for the Ponzu sauce-

  • ½ cup light soy sauce
  • juice of 1 large orange, about ½ a cup
  • juice of 1 lemon, about ¼ cup
  • 3 tablespoons mirin
  • ¼ teaspoon red pepper flake, or to taste

for garnish-

  • ½ lb. (230 grams) Daikon radish, peeled and finely grated
  • sliced scallion, to taste

for the Ponzu sauce-

Start by making the Ponzu sauce. Add the soy sauce into a medium sized bowl. Juice the lemon and orange through a strainer over the bowl of soy sauce. Add the mirin and pepper flake, whisk until combined. Set aside and reserve.

Ponzu sauce can be made ahead and will keep up to 1 week in the fridge.

for the latkes-

Preheat the oven to 325°F/165°C.

Peel and grate the potatoes, Daikon, and onion into a large bowl. Using a clean dish towel, squeeze the moisture out of the combined potatoes, Daikon and onion. This step ensures a crispy latke!

To a large bowl, add the potatoes, Daikon and onion. Add the sliced scallion, beaten eggs, flour and salt to the bowl. Mix until just combined.

Line a sheet pan with paper towels.

Add about ⅛-¼ inch of oil to a large heavy-bottomed skillet, cast iron is ideal. Over medium high heat, allow the oil to get hot. Test the oil with a small piece of potato. If it immediately starts to sizzle and bubble the oil is ready. Form the latkes into small thin patties. I make mine to fit the palm of my hand, but these can be as wide or small as you prefer.

Carefully add the latkes to the hot oil. Brown on one side for 2-3 minutes, flip and brown for another 2-3 minutes. Occasionally, rotate the pan or adjust the heat to ensure even browning and cooking. Like pancakes, the first batch is usually the worst, so don’t get discouraged. When browned and crispy on each side transfer the cooked latkes to the lined sheet pan and allow to rest.

Fry the latkes in batches, be careful not to crowd the pan. Add more oil as necessary to maintain a constant level. Adding more oil will drop the temperature, so adjust the heat as necessary.

Keep the latkes warm in the oven until ready to serve (remove paper towels from sheet pan). Serve warm and fresh!

for the garnish-

Using a microplane or the small size on a box grater, grate the Daikon radish. Thinly slice the scallion.

to serve-

Top each latke with the grated Daikon radish and sliced scallion. Serve alongside the Ponzu dipping sauce.

In Vegetarian, Dinner, Lunch, Appetizer Tags Latke, Jewish food, Japanese, Ponzu, Dipping Sauce, Vegetarian, Hanukkah, Chanukkah, Holiday fodo
Comment

Tahini Cookies

December 1, 2015

I've been interested in these tahini cookies since I first saw them in Bon Appetit last November.  I love tahini, and I always keep a jar of the stuff on hand for dips and salad dressings. My personal favorite is the Whole Foods brand organic tahini; it runs about 6 dollars and lasts for many months in the fridge.

Having finally made these cookies, I think they're prettier looking, and nicer sounding than their actual taste. They're not bad, but they remind me a lot of Halvah (the sesame seed paste based dessert common across the Middle East). To be fair, I also tried to modify them a little. I used coconut oil instead of butter. I love the taste of butter, but I was interested to see if these cookies could be made vegan (they can). I also added some almond butter; I wanted more nut flavor and less flour. I think that modification actually worked pretty well, but it isn't necessary. 

Having said that, why am I posting them here? 1) To review it for the curious. 2) These are super easy cookies to make and bake 3) To suggest some un-tested modifications. At the end of the day, I love the idea of this. I love sesame seeds. I love a good nut-butter cookie. One of my favorites is a recipe my friend Kari showed me that is a flourless peanut butter cookie (peanut butter, eggs, sugar, that's about it). I am going to include the recipe below, but if I make these again I would probably make them with less flour and slightly less sugar, too.

If you don't like sesame flavor, skip this. These cookies live up to their name. They capture all that "tahini" taste and texture.

Tahini Cookies                                                                                                                                                                                                                     Recipe by Claire Saffitz for Bon Appetit (November, 2014) - With some very slight modifications

  • 1 cup all purpose flour

  • 1/2 cup toasted pine nuts (I omitted)

  • 1/3 cup powdered sugar

  • 1/3 cup tahini

  • 1/4 cup room temperature unsalted butter (or coconut oil)

  • 1/2 teaspoon kosher salt

  • 1 tablespoon black sesame seeds

  • 1 tablespoons white sesame seeds (or substitute for all black sesame seeds)

  • 2 tablespoons demerara or Turbinado sugar

Preheat oven to 350°. 

Pulse flour, pine nuts, powdered sugar, tahini, butter, and salt in a food processor until dough forms a ball around blade. (I made this with my hands in a bowl.... it seemed to work totally fine).

Mix black sesame seeds and demerara sugar in a small bowl. Form dough into 1” balls and roll in sesame seed mixture. Place on a parchment-lined rimmed baking sheet, spacing 2” apart, and flatten slightly. Bake cookies until lightly golden, 20–25 minutes.

Transfer to a rack and allow to fully cool before serving. Lasts 3-4 days in an air tight container. 

In Dessert, Vegetarian Tags Cookie, Cookies, Tahini, Tahini Cookies, Sweet, Dessert
Comment
← Newer Posts

Latest

Featured
IMG_3606.jpeg
May 27, 2025
Sheet-pan Lemony Potatoes and Baby Artichokes
May 27, 2025
May 27, 2025
IMG_3784.jpeg
May 12, 2025
The Secret to Crispy Tofu Every Time + A Sweet & Spicy Gochujang Glaze
May 12, 2025
May 12, 2025
snackingcakeslices copy.jpg
Apr 11, 2025
One-bowl blueberry lemon snacking cake (gluten-free/grain-free)
Apr 11, 2025
Apr 11, 2025
IMG_5075.JPG
Feb 24, 2025
Manti (meat dumplings) in brothy tomato sauce
Feb 24, 2025
Feb 24, 2025
matzoballsontablecloth.jpg
Jan 20, 2025
Golden Chicken Soup with Matzo Balls
Jan 20, 2025
Jan 20, 2025
harissatofuandchickpeas.jpg
Dec 18, 2024
Sheet-Pan Crispy Harissa Tofu, Chickpeas, and Broccolini
Dec 18, 2024
Dec 18, 2024
caracaracake.jpg
Dec 4, 2024
Cara Cara Orange Olive Oil Cake
Dec 4, 2024
Dec 4, 2024
IMG_0640.JPG
Nov 6, 2024
Easy Roast Turkey for Thanksgiving
Nov 6, 2024
Nov 6, 2024
IMG_3282.JPG
Sep 19, 2024
Apple and Honey Dumplings
Sep 19, 2024
Sep 19, 2024
IMG_7173.jpeg
Jul 31, 2024
Galette with any kind of fruit
Jul 31, 2024
Jul 31, 2024
IMG_4004.jpeg
May 9, 2024
Cheddar Cheese Coin Crackers
May 9, 2024
May 9, 2024
DSC02602.JPG
May 2, 2024
Asparagus, Gruyere & Swiss Tart
May 2, 2024
May 2, 2024
whitebeansoupwithzhug.JPG
Mar 11, 2024
Yemenite White Bean Soup with Zhoug
Mar 11, 2024
Mar 11, 2024
DSC02301 (1).jpeg
Jan 24, 2024
Celery, kohlrabi, date salad with toasted almond and sesame
Jan 24, 2024
Jan 24, 2024
DSC02138.jpg
Dec 3, 2023
Sweet potato latkes with cranberry salsa
Dec 3, 2023
Dec 3, 2023
kompot_main photo.JPG
Jul 11, 2023
Ukrainian Summer Fruit Kompot
Jul 11, 2023
Jul 11, 2023
cherryvareniki mainphoto.jpg
Jun 15, 2023
Cherry Vareniki
Jun 15, 2023
Jun 15, 2023
tzimmescaketopdown.jpg
Apr 19, 2023
One-Bowl Tzimmes Cake
Apr 19, 2023
Apr 19, 2023

Sign up with your name and email address to join my mailing list.

I respect your privacy.

Thank you!

Privacy Policy can be found here

All photos copyright of Sonya Sanford unless otherwise indicated