Every week, I like to make a batch of salads that can sit in my fridge for days on end, and that I can grab in a pinch for lunches, dinner, or a quick snack.
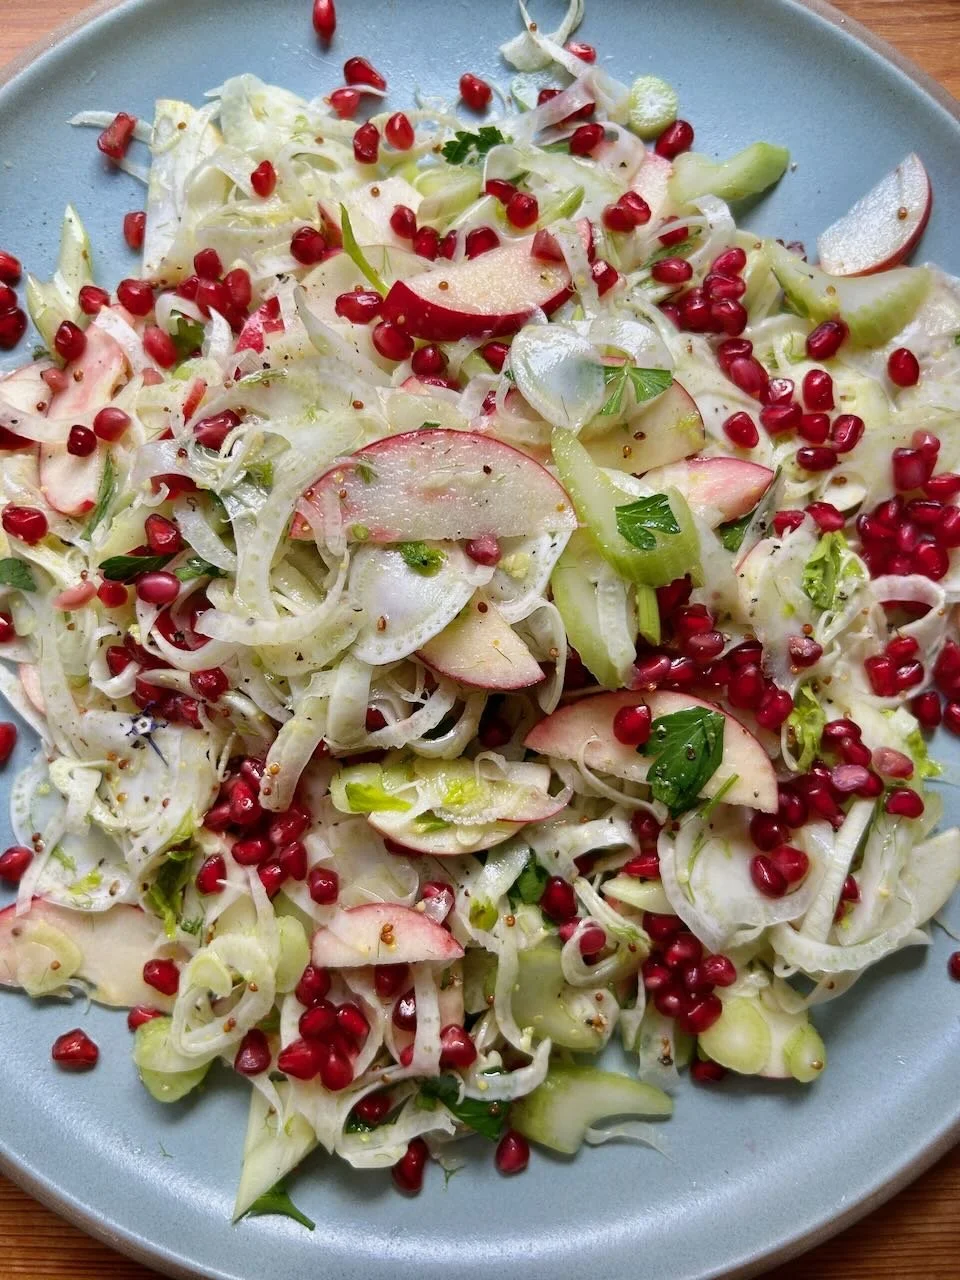
This fennel apple salad is a fall staple. It’s festive enough for hosting, and simple enough that it makes for a great dinner side with a piece of salmon. The fennel and apple stay bright and vibrant, thanks to a good dose of lemon juice. The ingredients do soften as they sit in the fridge; if you prefer more texture slice them thicker and they’ll retain their firmness for longer. If you prefer a delicate salad, slice the fennel on a mandolin very thin for tender bites.
Fennel, Apple, Celery, Pomegranate Salad
Serves 6
Ingredients:
For the salad-
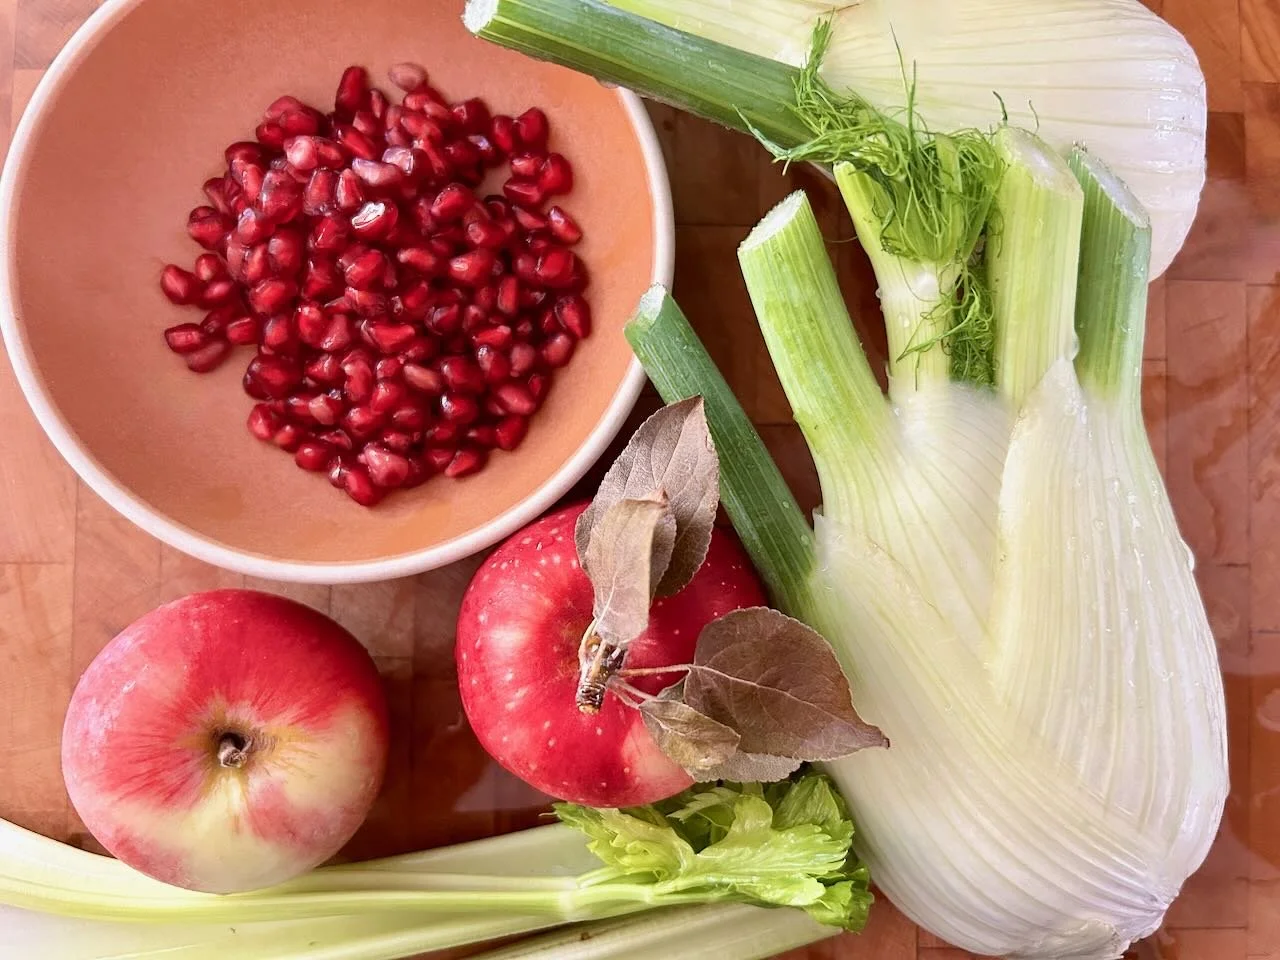
2 heads (1 lb) fennel
3 stalks of celery
1 large apple, or 2 medium (Cosmic Crisp, Pink Lady, or your preferred variety)
½ cup pomegranate arils
2 Tbsps lemon juice
¼ cup parsley or mint
salt and pepper, to taste
For the dressing-
2 Tbsps lemon juice
2 tsps whole grain Dijon mustard
2 tsps honey, or to taste
2 tsps dried tarragon (optional)
½ tsp kosher salt
3 Tbsps olive oil
Directions:
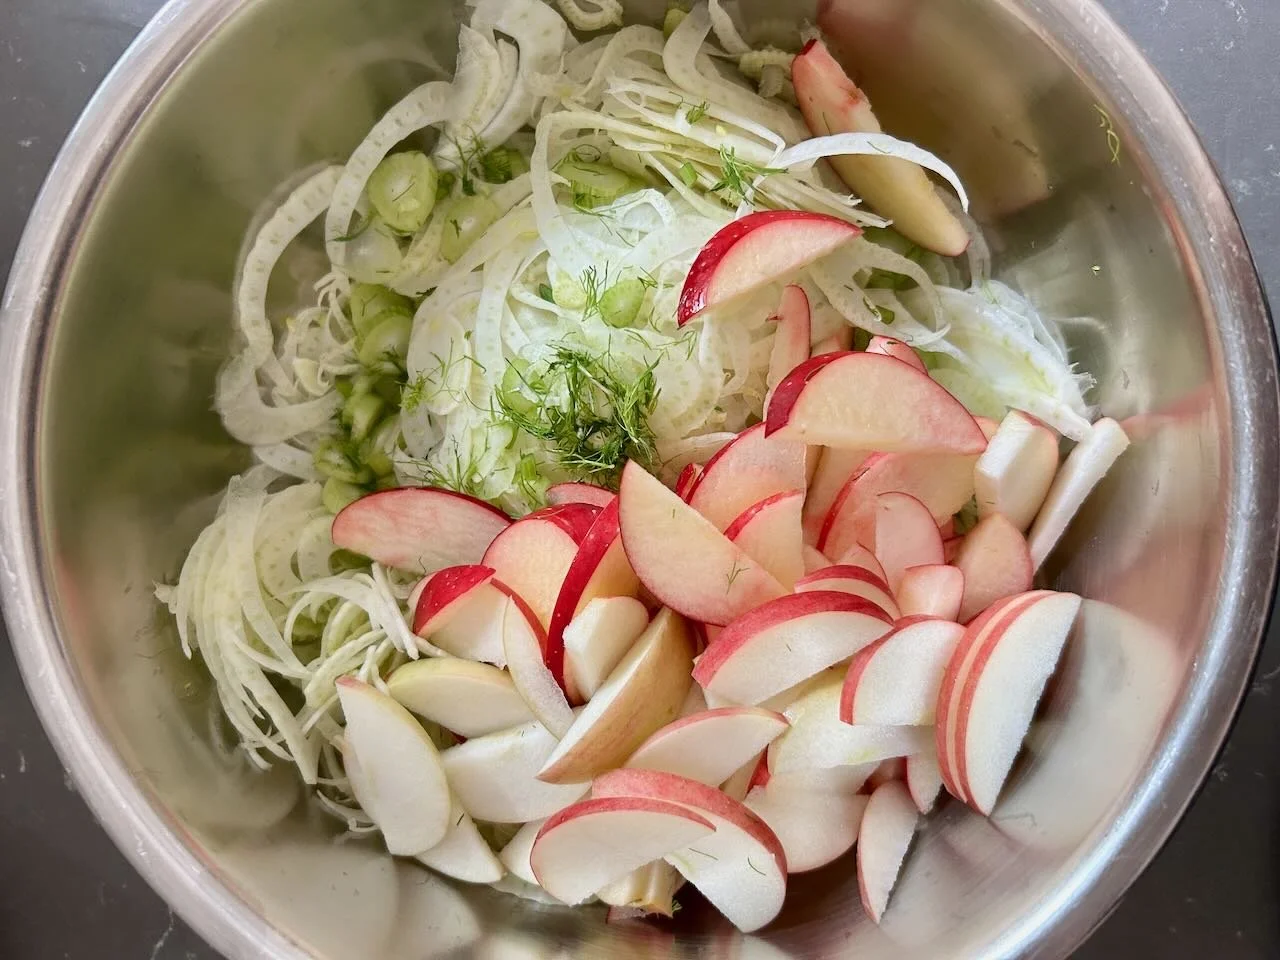
Prepare your vegetables: Peel any tough outer leaves from the fennel, trim the top fronds (you can reserve the leafy bits as garnish). Thinly slice the fennel with a mandoline or a knife; if making in advance, you may want to slice a little less thin as the fennel will soften as it sits in the fridge. Thinly slice the celery on the bias. Core the apple, and slice into thin half-moons; or your desired shape and size.
Add all of the vegetables to a bowl, and toss well with the juice of a lemon. Season with salt and pepper.
Make the dressing: Whisk together the lemon juice, mustard, honey, tarragon and salt. Slowly drizzle in the olive oil while whisking until the dressing is emulsified. Alternatively, you can shake everything together in a jar. Taste and adjust as desired with more honey for sweetness, lemon juice for brightness, or oil for richness.
Assemble: Toss the salad with the dressing. Just before serving, garnish with pomegranate and herbs. Salad keeps for up to 4 days in an airtight container in the fridge; but it will soften as it sits.